Free Dwarf List thoughts (Matt):
I built this list around models I had. I have lots of different type of infantry which typically in a WYSIWYG is a mix of iron clad, iron guard and shieldbreakers. I don’t have enough regiments of shieldbreakers for the formation so I wanted all the infantry to be the same. Therefore I thought I’d try them out en masse.
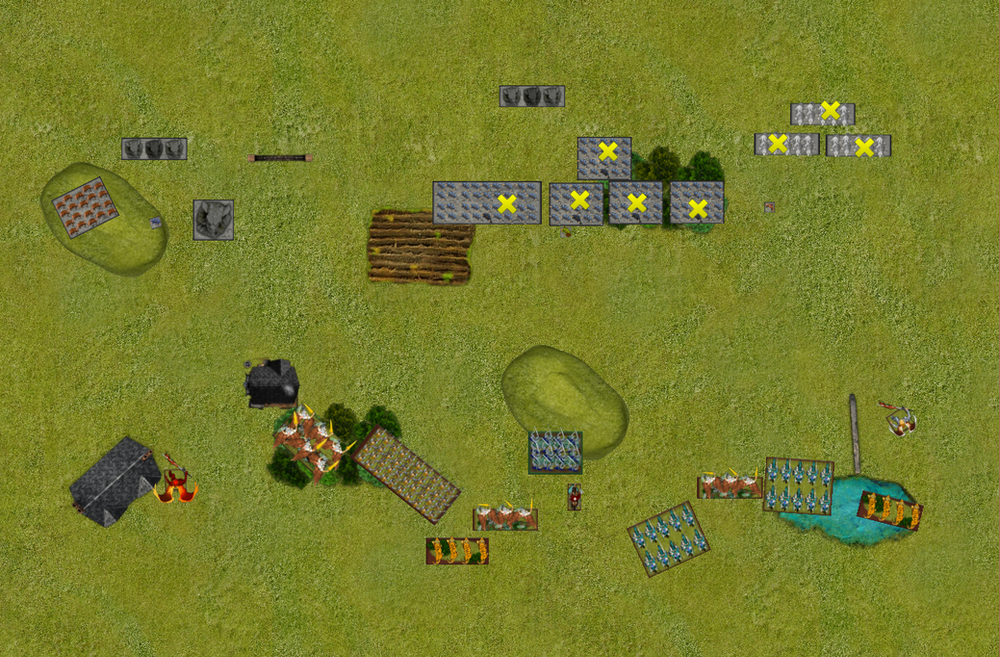
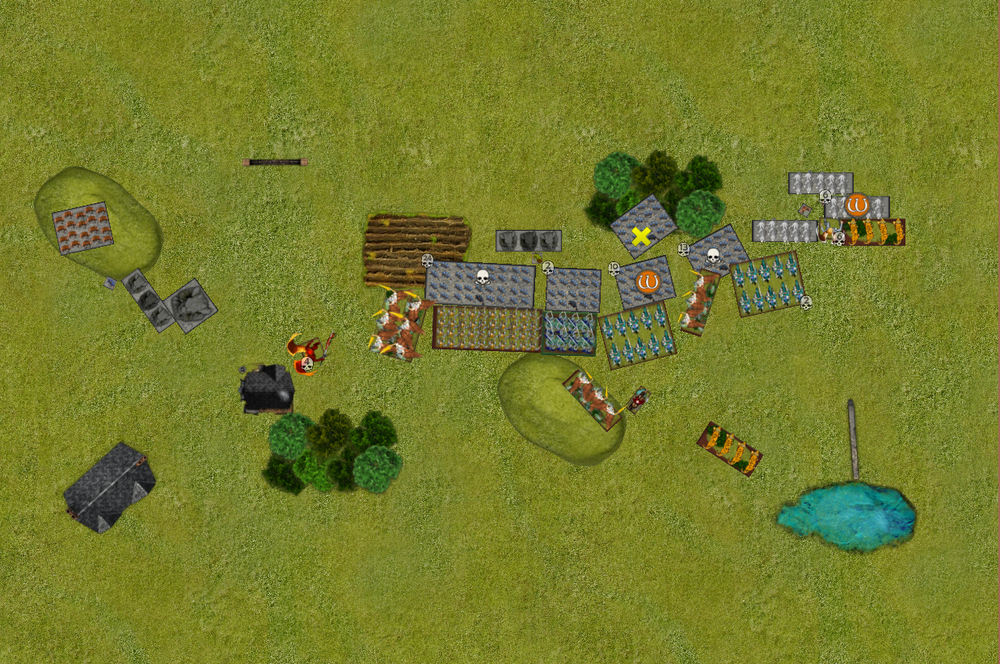
Deployment (post scout)

Nick:
I need to be careful here not to get zapped too hard by all the dawgs. The idea was to deploy a bit back from the 12″ line so I don’t get jumped by all the scouting. I focused on deploying in the middle 2/3 of the board so I was somewhat compact but also able to project threat to the flanks if he tried to sneak some high US into the corners given the scenario was invade. The elohi horde was deployed out on the flank, hoping that it’d attract a bit of attention in counter deployment from which I could shimmy onto the other side of the building through the forest.
Matt:
Invade is my least favourite scenario even with the free dwarfs. I like to play a particularly defensive style with the dwarfs and having to bring everything forward bothers me. Especially against a fast high def list like Nicks.
First run with this list I’m not entirely sure what I am doing. I ended up with a really bizarre deployment as I was focussed on being able to get all my dogs off at some point and stressed about all the high speed coming at me.
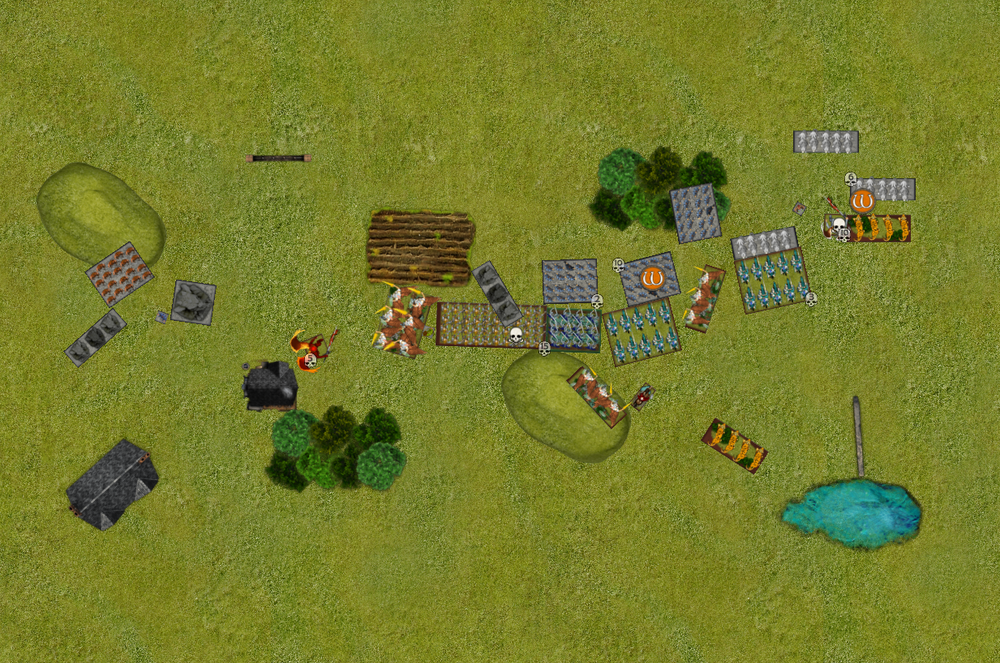
Turn 1
Nick:
I advanced cautiously here. The left could be a problem here with craggoth scouting up and a few units there. Julius hung back to make craggoth think twice about turning a flank and moving towards the centre with the elohi having redeployed. The plan on the right was to try and get the Ur-elohi and gurmanthers into his mastiffs to shut down that source of mastiff shooting. Elohi and Paladin Foot guard in the centre were the ones I’d hope would eat the dawgs on the way in. The flying lord is a problem but the way I’d set up is he couldn’t land behind my lines and even if he came up full 20″ he was facing a charge.
Matt:
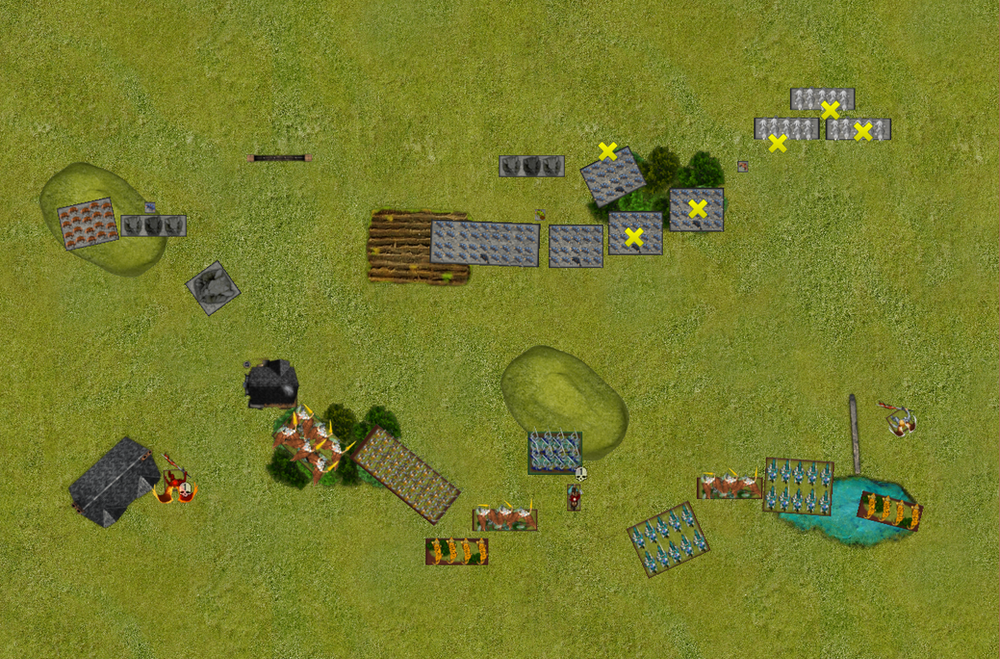
Nick is a master of movement and I am pretty confident his fliers are going to out maneuvre me. On the left I make sure I protect Bannick but position to get a dual shot with Craggoth and the rangers
In the middle I push most things forward trying to not give a flank to the horde of Elohi on the right I leave open some charge options for the ur elohi and elohi regiment but I push the mastiffs back to save their dogs
In shooting the rangers and craggoth do 2 wounds to Julius which isn’t enough to cause a problem and her IR’s back 1. The two most central dogs do 2 wounds also and the paladin regiment IR’s back 1
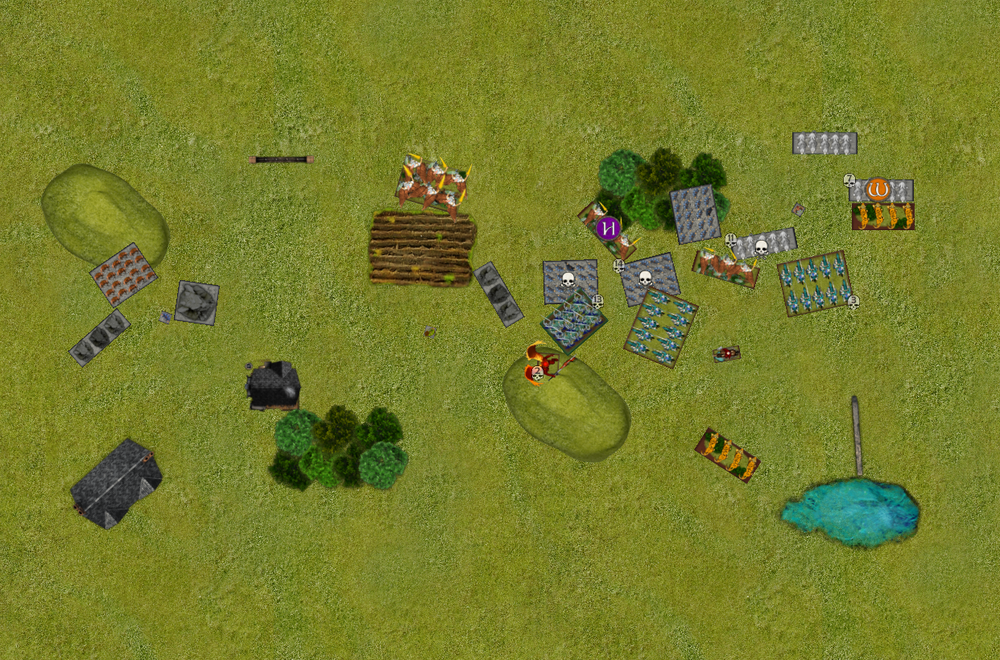
Turn 2
Nick:
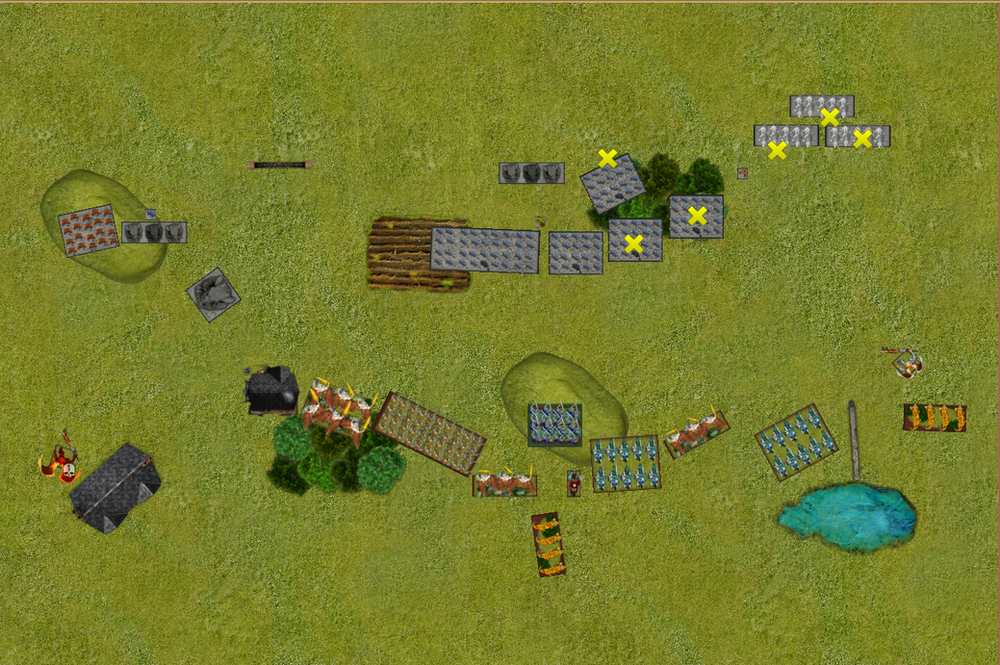
Yet another cautious advance, the key here is to not let too many dawgs focus on one unit to take it off. I’m hoping next turn will see a bunch of charges and start to encircle him. Matt will get a bunch of unit strength across the table on the left but as long as I kill the stuff in the centre and right it should be good. Idea is to fly julius over next turn and to start the killing process
Matt:
I realised I have had a deployment mistake. I always run my horde of shieldbreakers as a second line and I don’t know why I haven’t here. I am not going to be able to protect anything well enough and it’s going to go badly quickly. In deployment I also got stuck in my head of trying to protect mastiffs so I could get their three mastiffs off but I should’ve just prioritised their actual role which is protecting everything else.
Jullius is such a pain in the arse I can’t afford to ignore him so the four units on the right all focus on him with three looking to shooting.
The middle pushes forward in a staggered fashion and the right mastiffs stagger to get some shots off too.
Shooting
On the left a combined 5 wounds on Jullius with an 11 neve roll pops him! But he is saved on the re roll. Mastiffs with a combination of vicious and non vicious do 7 wounds on the ur elohi and 5 on the knights I fail to pop both and IR brings back some wounds.
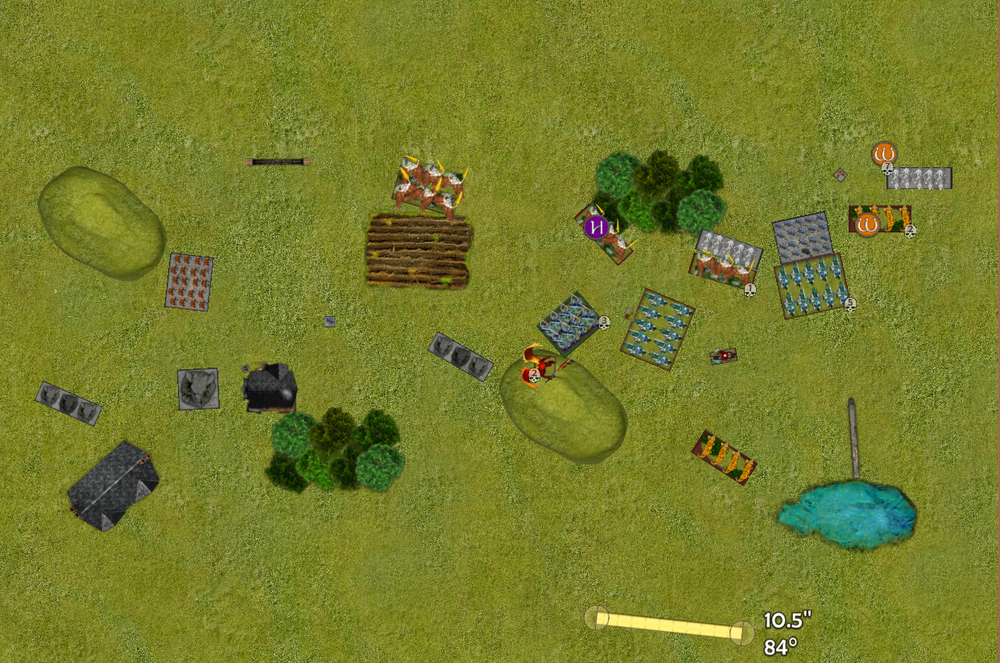
Turn 3
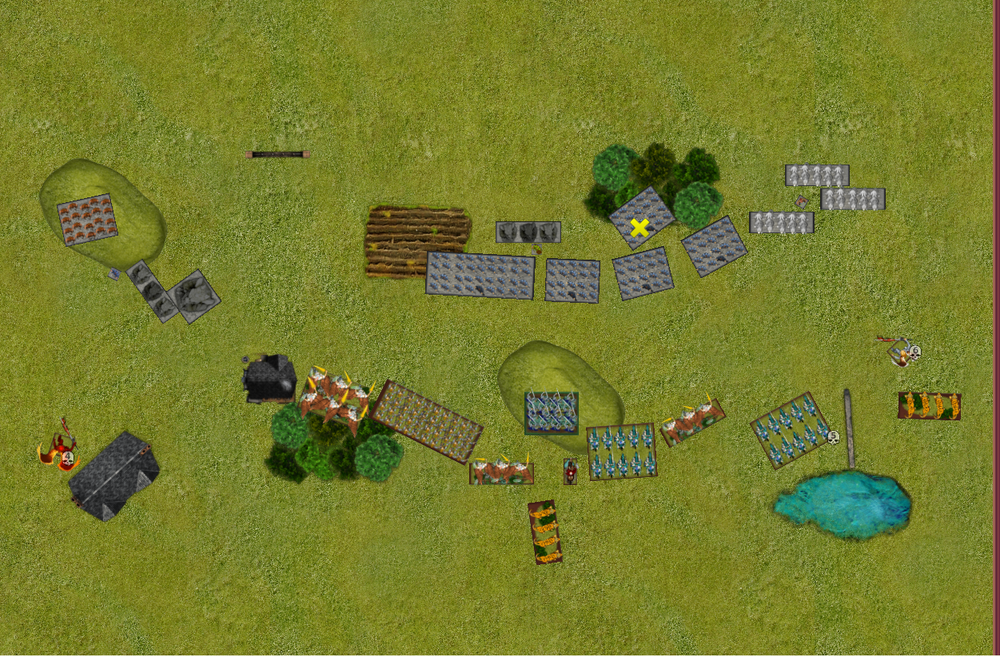
Nick:
No losses from dawgs. It’s showtime! I charged in with basically everything I could and positioned the remaining units being the elohi and second gur troop to charge in my following turn. Priest decided to do heal on the knights as I wanted to try and make sure they stayed alive as I’ll need all the US I can get given I’ve resigned myself to Matt getting 6 US over the line on the length. Julius flew over past that group as I had planned in my last turn with the hope of causing havoc on the flank of what remained of his main line next turn. The flying king was a potential issue holding him up. So the way I placed julius in a position where he’d ideally be blocked by the reforming elohi horde next turn. The charges were all successful. Both big double charges led to routes and I had wavers on the other two charges. The elohi reformed to further keep that left flank of Matt’s honest.
Matt:
Nick has me on the ropes here. The left hand side of the board reposition to only allow charges on def 6 from the elohi. In the middle the king went into the back of the elohi to try and ground them and do a wound, the earth elementals went into the sisters whilst the shiedlbreakers that were in combat with the paladins withdrew and flanked the sisters.
The top shiedlbreakers repositioned allow to get a dog off on the ur elohi with the packmaster, Whilst the mastiffs at the top both backed up to allow this.
The third mastiff pack went in to hold up the knights.
In shooting craggoth and bannick did 2 wounds to julius but failed to do anything else, herneas rangers couldn’t see. The packmaster and shieldbreaker mastiffs did 4 wounds on the ur elohi and popped it.
In combat the king did no wounds on the elohi. The combined 15 wounds on the sisters and then got two very good nerve rolls to pop them. The mastiffs did 2 wounds on the cavalry but failed to waver so one came back.
Turn 4
Nick:
Key lesson time. Communication is key in KoW and ESPECIALLY in PBE games. I was quite surprised to see my sisterhood horde routed with 15W after only the earth elemental regiment could charge them, or so I thought. I had just assumed that Matt’s lines were uniform, meaning my paladin foot guard and sisterhood horde were in line when charging his units last turn. Therefore I didn’t think I needed to do anything with my sisters to keep them safe. I could have very easily gone back d3 and been safe in this instance or even stated that it looks like they were in line and therefore were safe. Lesson learnt! At any rate I still felt the game was there for the taking. I continued to dance around his left hand side and sent my elohi up towards the board edge and out of charge of his units on the left. Without surge, the threat of Craggoth and the earth elementals was severely limited. The priest healed Julius for 3W after he’d suffered 5W from multiple turns of light shooting which meant he should go on to survive the game and hopefully mop up some stuff in the final turns. I got some great flanks seeing over the H2 infantry with my elohi regiments and proceeded to take off the mastiffs and SB regiment while my knights made short work of the heavily wounded regiment they went into last turn which already had 10W. At this stage if I played carefully I was confident I’d have enough US remaining on the right to offset Matt’s units on the left.
Matt:
The rot is in and there’s not much to do here.
I decide to basically save the left hand US and move down whilst herneas rangers will get a couple of last shots off. The tope right take charges where they could and the king charges the knights.
Overall shooting does some wounds but fails to do much other than waver the top gurs. Combat does some minor damage although the king for the second turn in a row does none! haha. That’s pretty much game over
Turn 5
Nick:
My final charges took out the rest of Matt’s stuff on the right (except a snake eyes on the mastiffs up the top right with ~20W now on them). This meant that he had 9 surviving US to my 19 and we decided to call it at this stage.
Post game thoughts
Nick:
Patience was key in this game to ensure I didn’t charge in straight up and get countered. Matt spread out a bit too much and it meant I could take him apart piecemeal. We discussed during the game the placement of his mastiffs. While the pack of dawgs all deployed together with the packmasters is cool, he needed to have them shielding the shieldbreakers (which can still throw dawgs over the dawgs who can also throw dawgs) so I couldn’t charge in and take them out without suffering a counter punch. The lack of surge was also a big consideration and I’m sure it’s something Matt will be including in the next rendition of the list.
Matt: I am happy that the core of this list (the formation plus a horde) can work but some tweaking needs to happen around the edges. The next type will be a little different. As discussed above I pretty much shat the bed in deployment so need to address that