2300 points. Raze
Lists
Matt:
Trying out a different list with models I have again but keeping the formation at the core. I think it is likely that 4 x mastiff regiments are un necessary and points could be spent elsewhere like on a BC option but we will see.
Dave:
So I tried to tweak my last list to have a little bit more attacking power, but during deployment I found myself about 300 points short so I quickly threw in the howitzers and another braves regiment. I still don’t think its very killy, however it will let me punch out a key unit or two, but we ended up playing raze so I should of just stick with my last list.
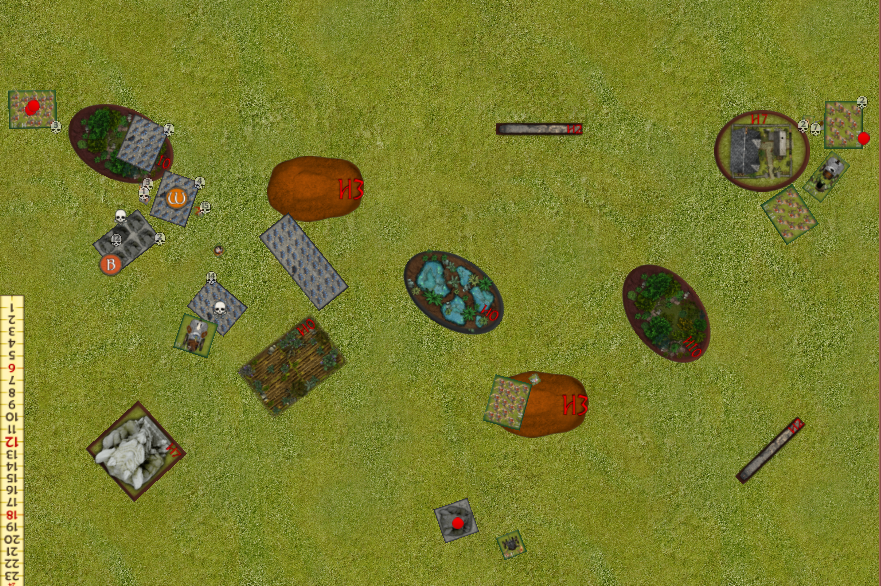
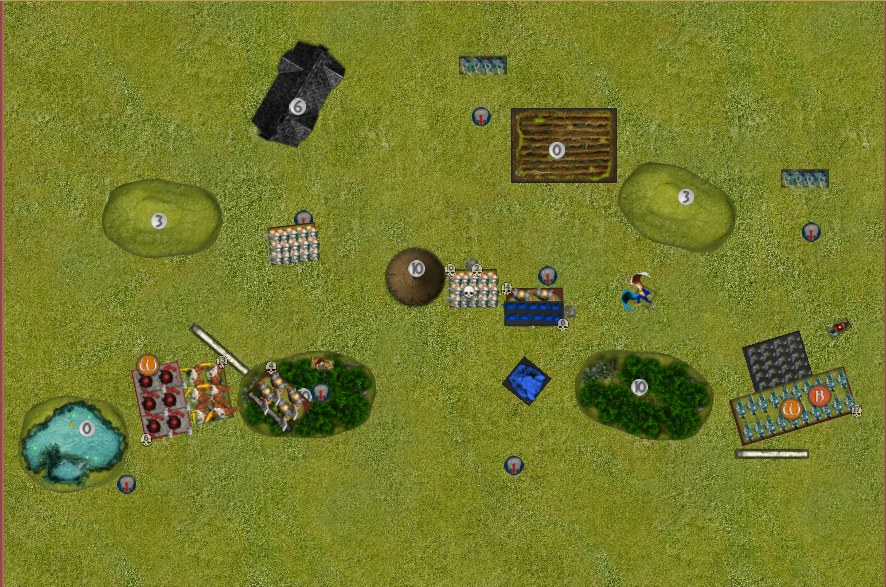
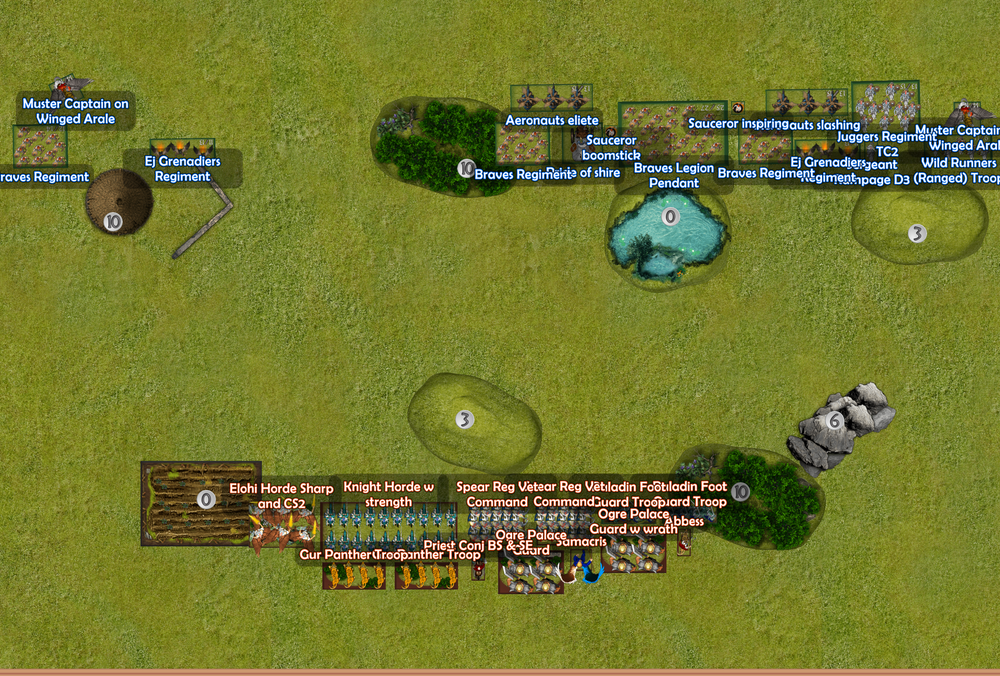
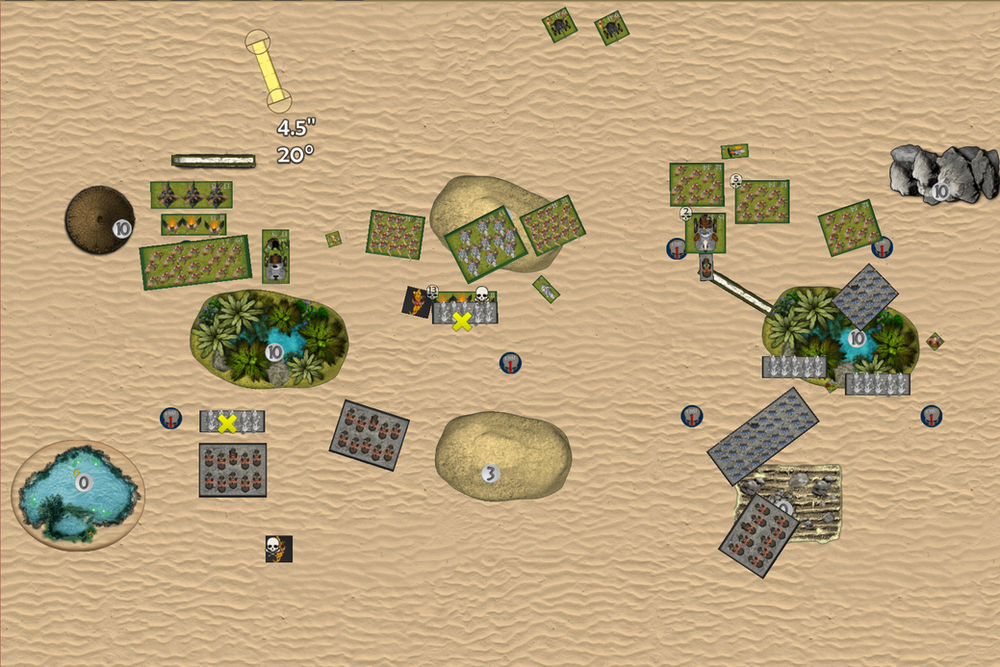
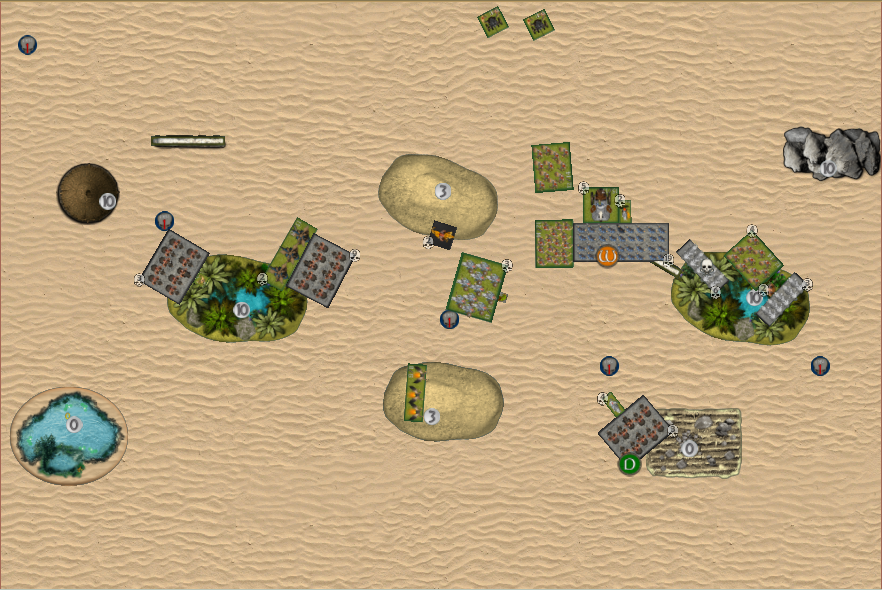
Deployment
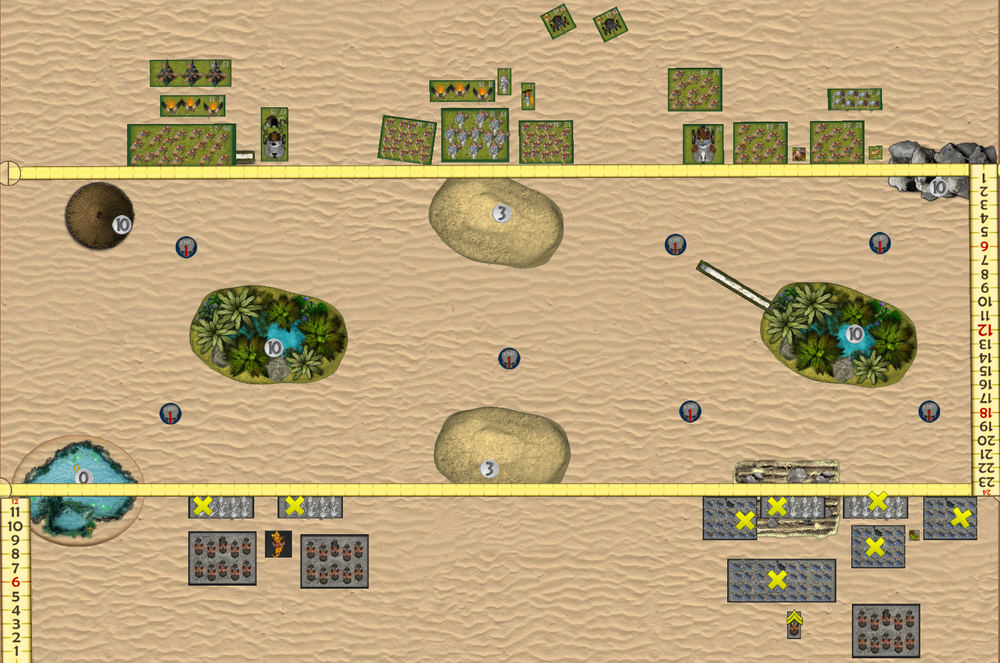
Matt:
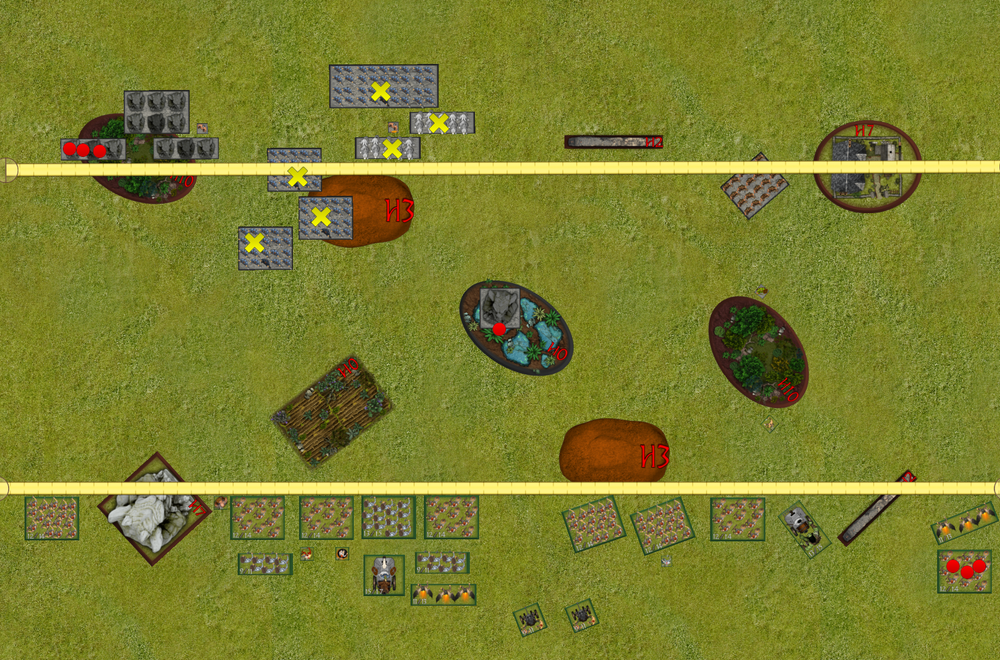
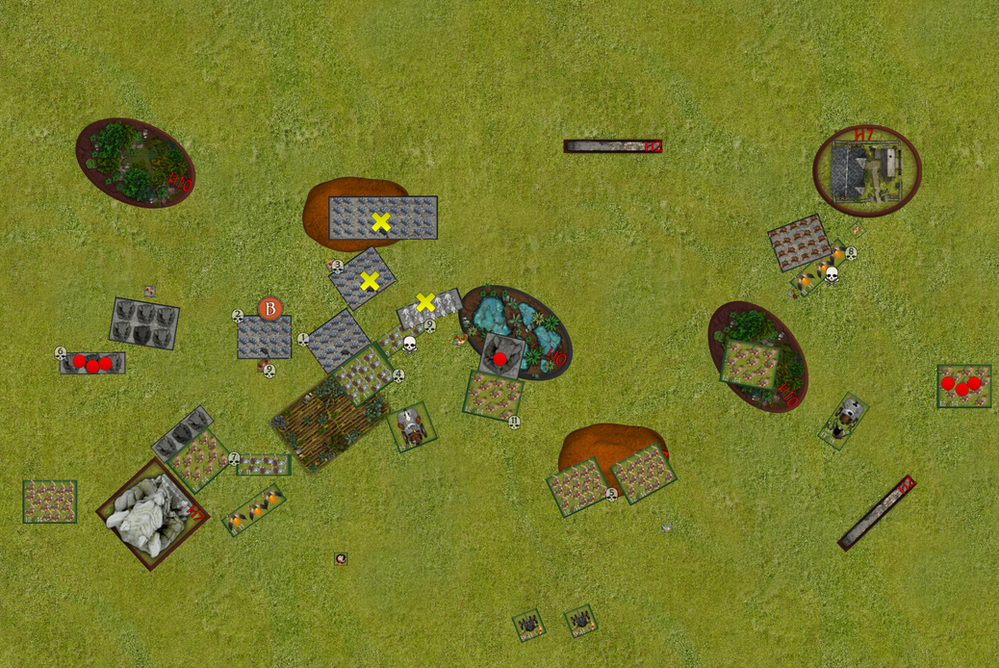
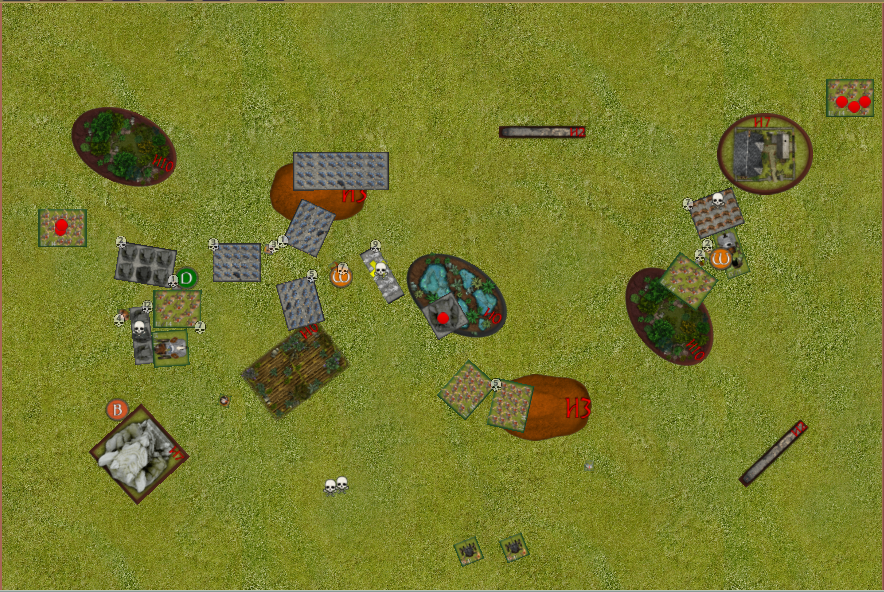
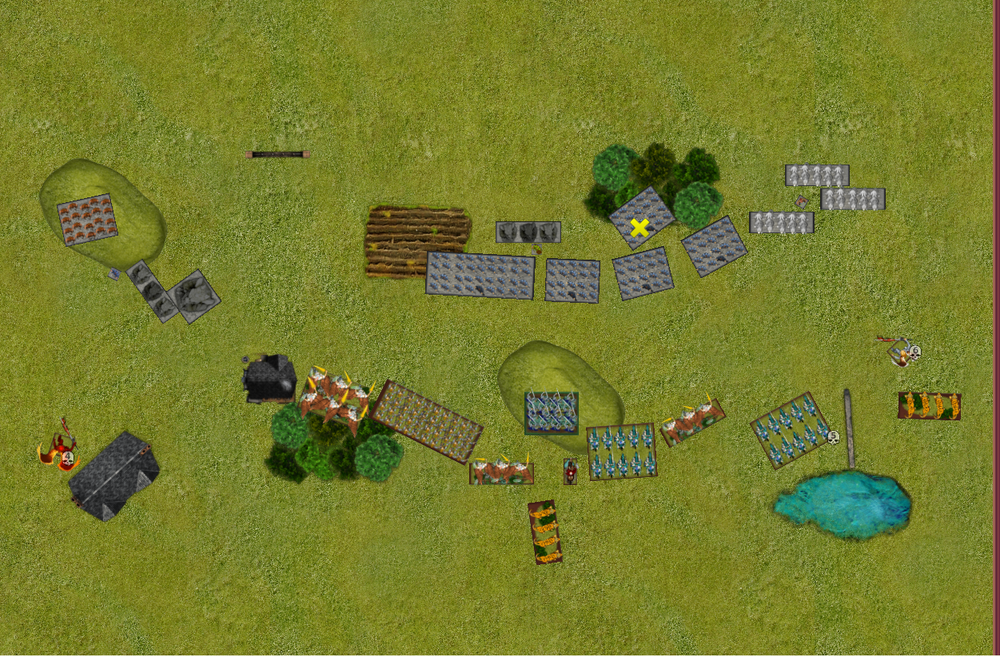
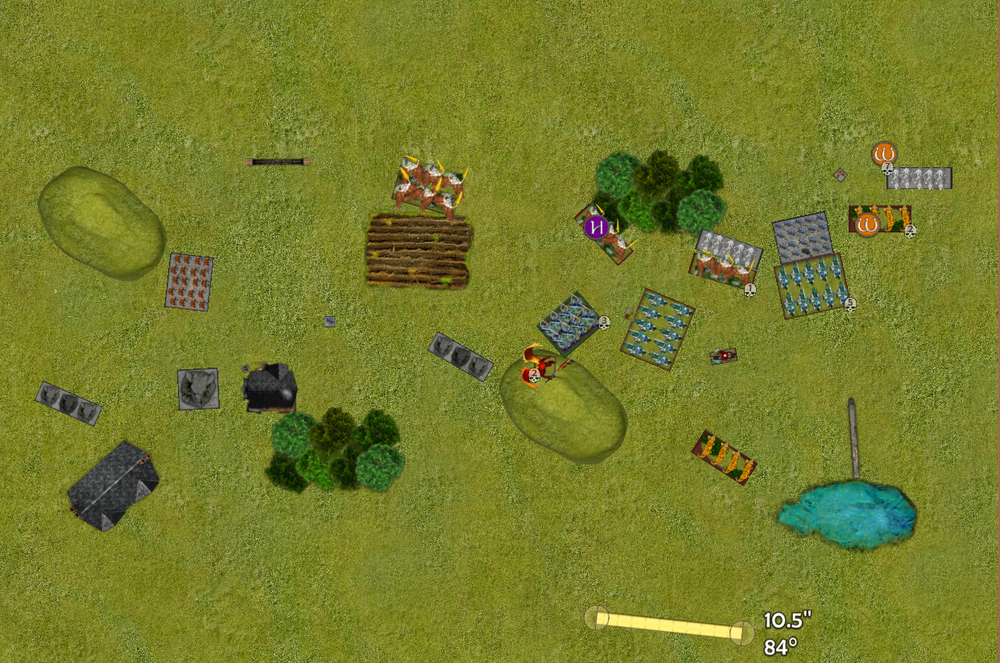
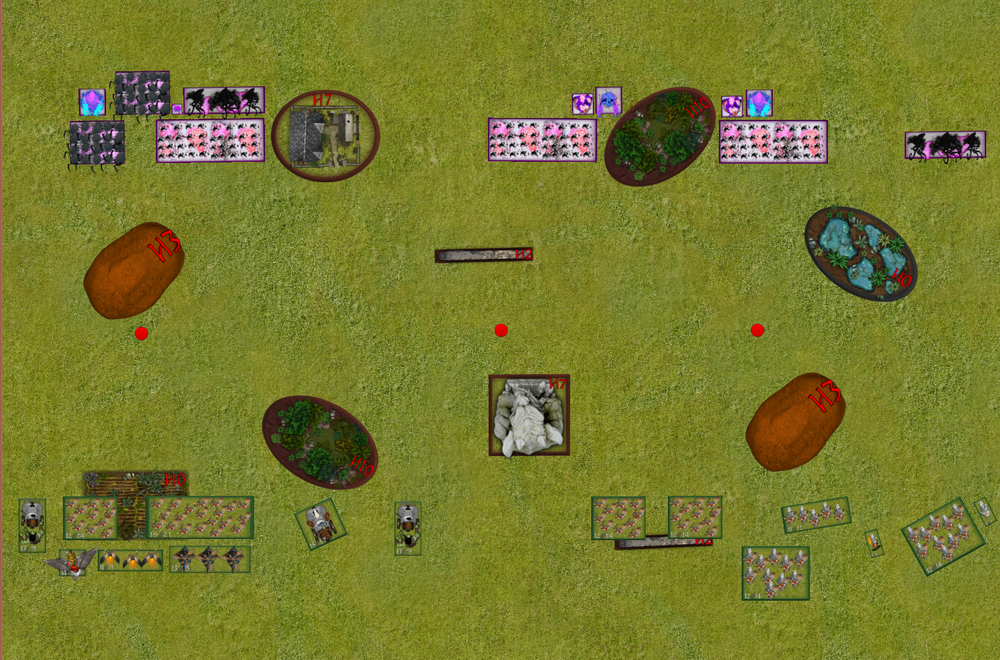
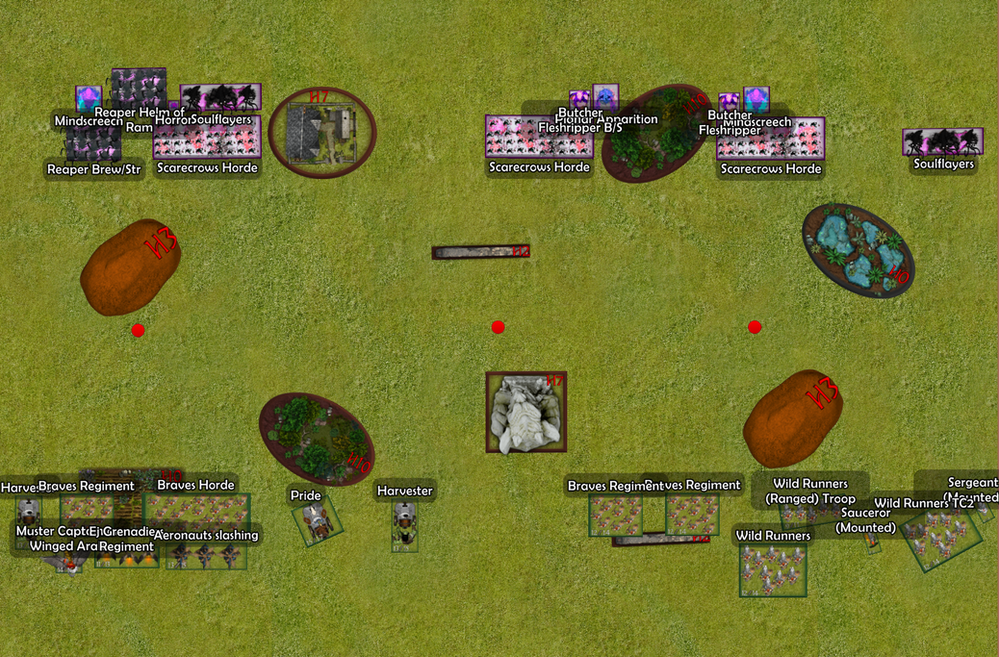
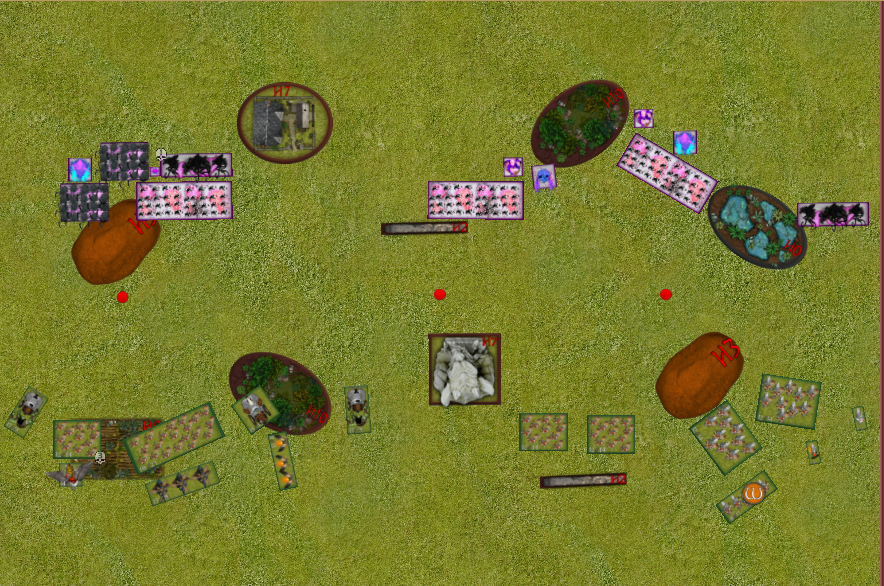
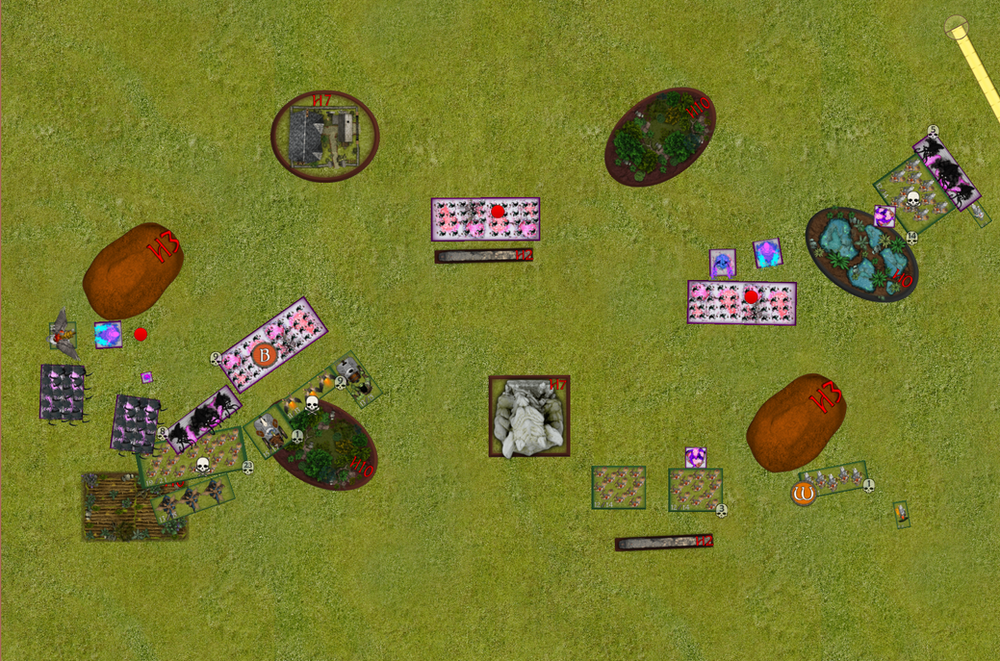
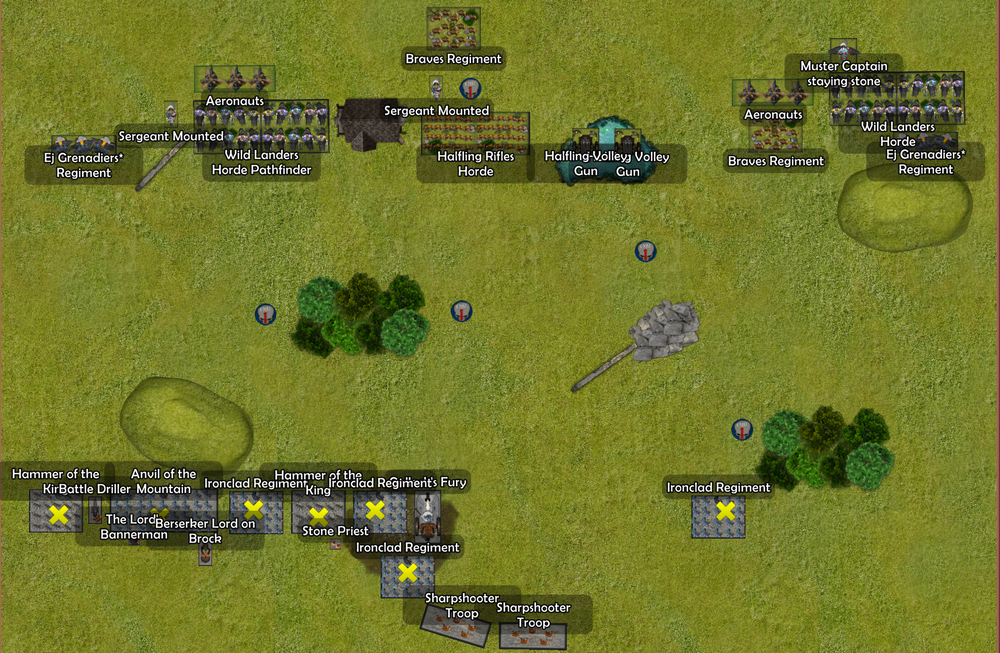
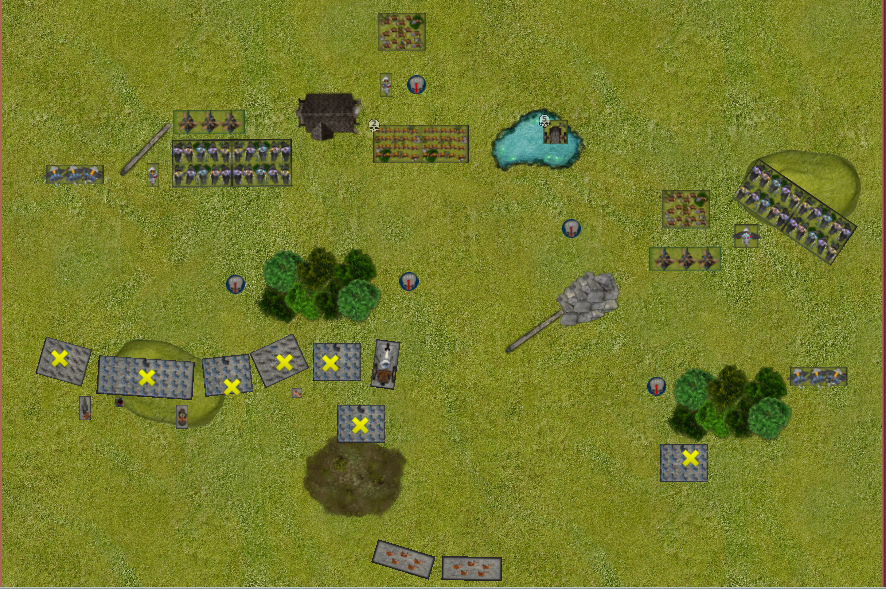
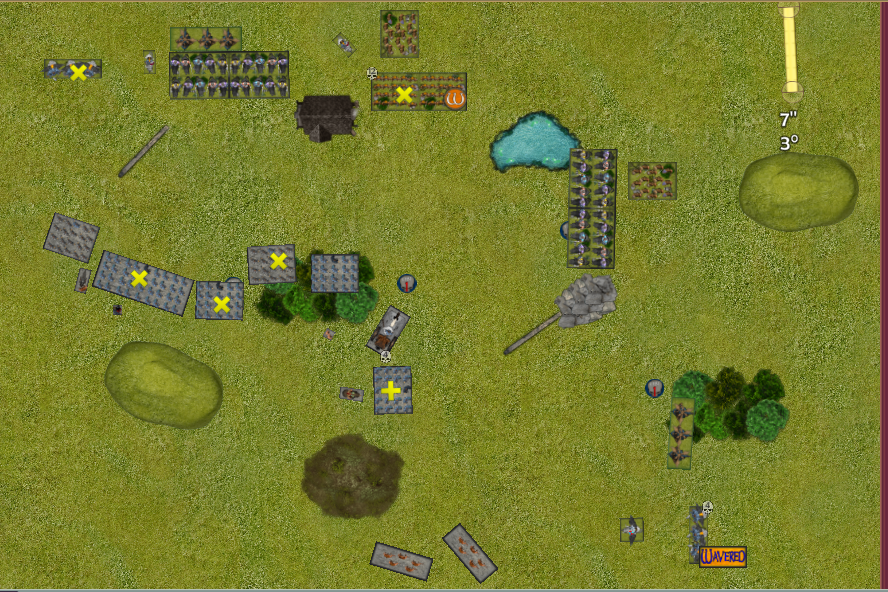
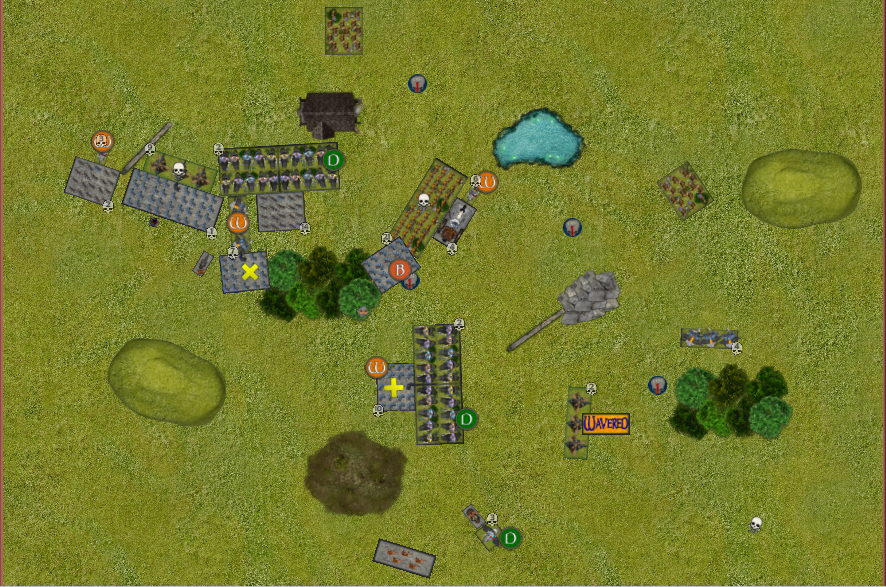
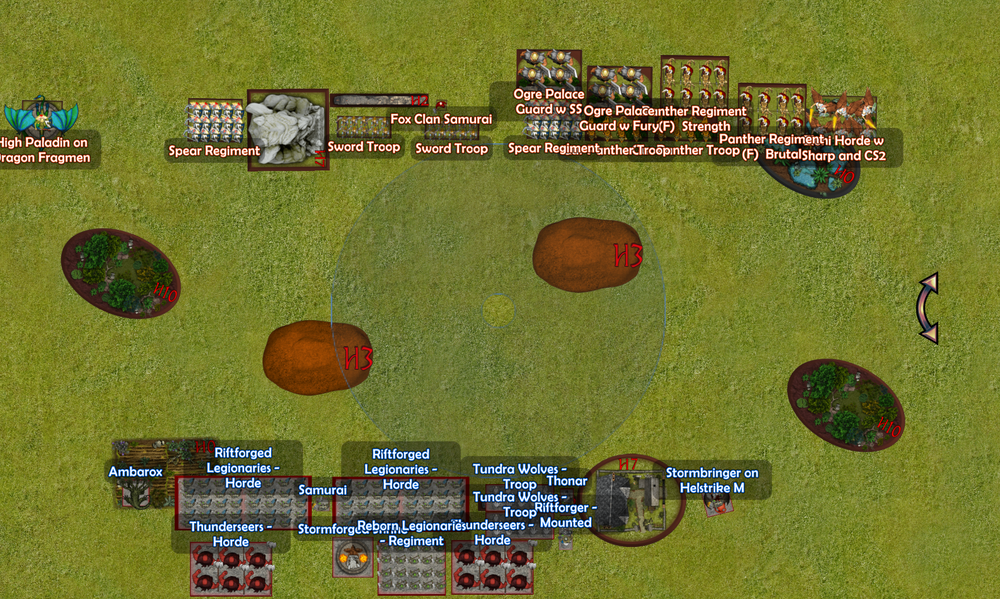
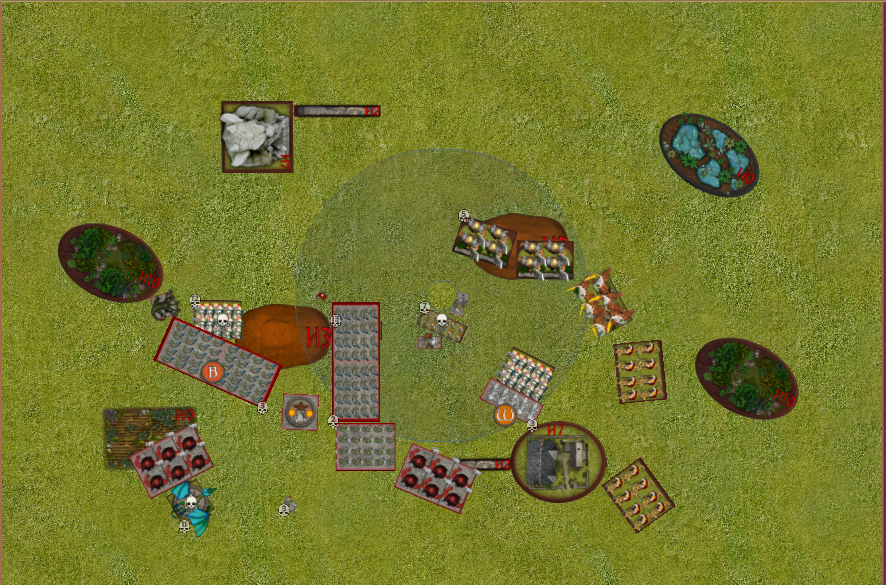
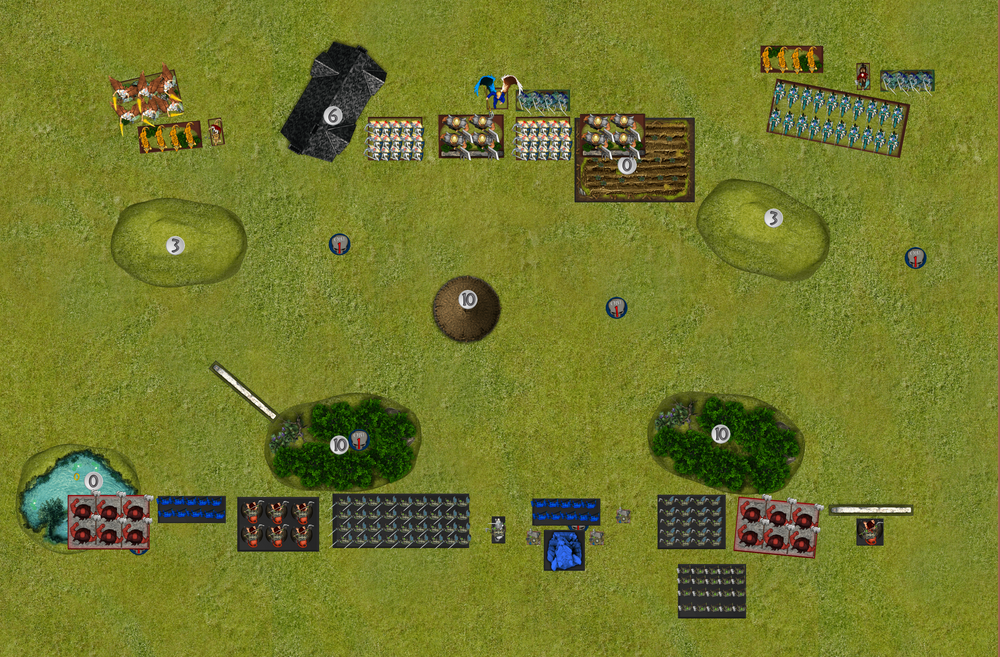
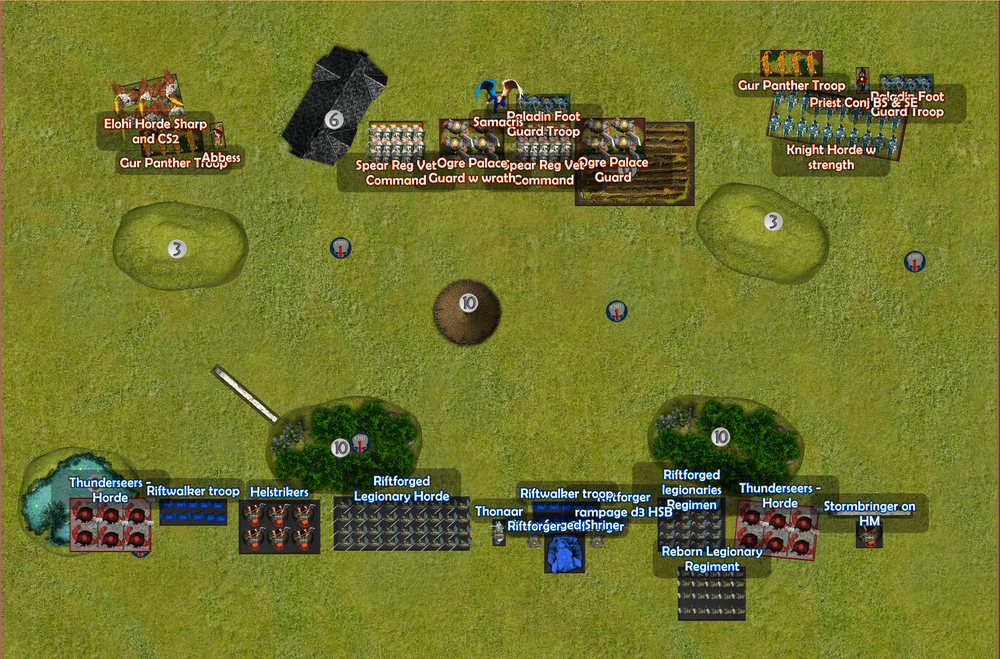
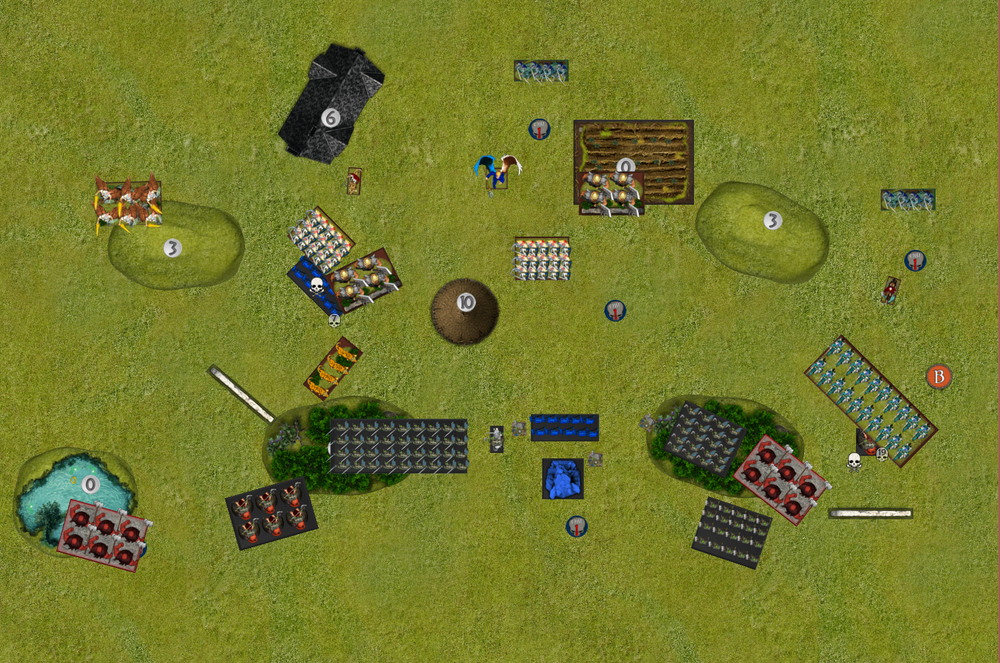
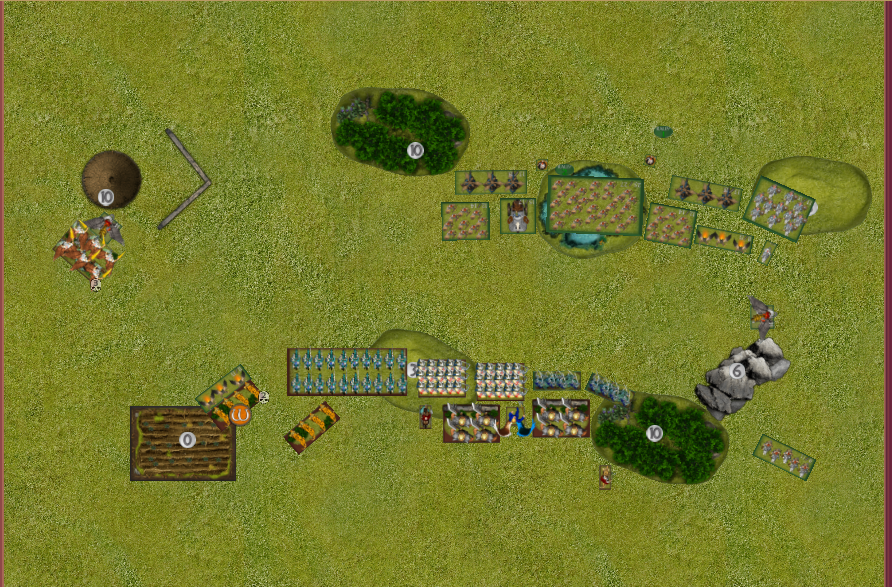
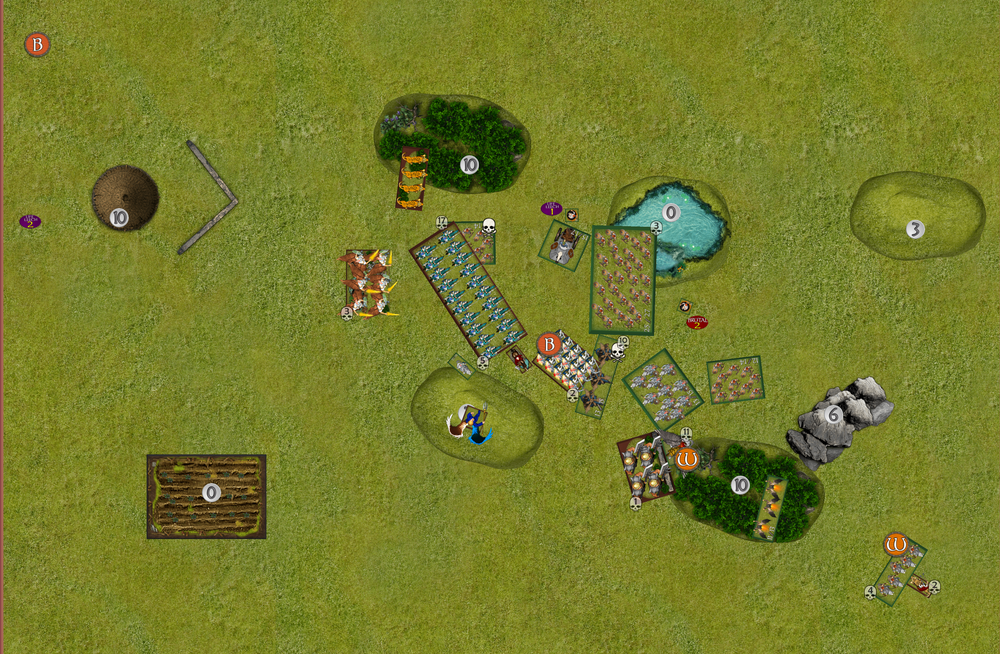
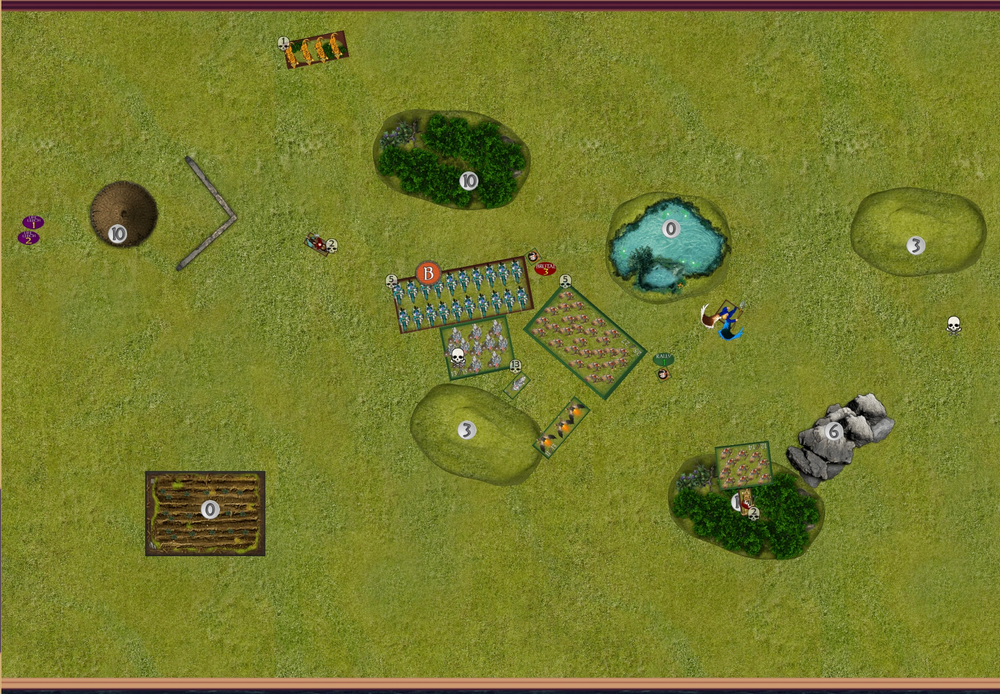
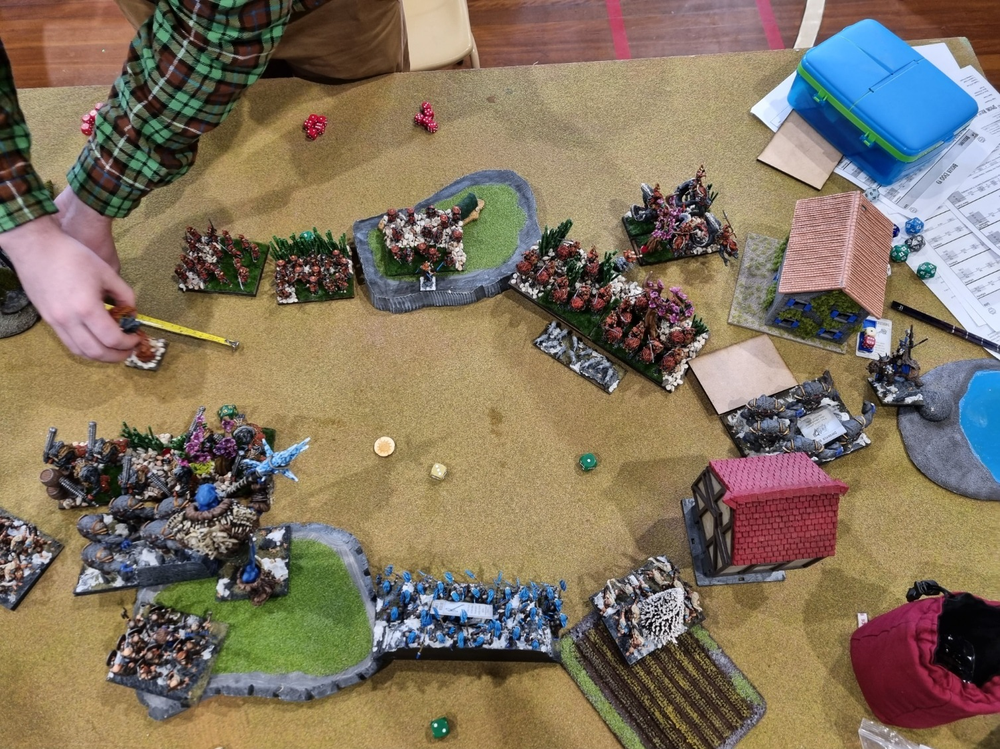
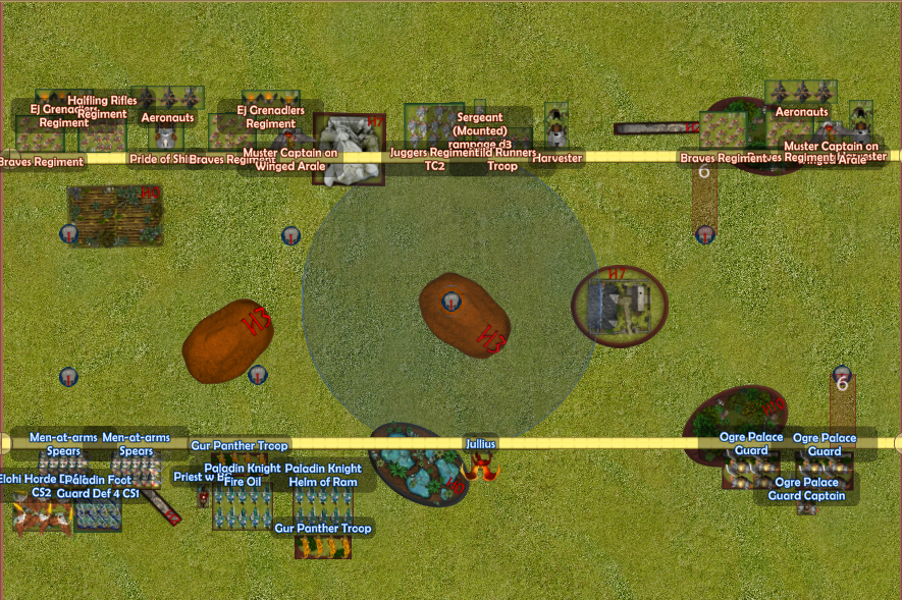
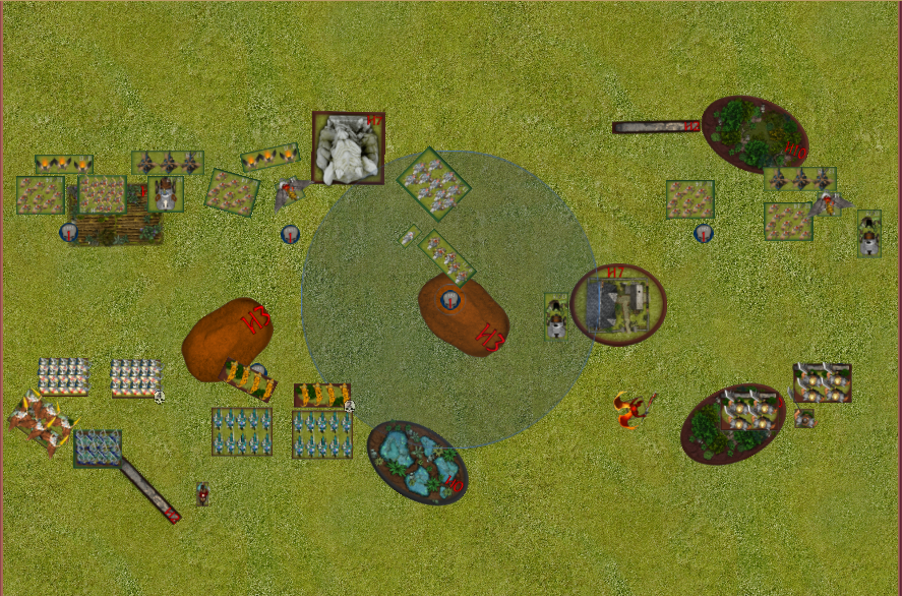
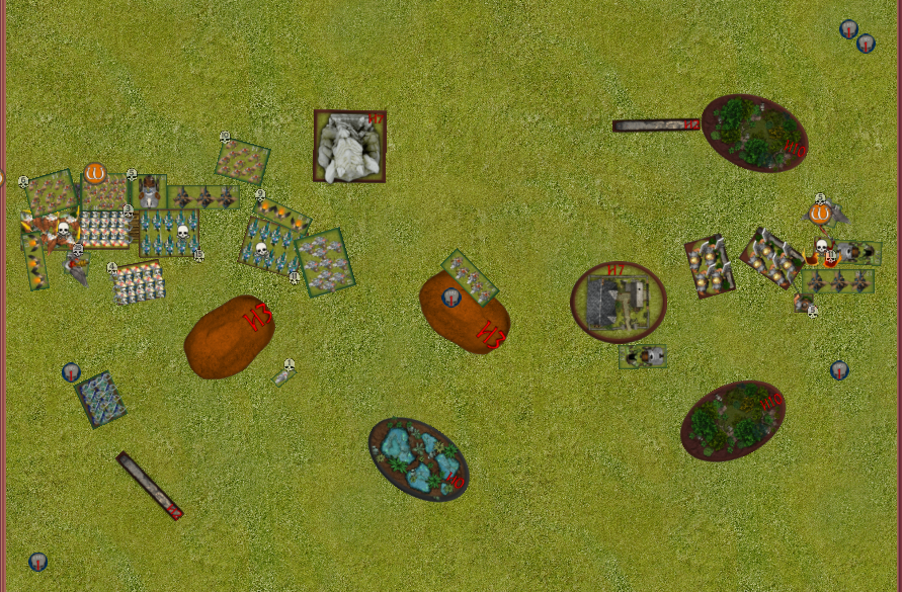
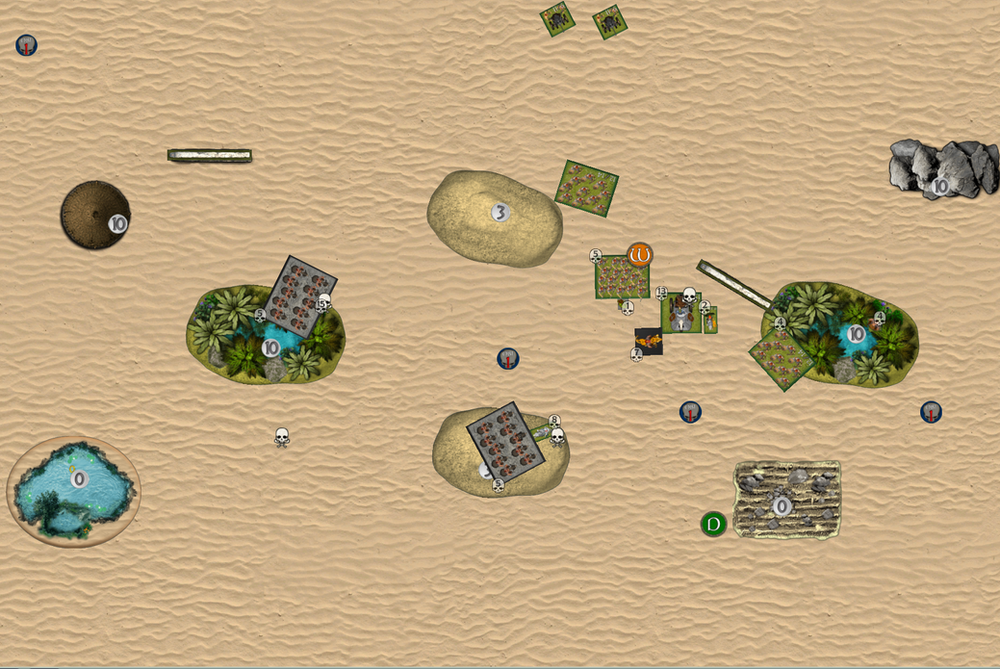
Basically I knew I wanted two blocks. Infantry, then brocks, with one lot of brocks protecting to rear. This game I wasn’t going to take a whole lot of notice of how Dave deployed as he outdrops me by so much so just wanted to go with what I thought could work. You can see in Dave’s first pic how my scout moves went.
Dave:
I really didn’t have a plan here, and it shows since I left my self short with inspiring on the left.
The Plan
Matt:
Hopefully capture the top two at the right at a minimum and defend his bottom two on the same side. I outrange everything but the Ej’s with the brocks (when not using WC from saucy) and use that to my advantage
Dave:
My plan is probably the same as Matt’s, take two tokens and the centre, and defend hard against 1.
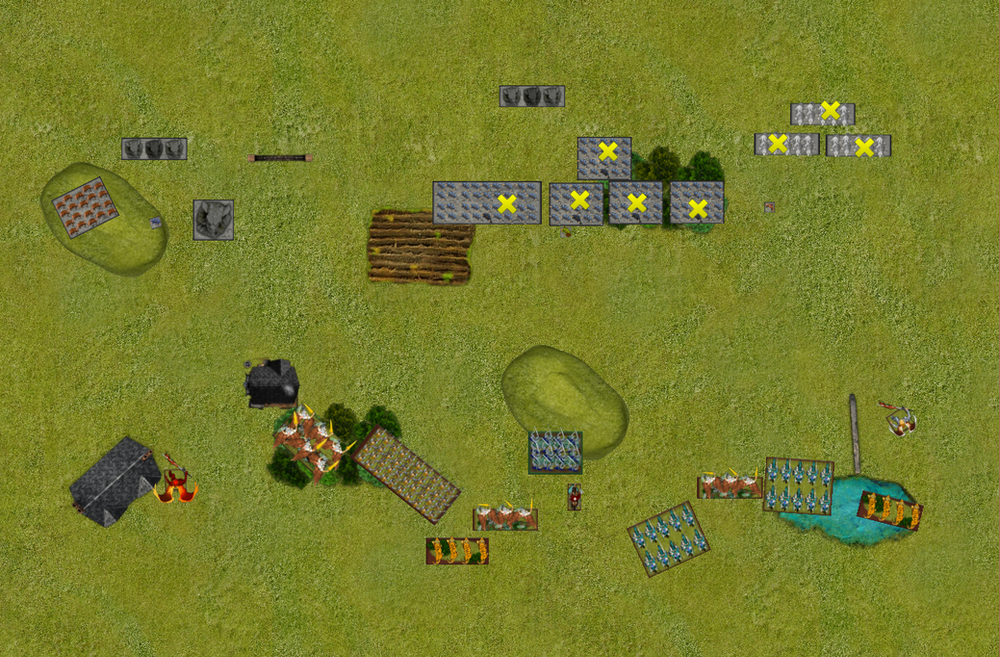
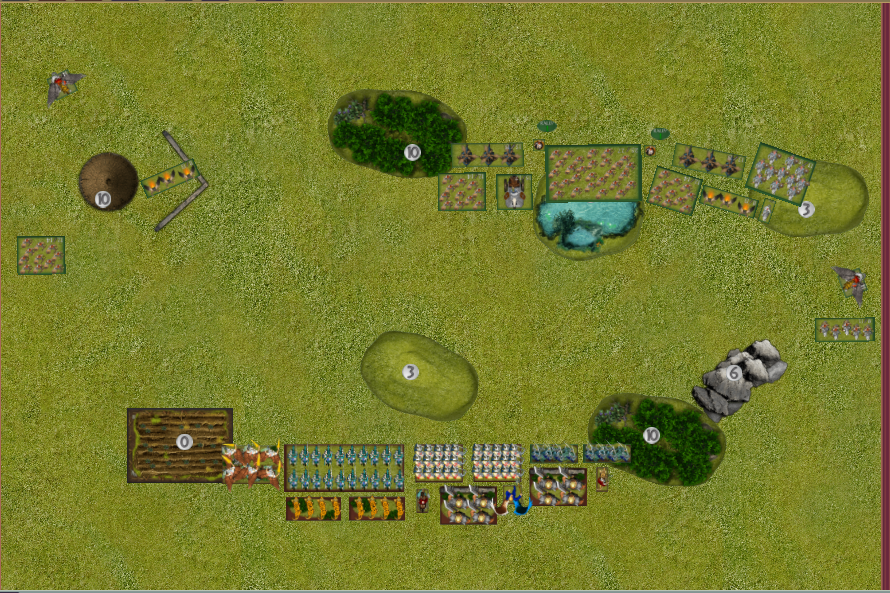
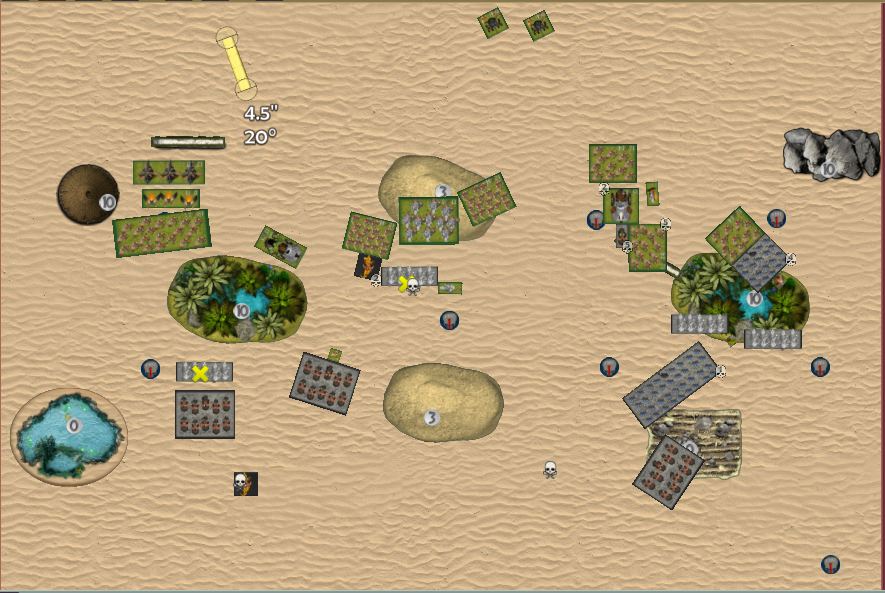
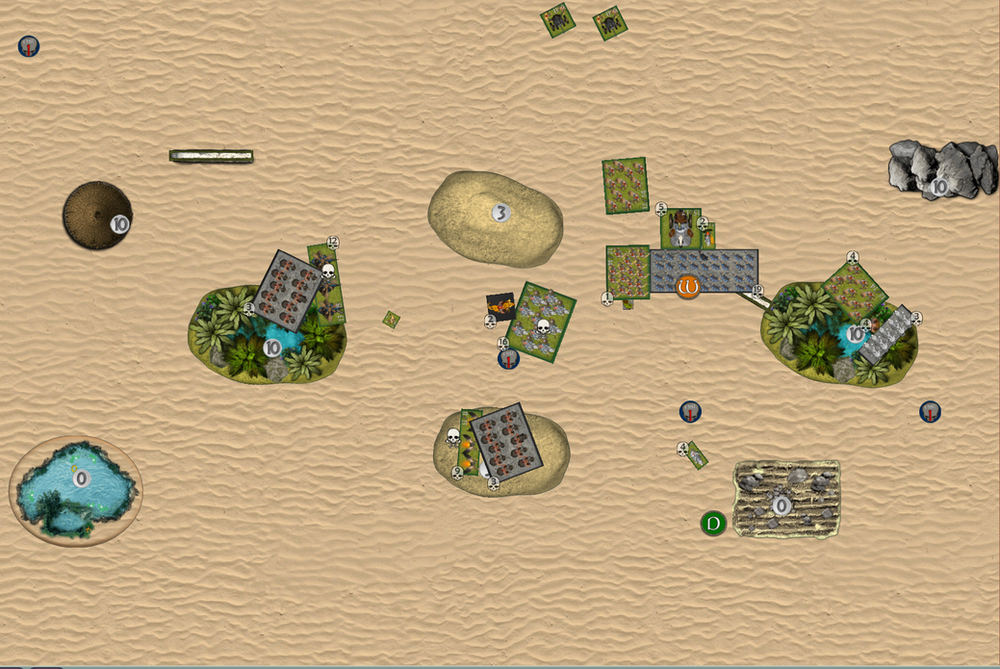
Turn 1
Dave:
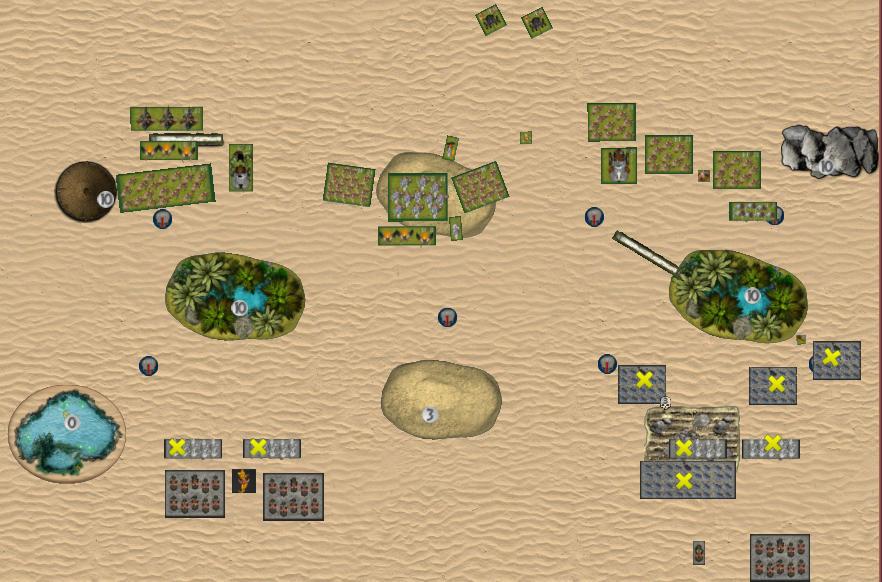
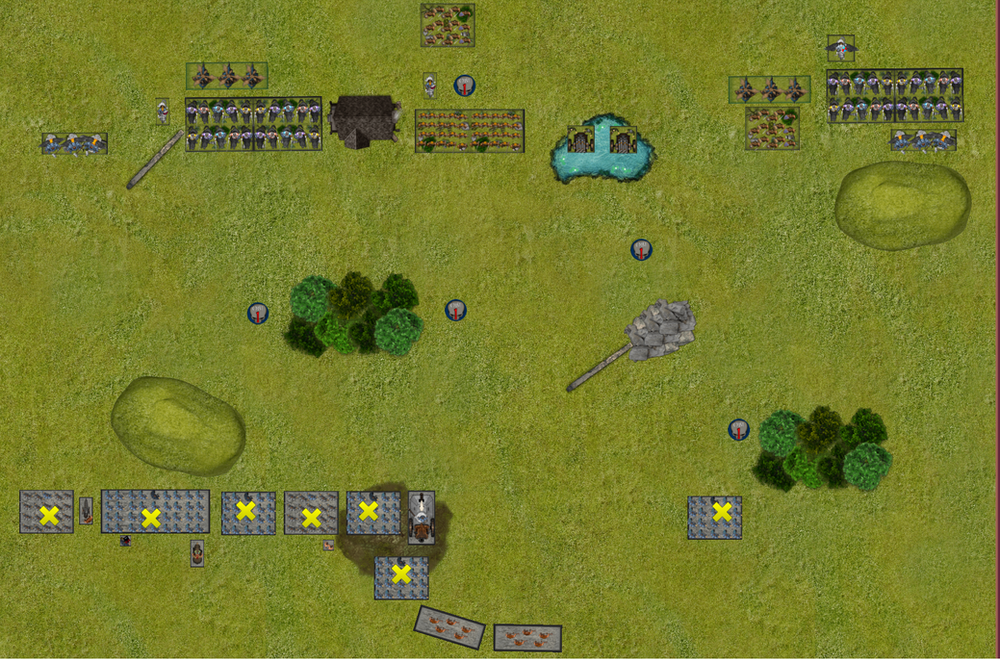
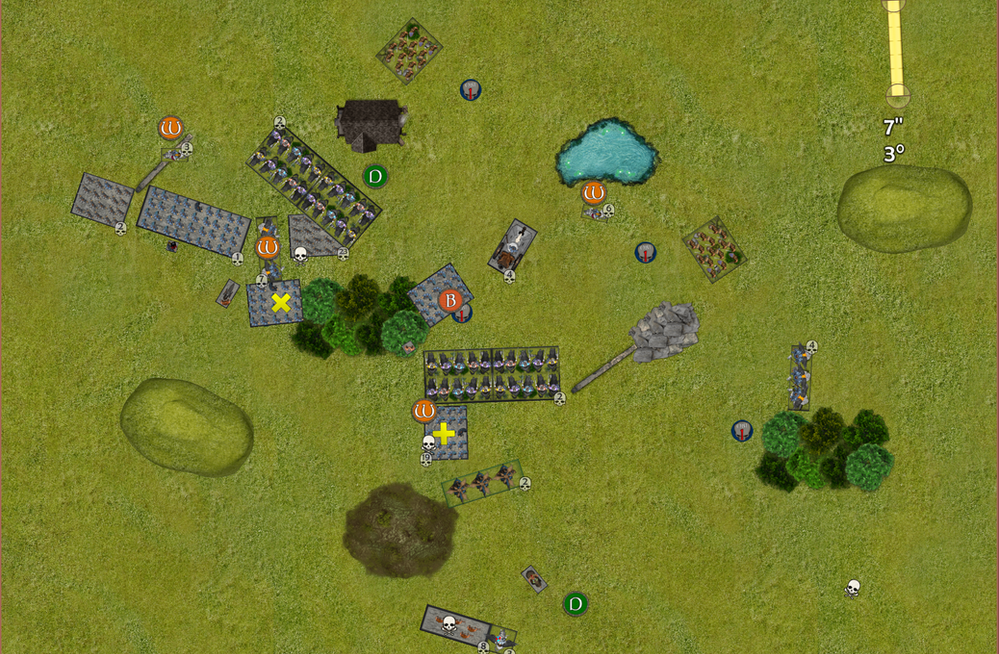
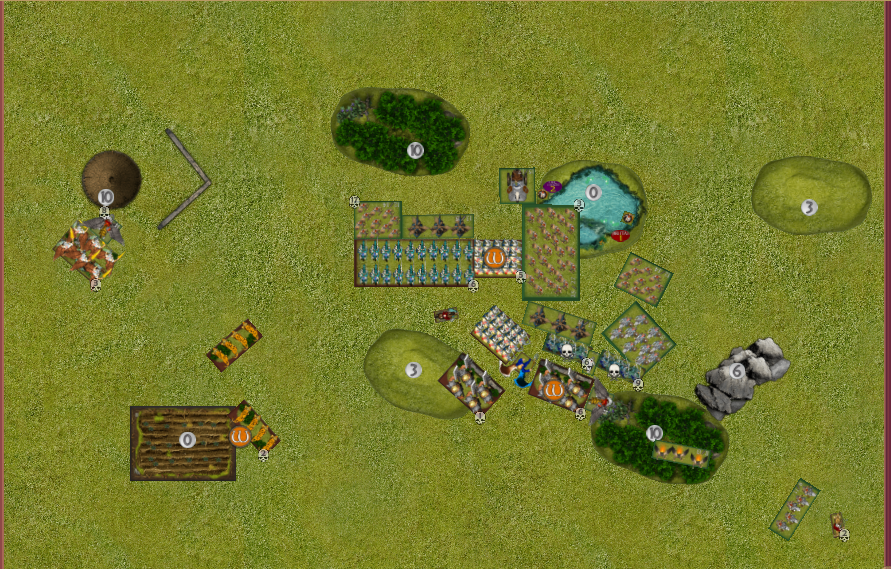
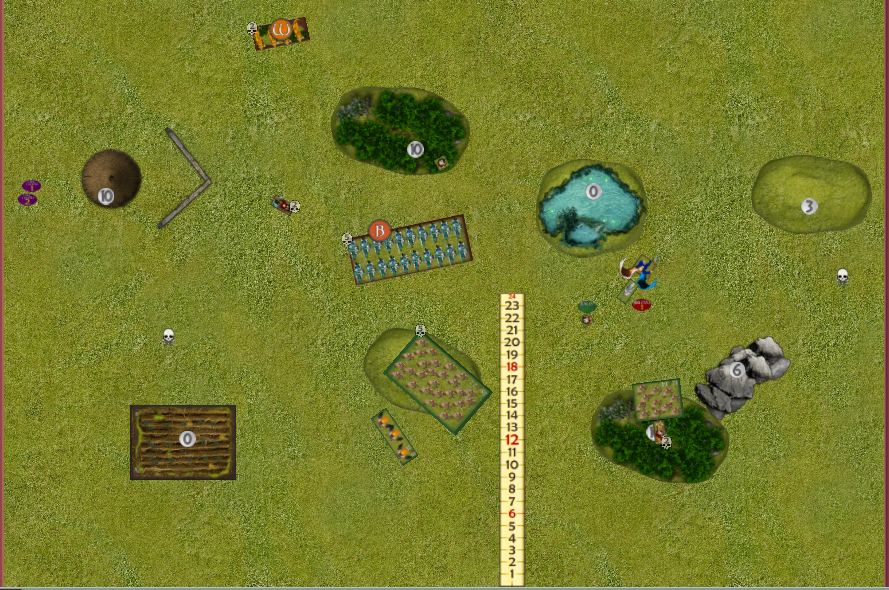
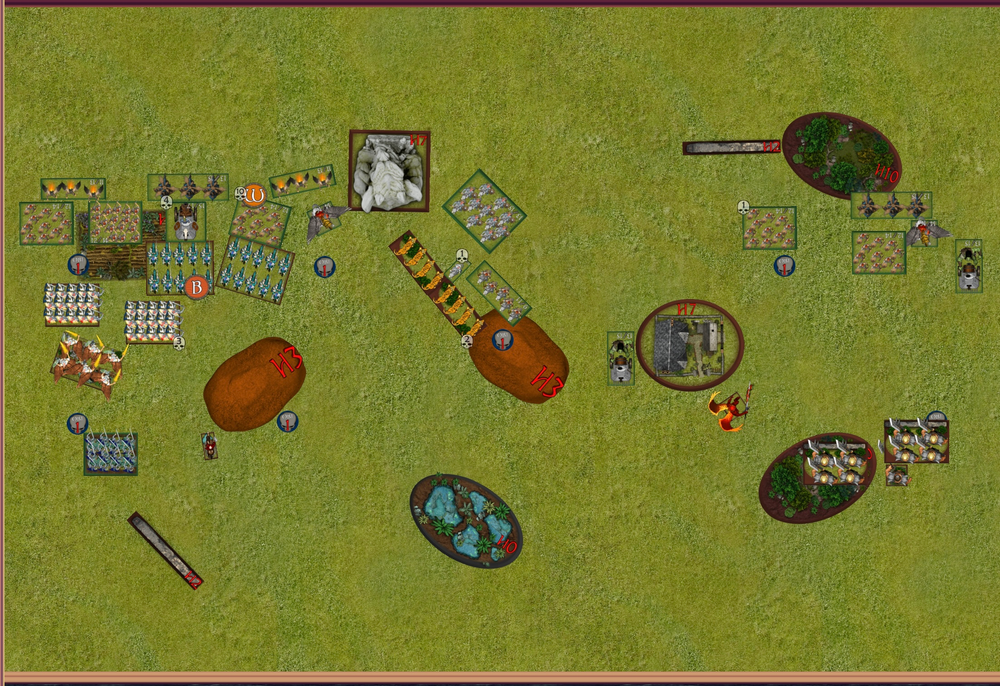
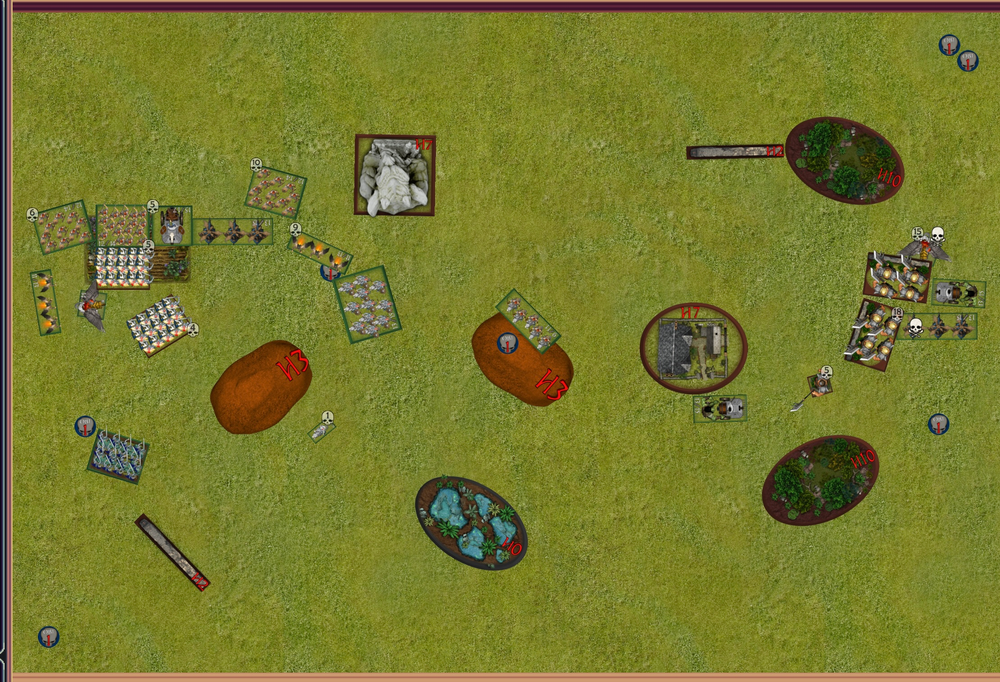
Just moved, and shot at dwarves nothing special. I did try and correct my lack on inspiring on the left by moving over my feast master
Matt:
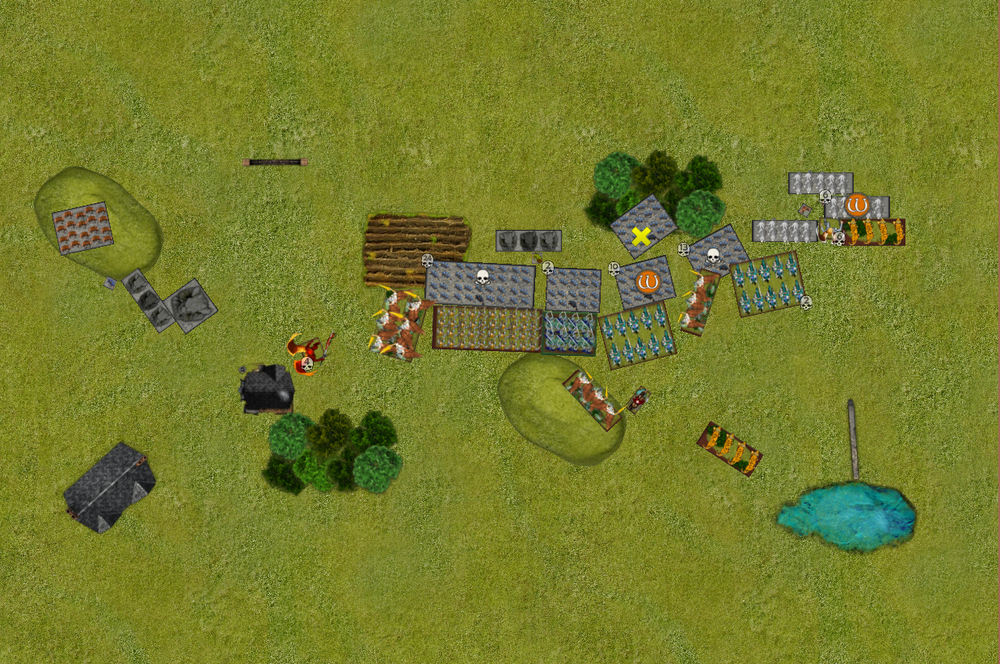
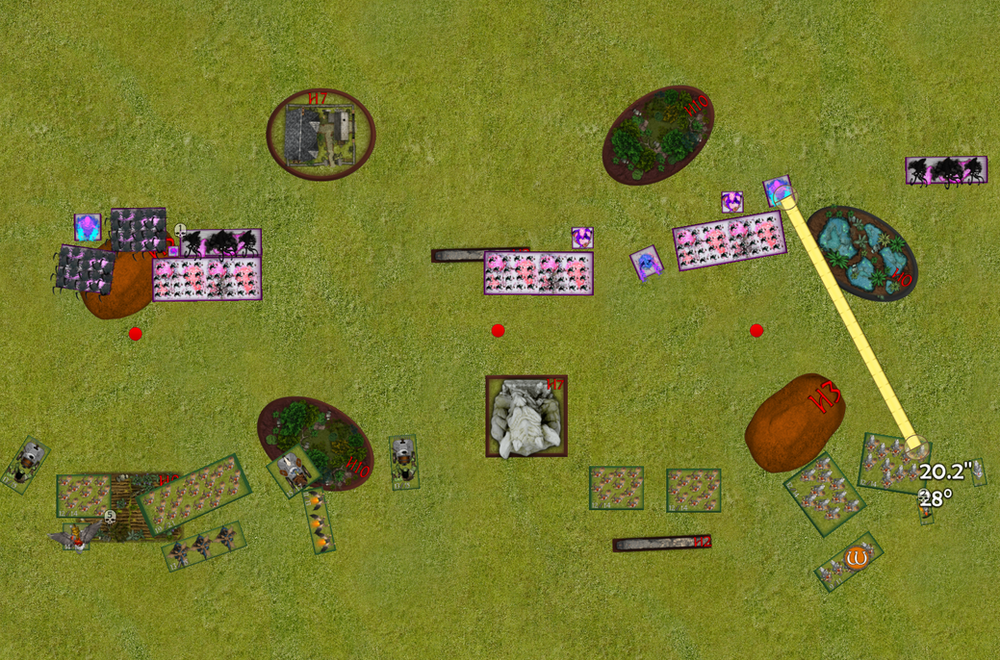
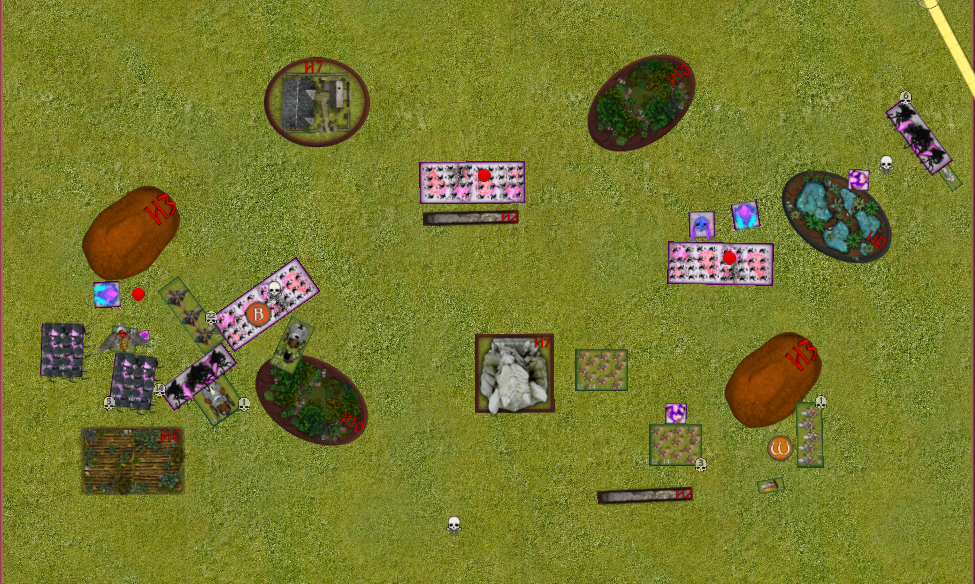
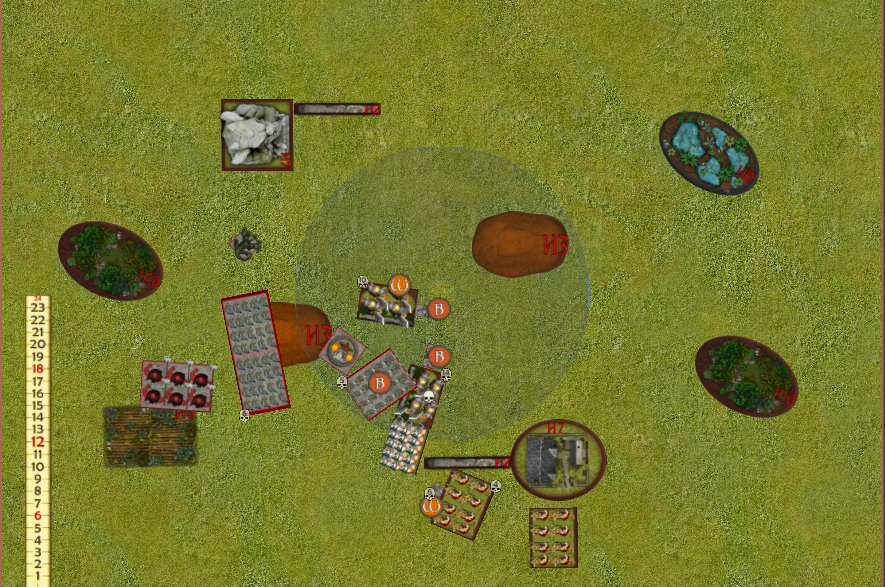
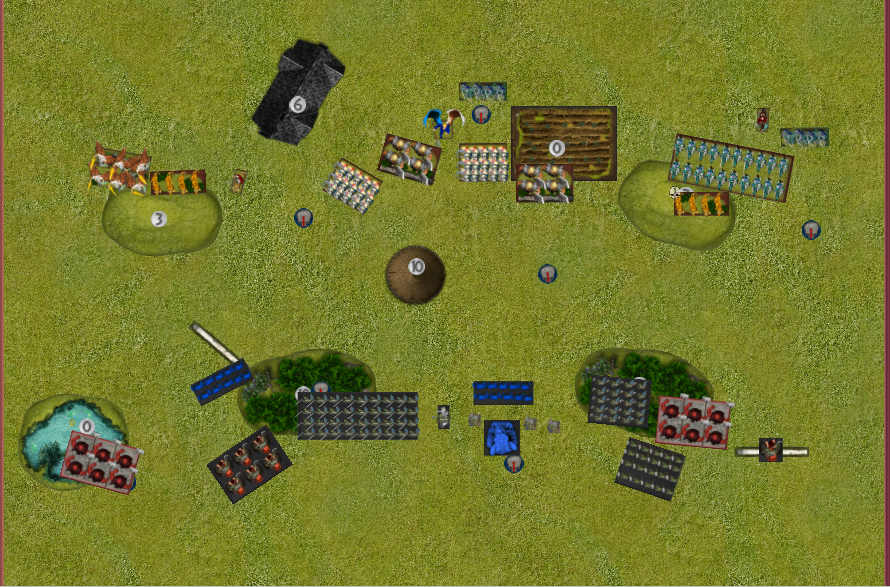
First idea is to push forward to get a couple of mastiffs into the stalwarts. If I can pop them then my US 3 reg will beat his US 2. So he would be forced to consider using greedy guts. I push forward gently to position on both sides. On the left I position to hopefully corale the EJs.
Two dogs go off into the stalwarts for 7 wounds and I pop them. Noice

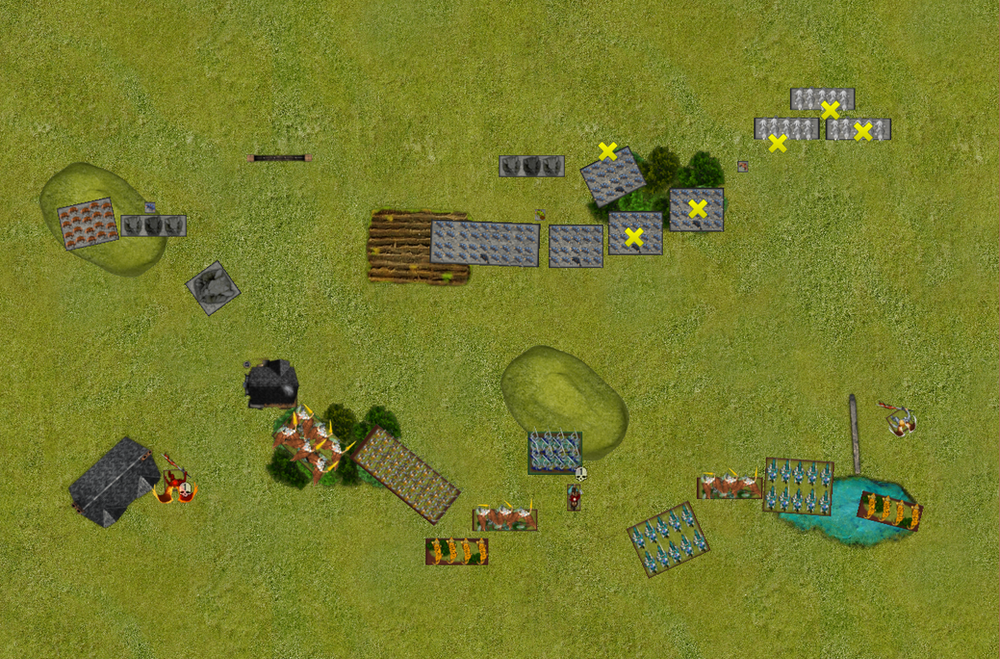
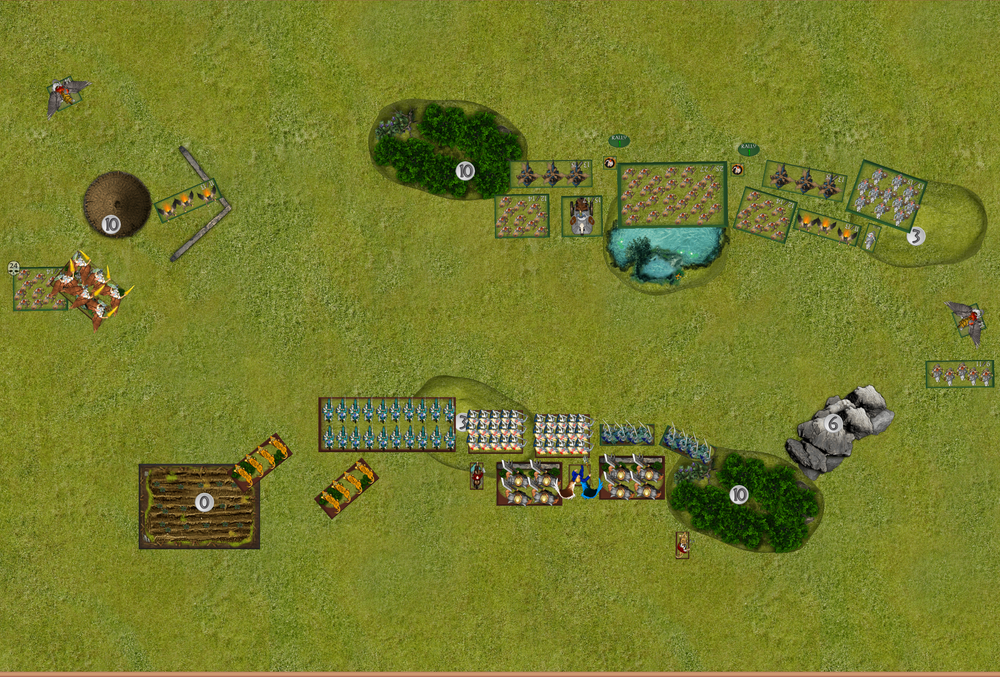
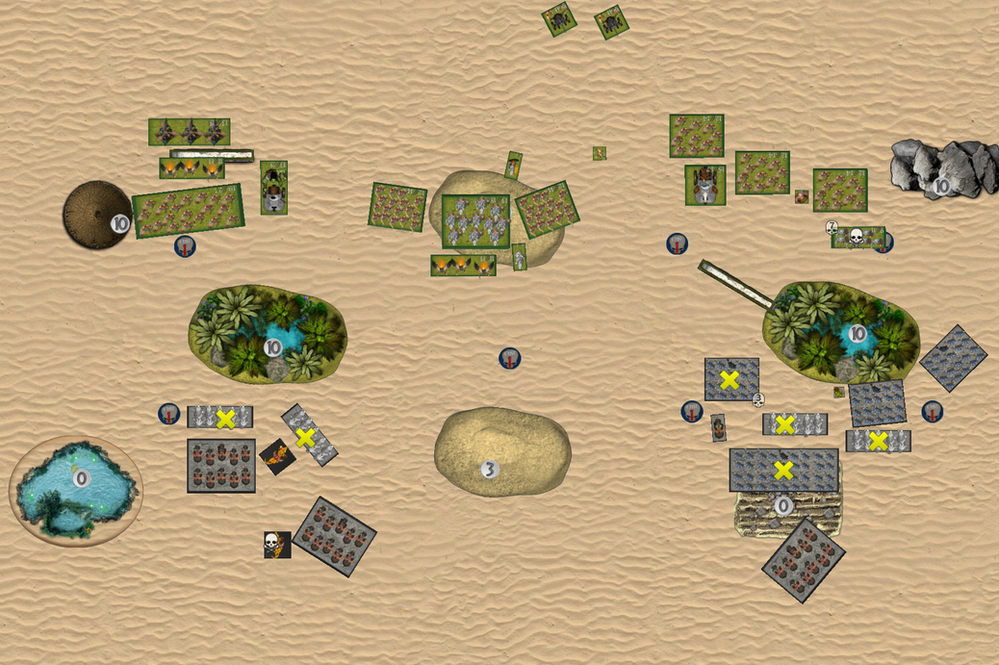
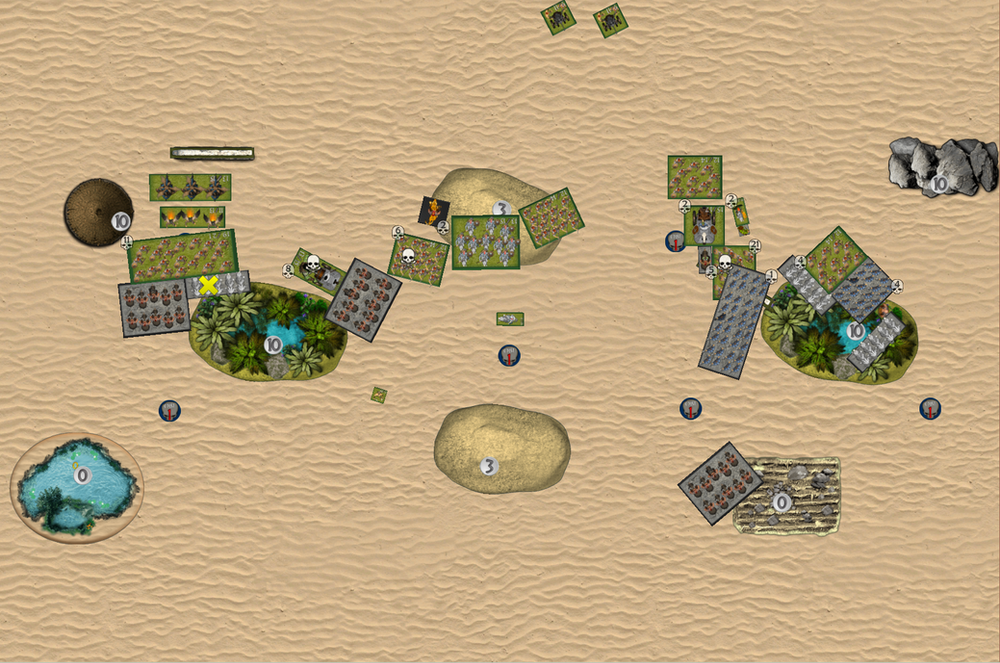
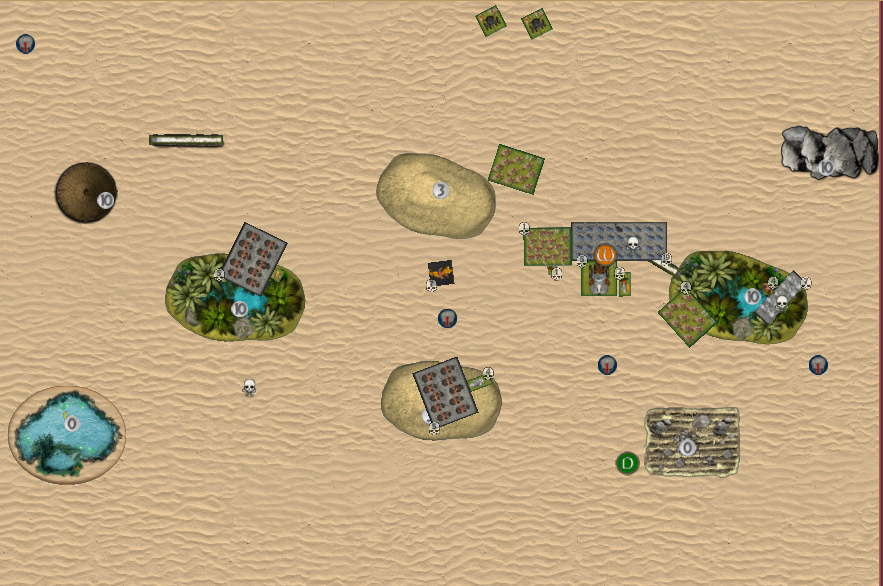
Turn 2
Dave:
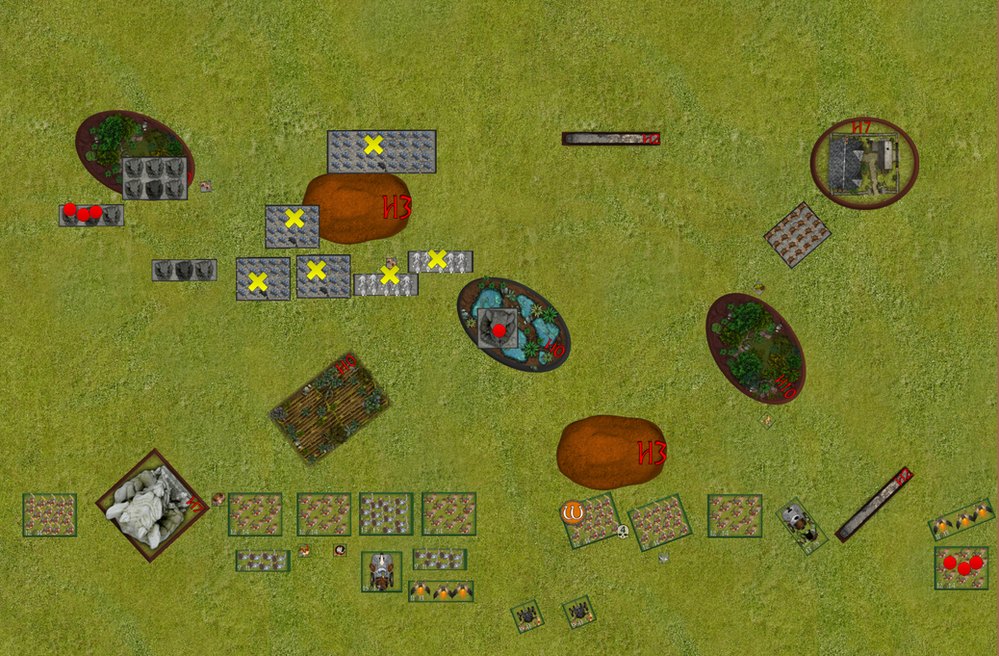
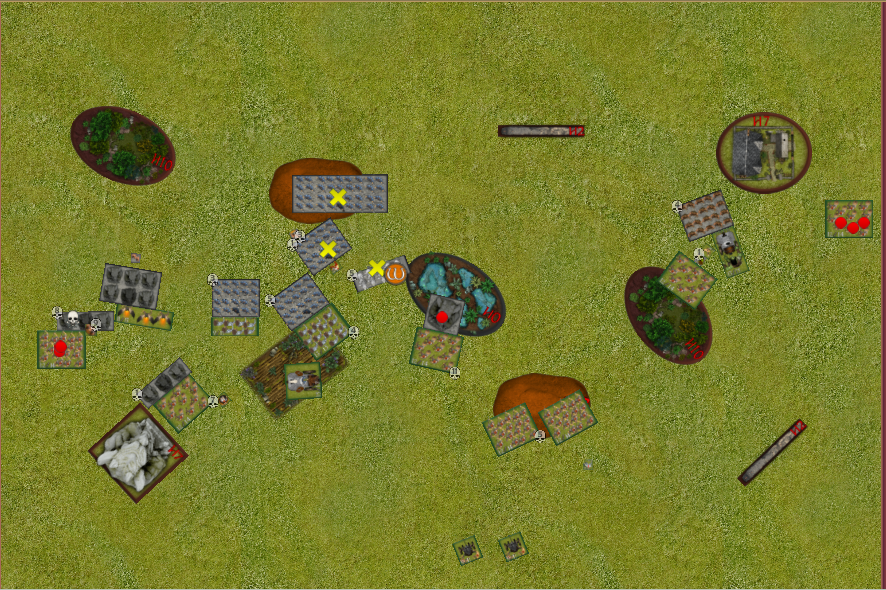
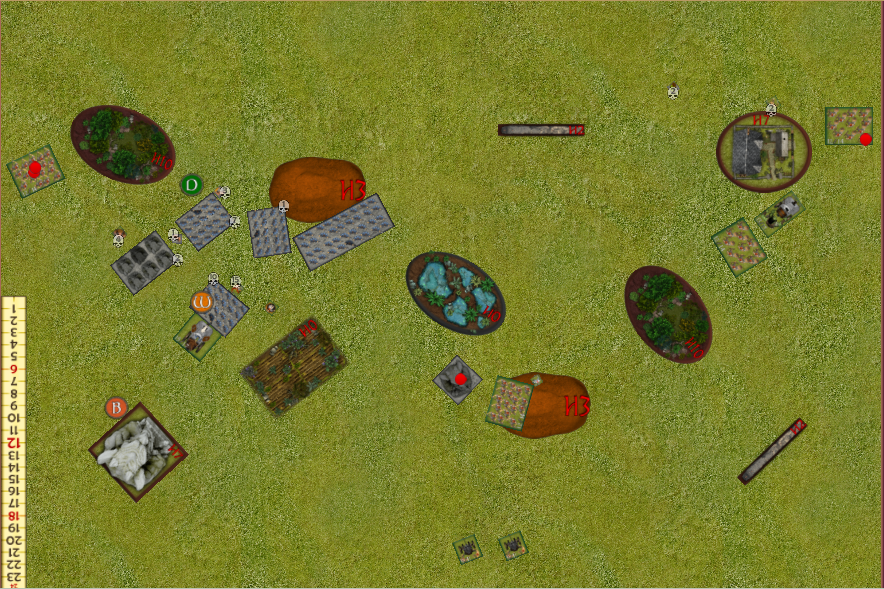
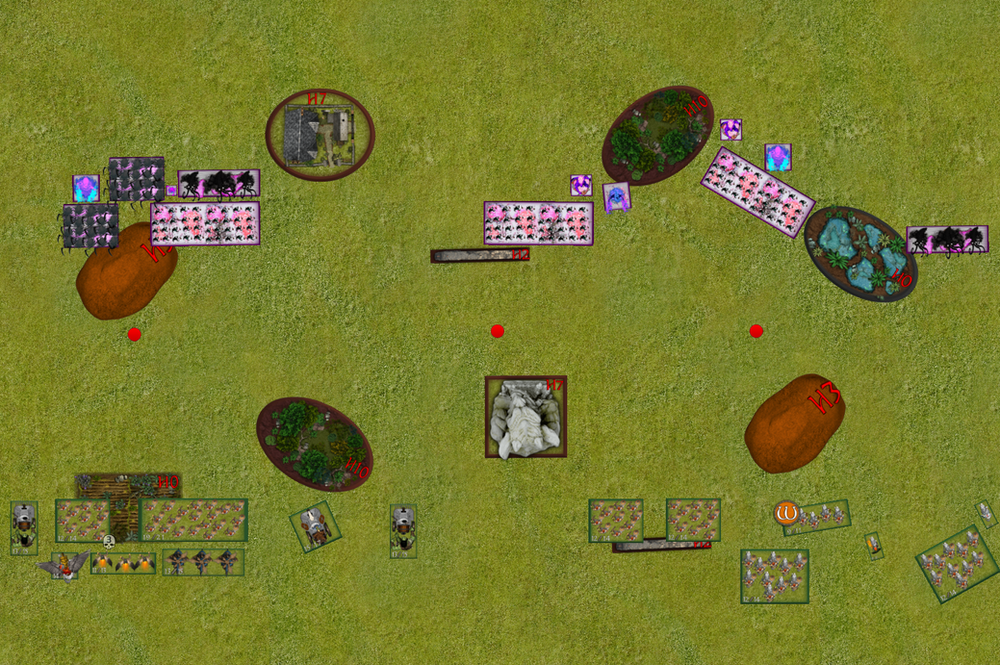
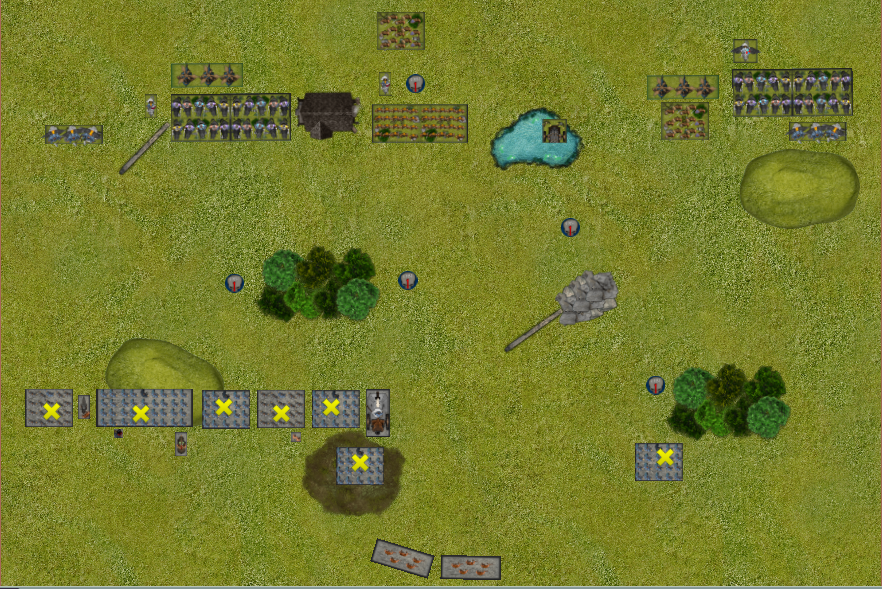
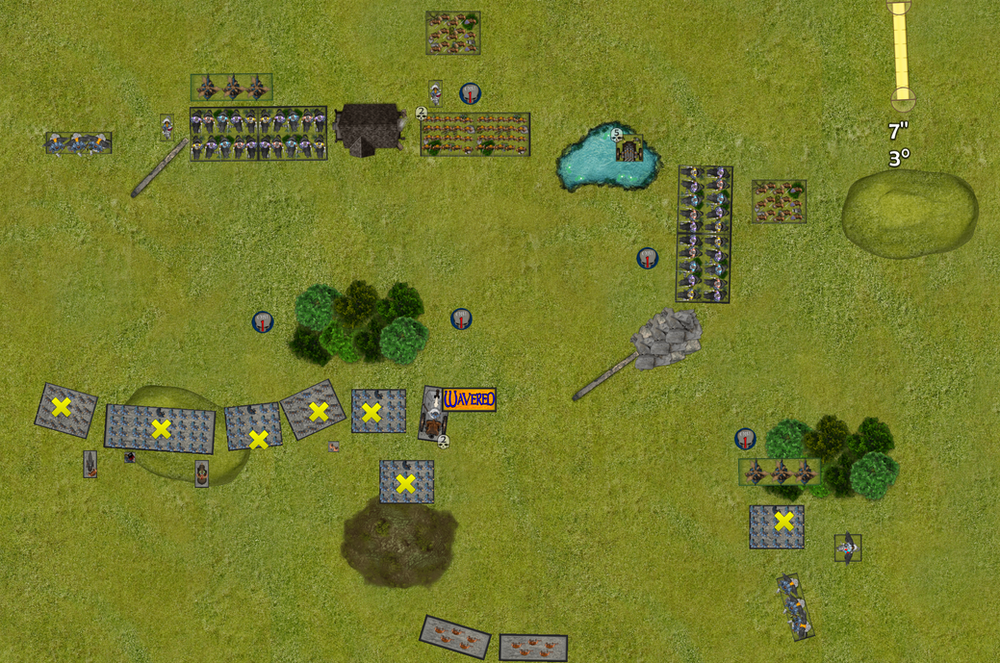
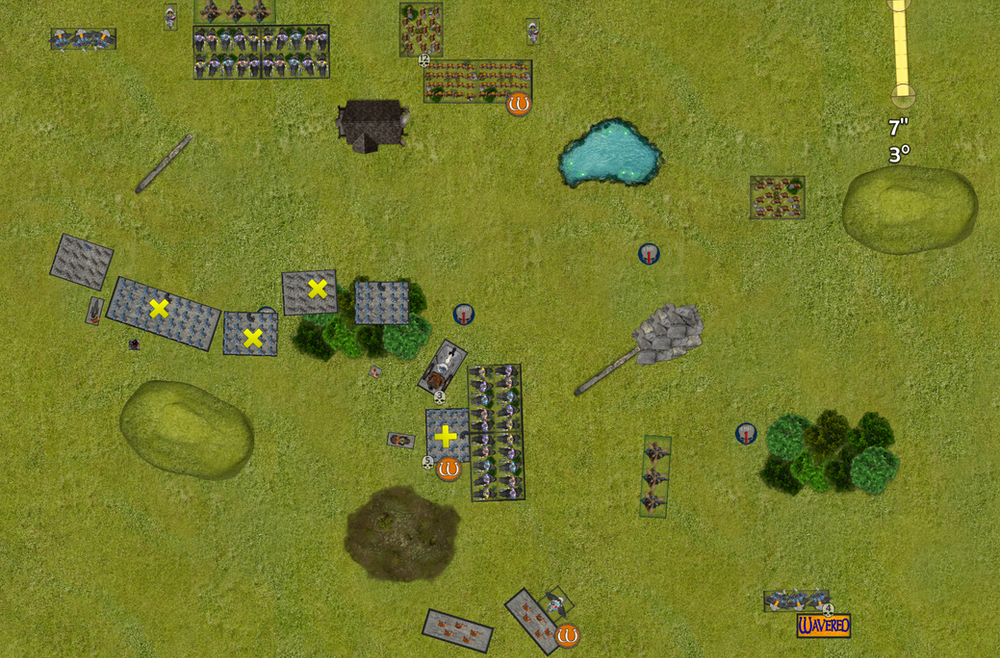
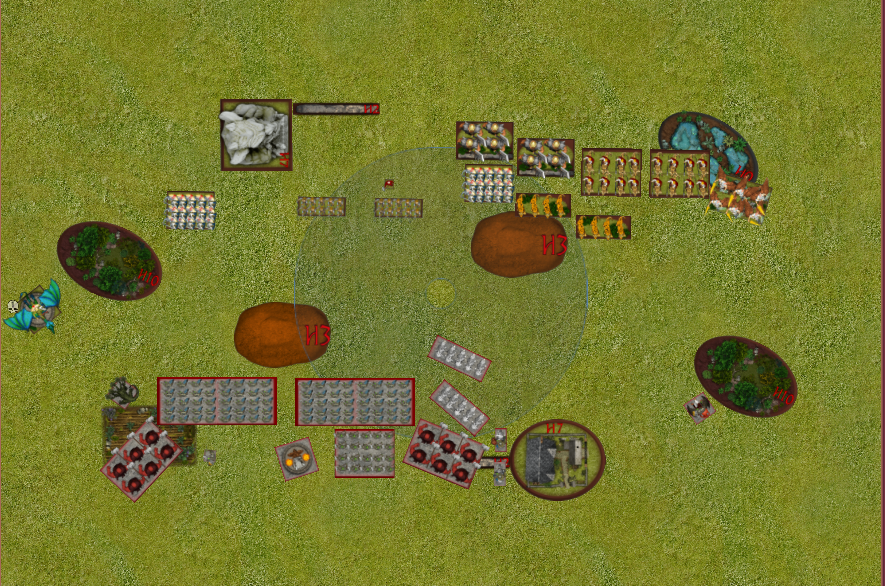
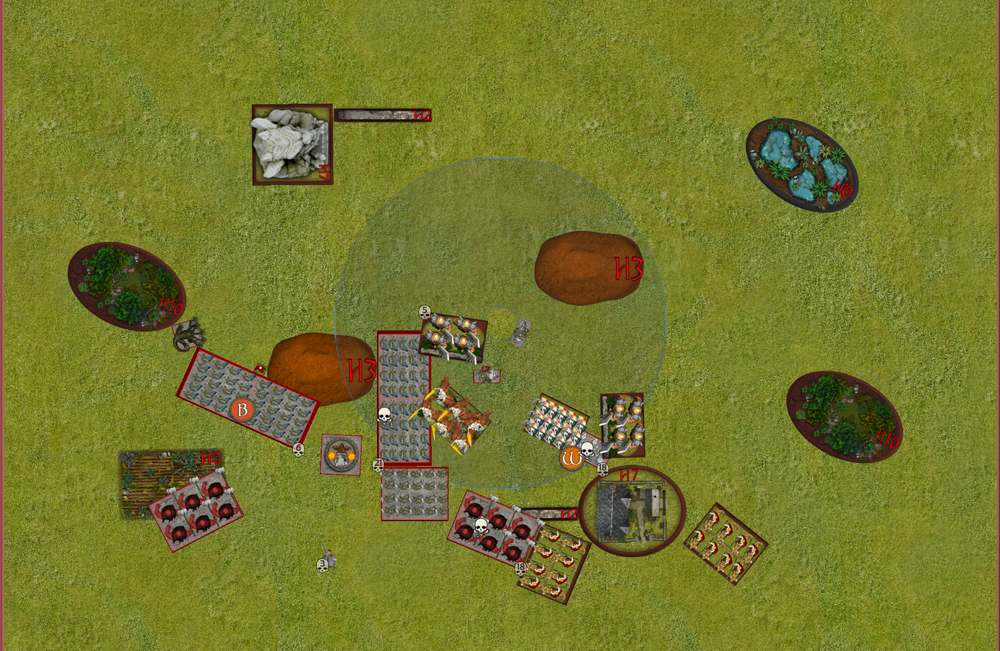
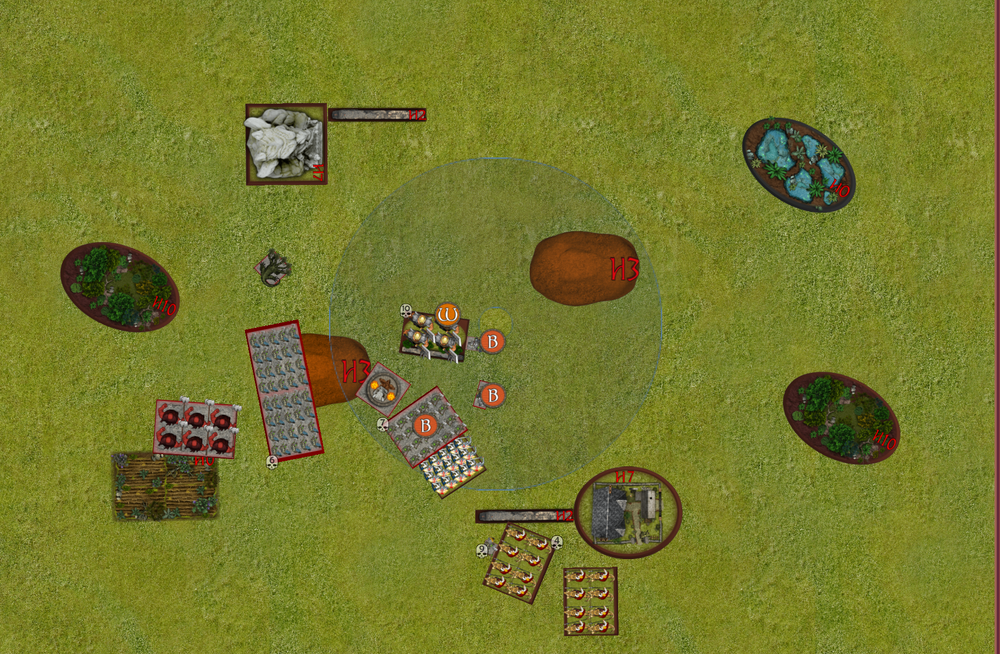
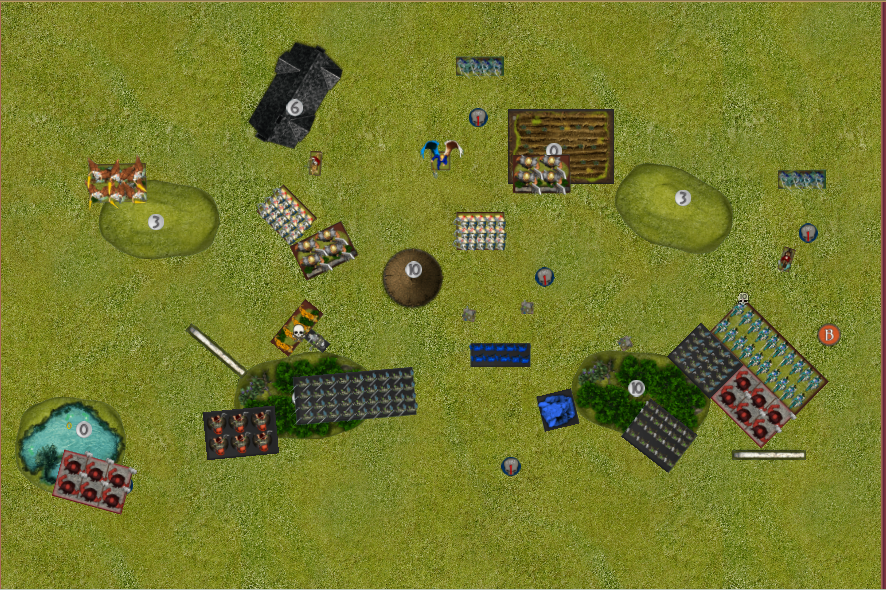
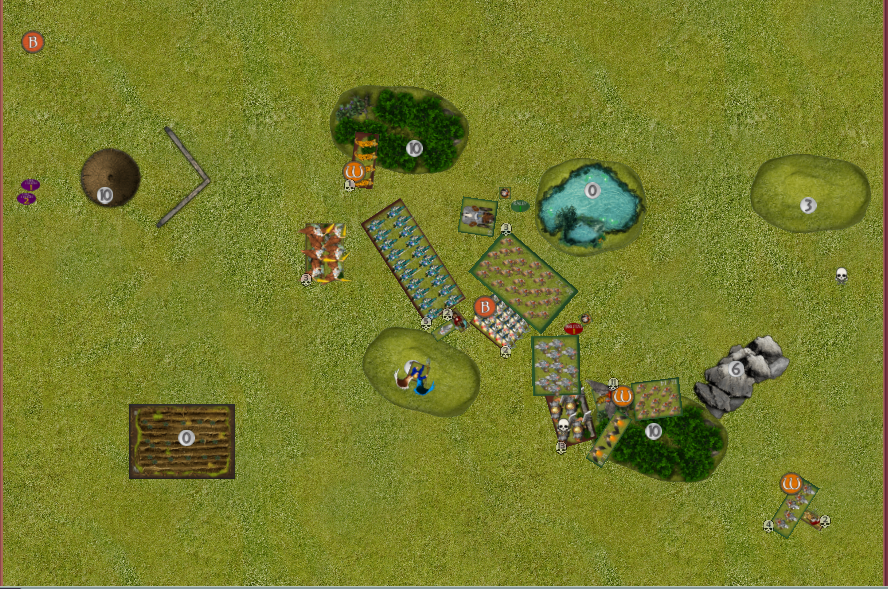
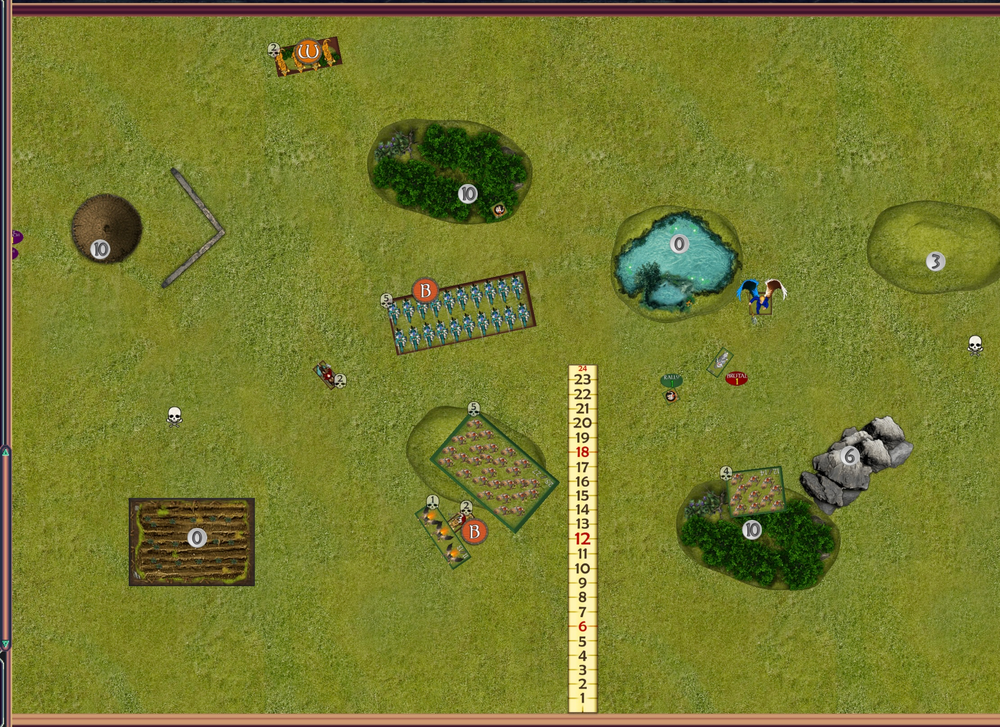
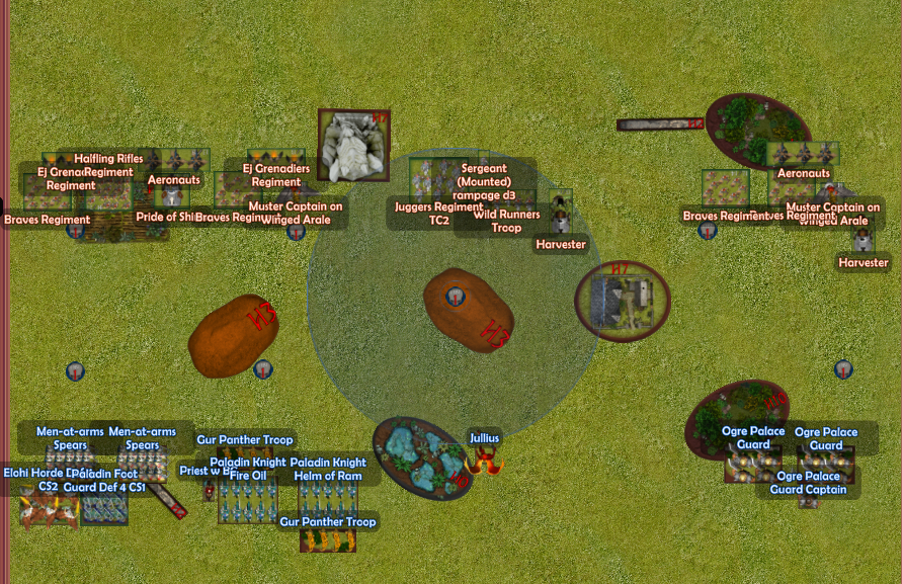
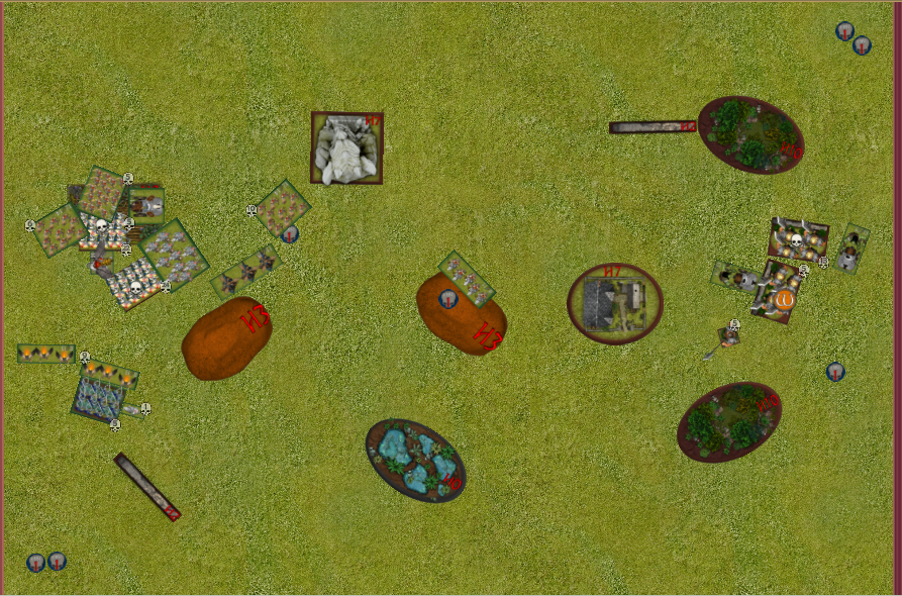
This is an interesting turn, I shape for some options next turn in the centre, on the left I stack in to protect the token but if Matt leave the back one open, I can jump over with the EJs and steal.
Losing the stalwarts was no shock I just wanted them to eat dogs and they did. I did try some cheeky stuff with greedy guts, putting WC on the sauceror and adding in greedys D3, gets me all the way across into Matts shield breakers. I only really wanted to hold them up to stop them getting the token, but double 10s on the nerve saw they go.
I had a hot round of shooting hitting the other dwarf shield breaker regiment with 9 wounds to take them off.
From here I plan to target the left and furthest right token
Matt:
I expected the charge from Greedy as an option but not that level of poo. That’s ok the next unit can still grab that token as per the plan. I’m torn between ignoring greedy and not, and I think this stage I need to focus on US play. So the next shieldbreaker unit pushes through to claim the token at the top right while the mastiffs and horde all push to get the mastiffs off on the next unit along whilst the beserker lord runs interference on the iron beast.
The two bottom left units of mastiff and brocks sidestep slightly left. I am pretty sure they were out of sight but just confirmed it. Whilst the mastiffs charge the Ej’s in the middle and sveri flanks. The reform will mean sveri can only be seen by the rifles. The other brocks push forward, the juggers may nimble around the mastiffs but we will see. I think the second pivot will be more than 90.
In shooting the three remaining mastiffs on the right went into the braves for 5 wounds but failed to route.
The Ej’s died and I reformed as planned.
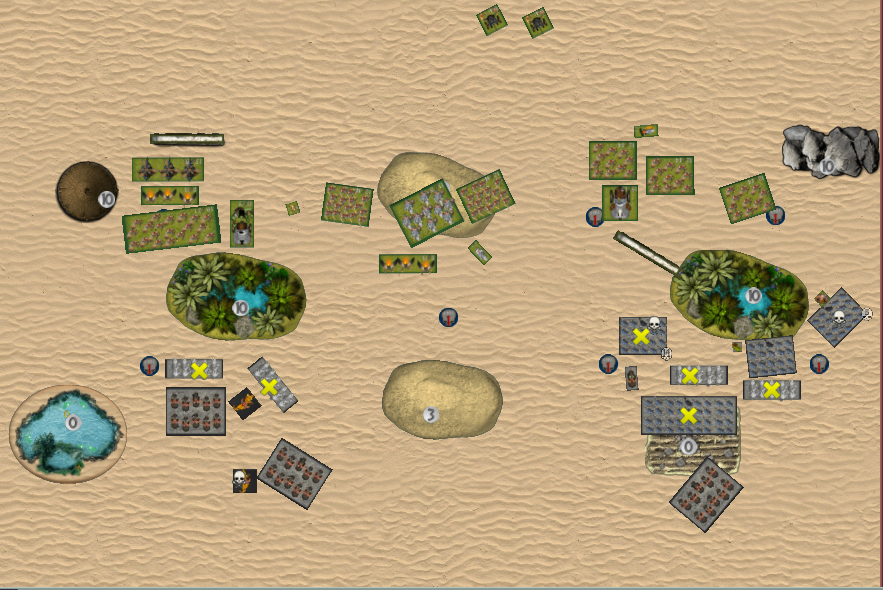
Turn 3
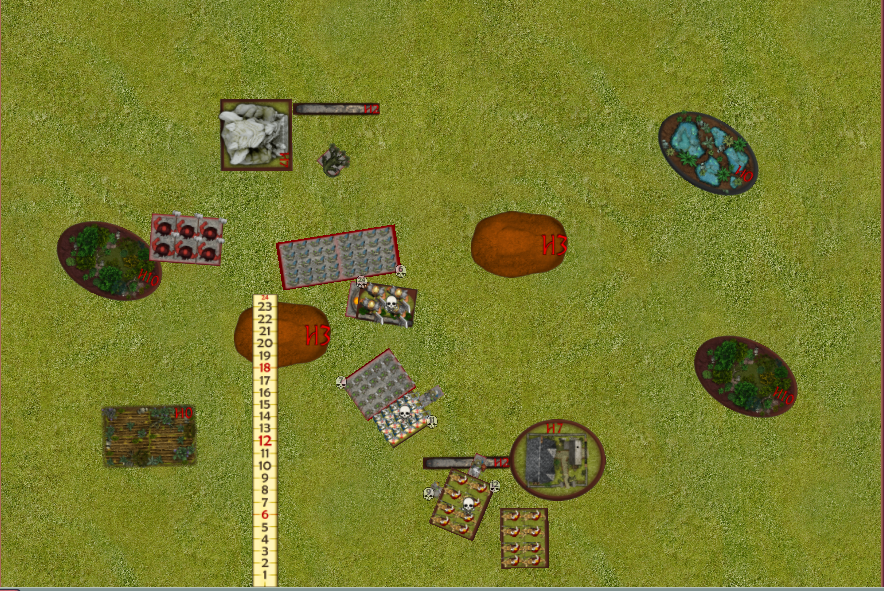
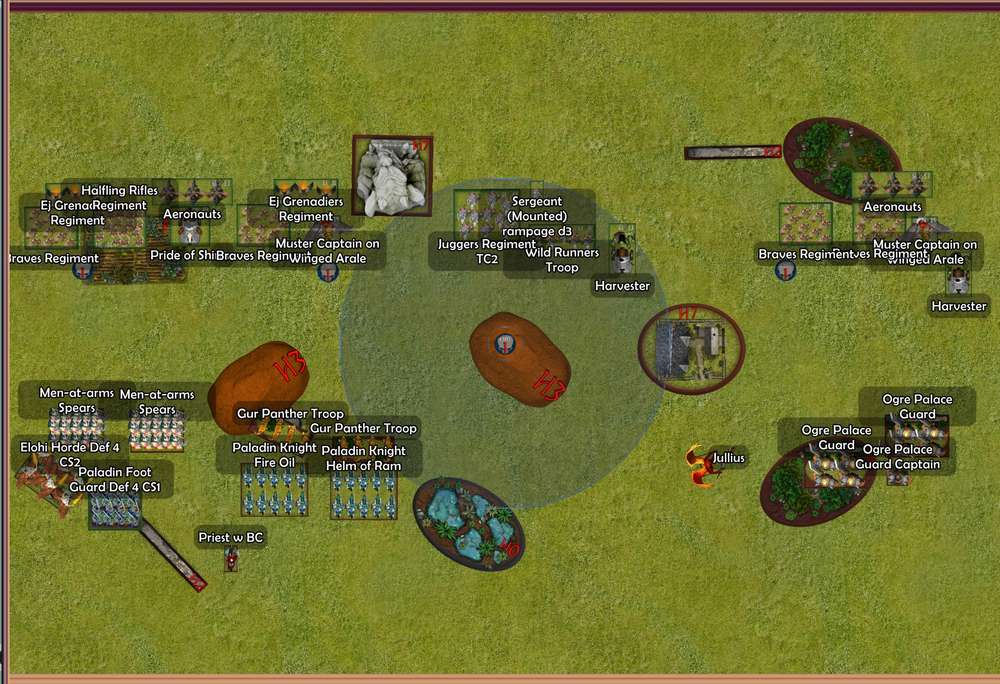
Dave:
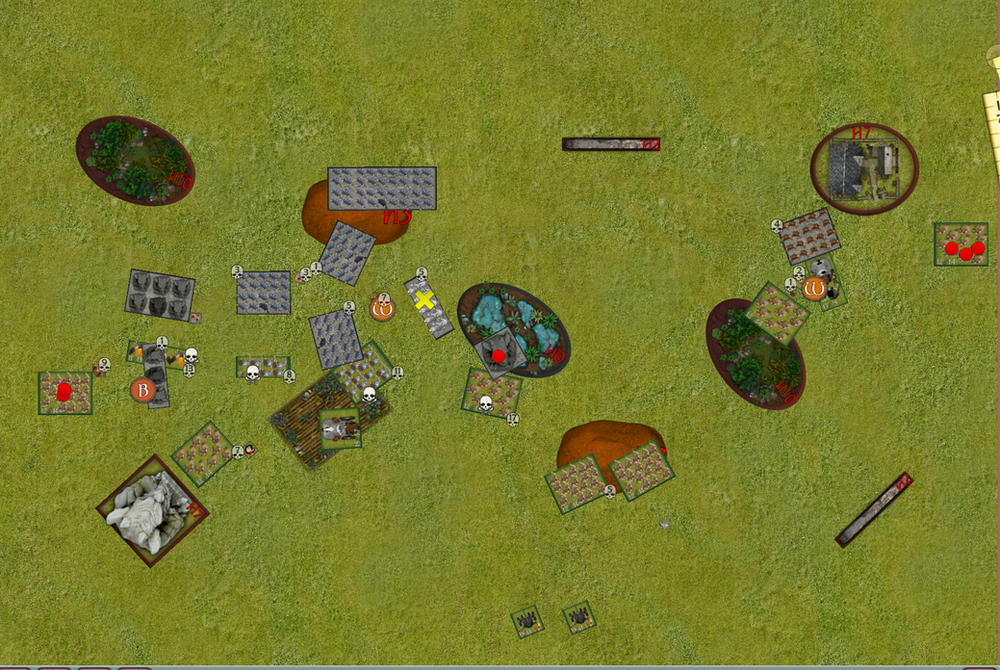
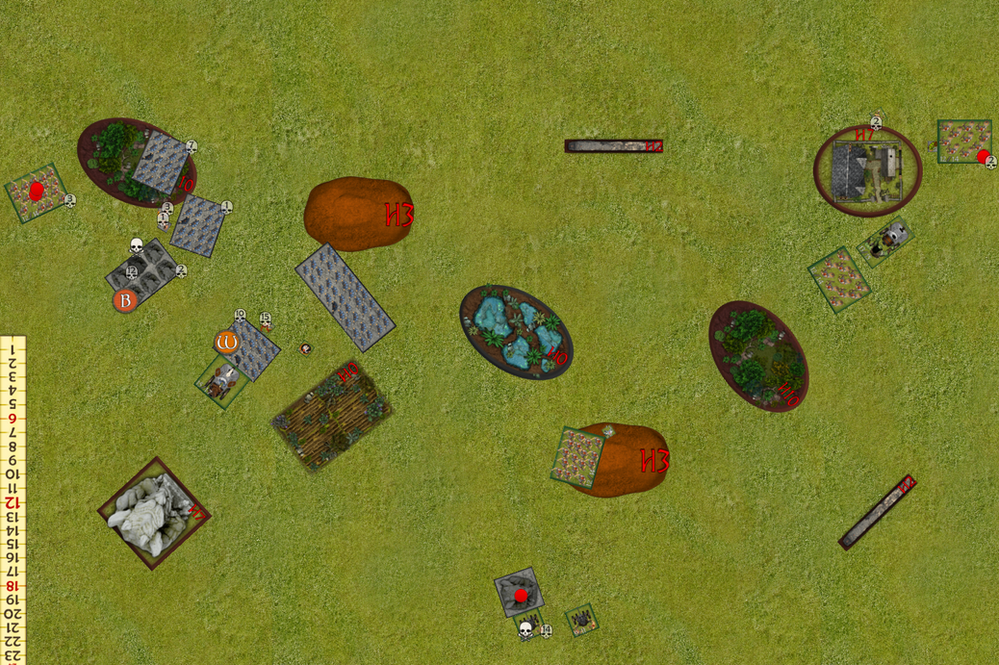
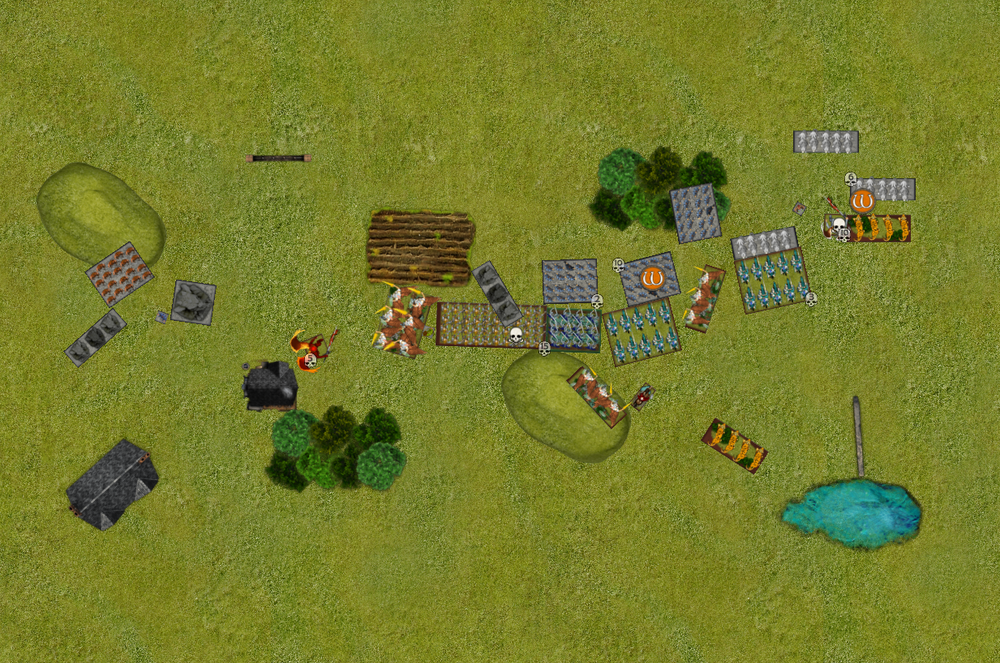
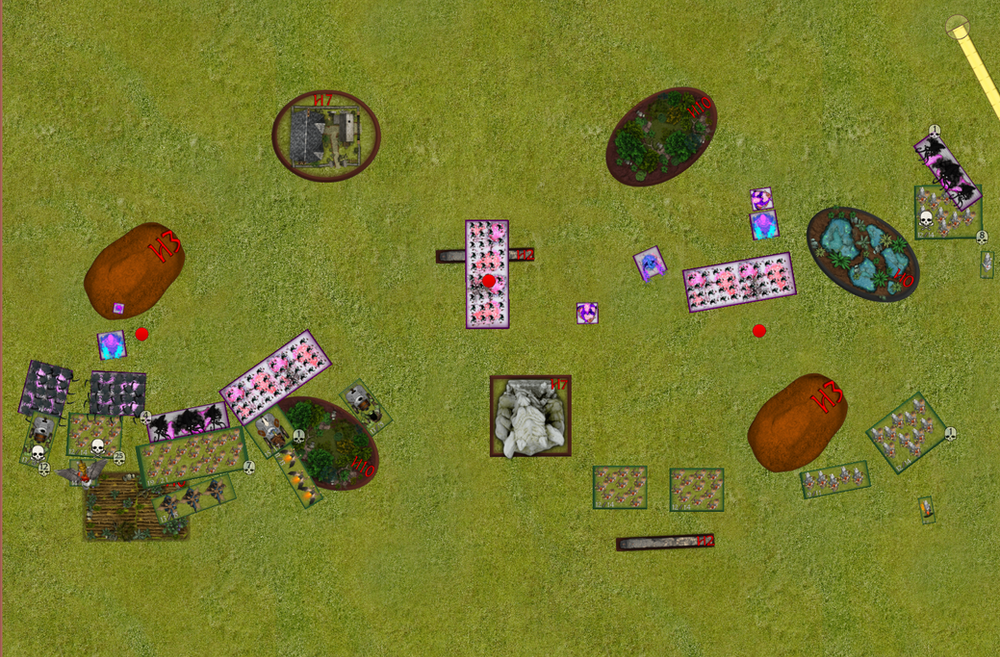
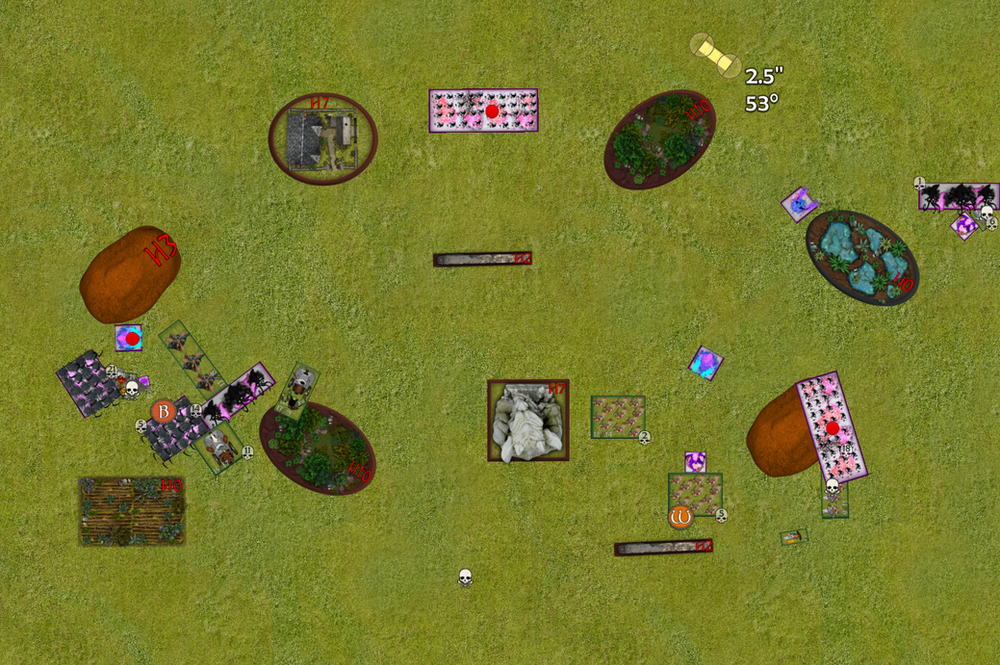
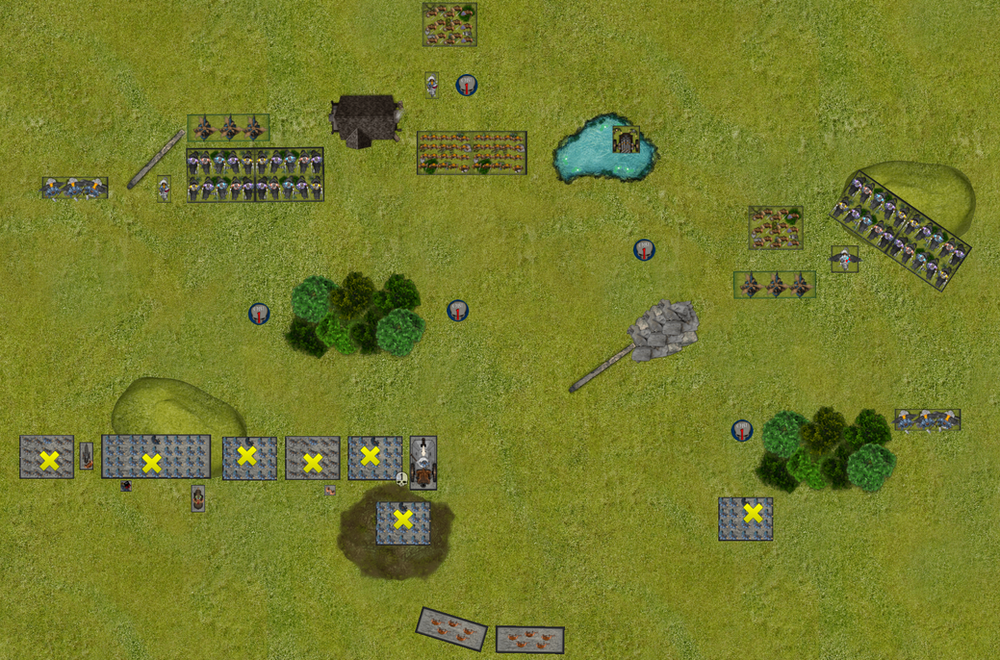
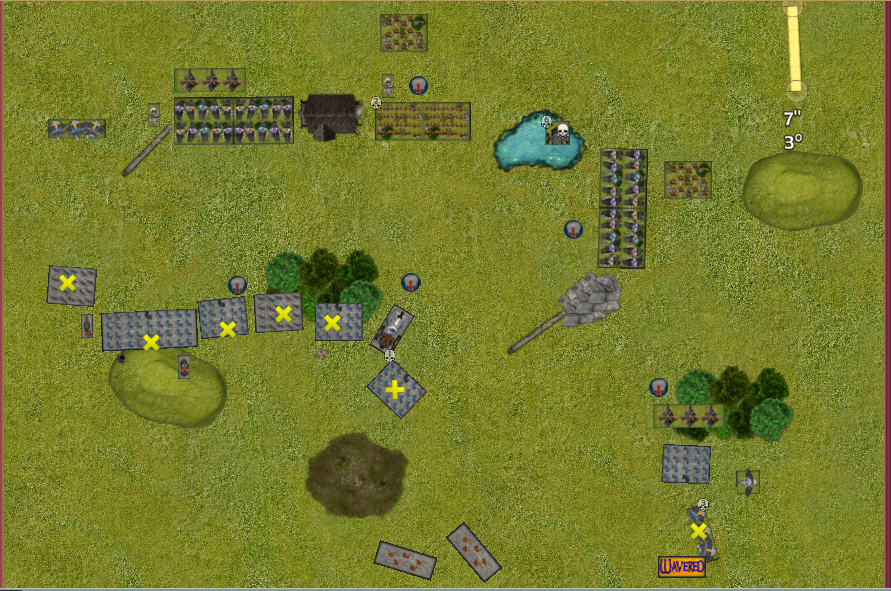
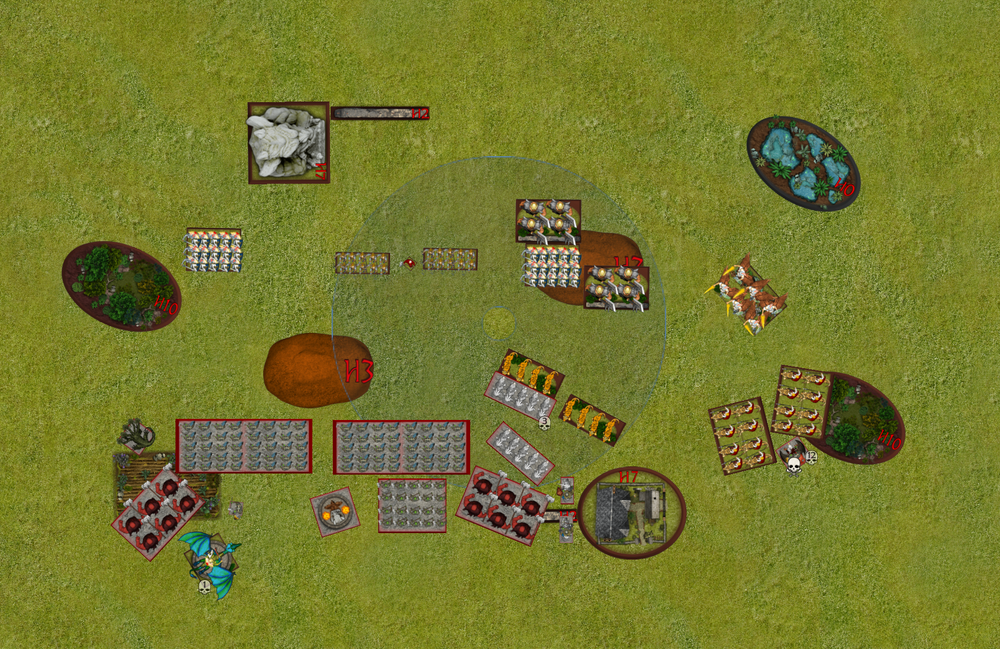
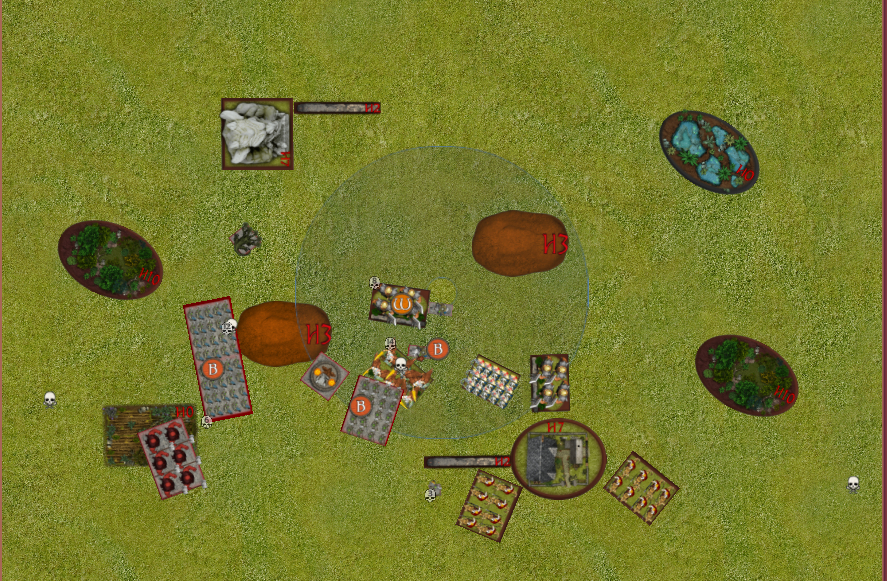
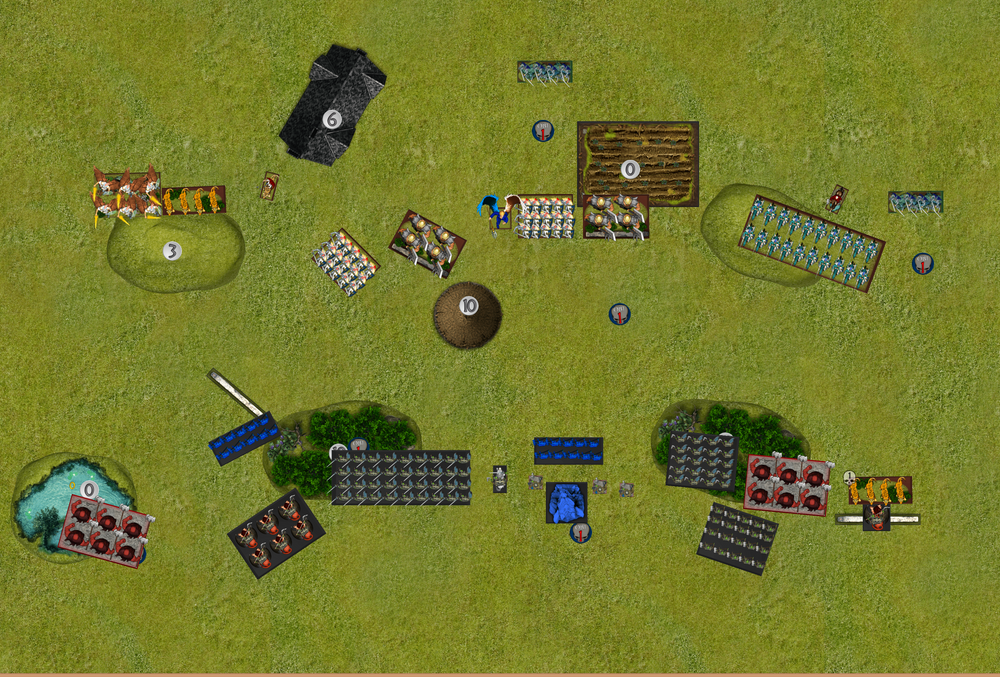
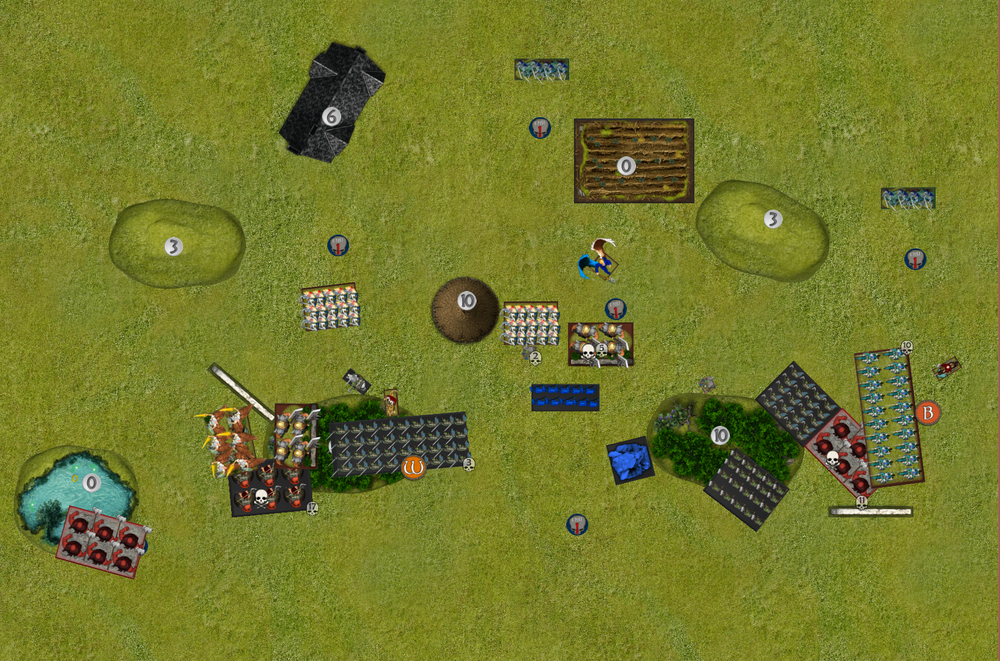
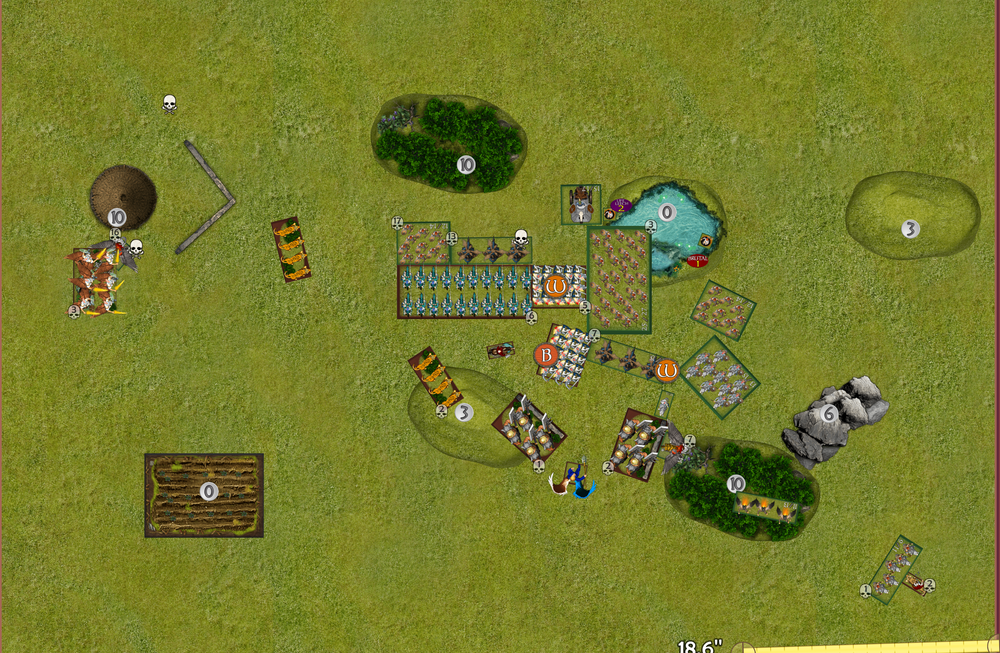
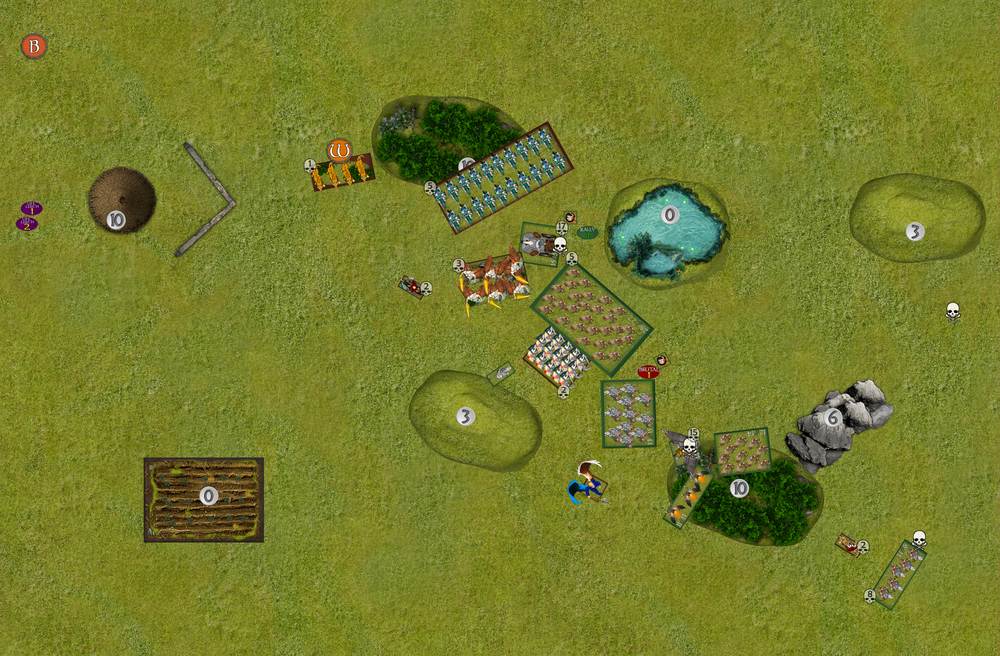
A bit more cat and mouse on the left, I’ve positioned my harvester to project a lot of theat and send my feast master in to hold back the broc riders to hopefully get a next turn charge then take the center, but you now… the fest master didn’t manage a single wound so now its a sitting duck.
In the middle my rifles hold up Sveri, and my juggers delete the mastiff hunting pack. I pushed the sergeant and juggers as far away as possible to avoid any over runs as the brocs could easily delete and over run the sergeant.
on the right I found Greedy a little out of place, but figured I needed to pack wounds on the shield breakers and with a little luck I might take the off, and well I didn’t.
The Broc lord is annoying in my line and I can see it becoming a pest so i looked to delete it to, but rolled super low with my pride and its fine.
My howitzers put a round on the shield breakers.
Matt:
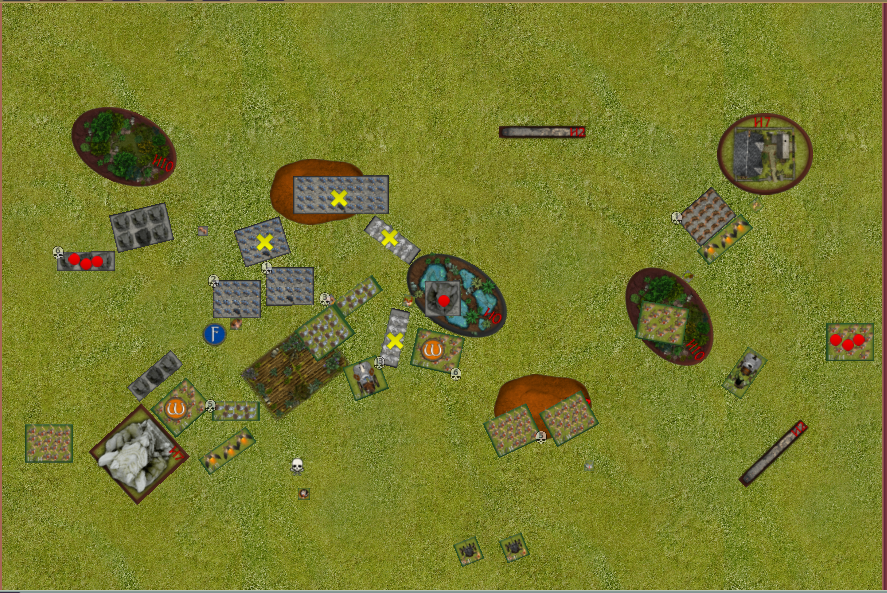
Things are pretty decent on the right. The mastiffs flank the braves, and the shieldbreakers go back in . The brock countercharges the pride whilst the shieldbreaker horde flanks the braves. Sveri counters the rifles whilst the strength brocks charge the lawn mower. I’m sick of the standoff on the left so the mastiffs and brocks double charge the horde of braves. Really lucky rolling could pop them. Because of the building he also won’t get super favourable charges if he chooses that path.
In combat on the right the shield breaker regiment only does a wound while the mastiffs do 3. A nerve roll of 11 with brutal gets them but then they are saved on the reroll. The sauceror cops two wounds and survives a waver due to rally. The brock lord does no wounds. Whilst the horde cleans up the braves
In the middle sveri does 6 wounds and pops the rifles. The brock regiment does 8 on the lawnmower and pops them as no inspiring. The mastiffs and sharpness brocks do 11 wounds but fail to waver by 1.
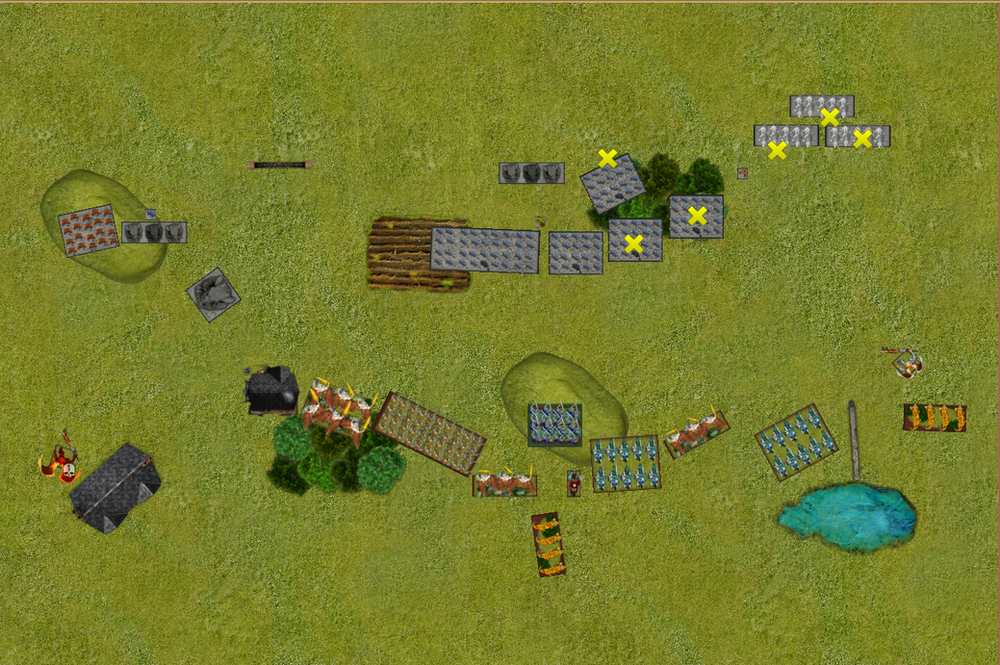
Turn 4
Dave:
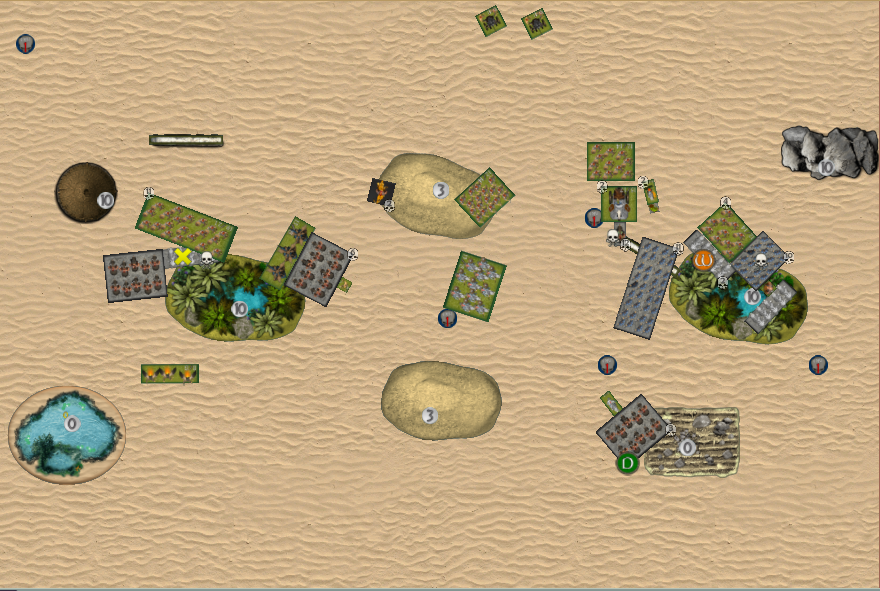
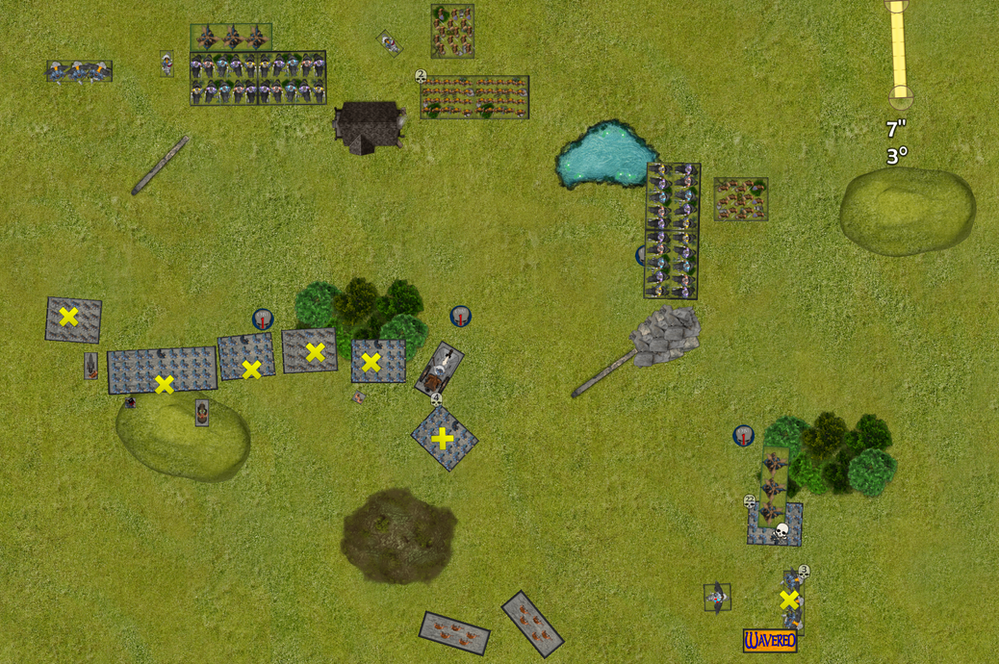
Ok not going to lie, I’m going to struggle from here, I really didn’t need to lose the harvester and rifles.. and I have no decent charges on my juggers.
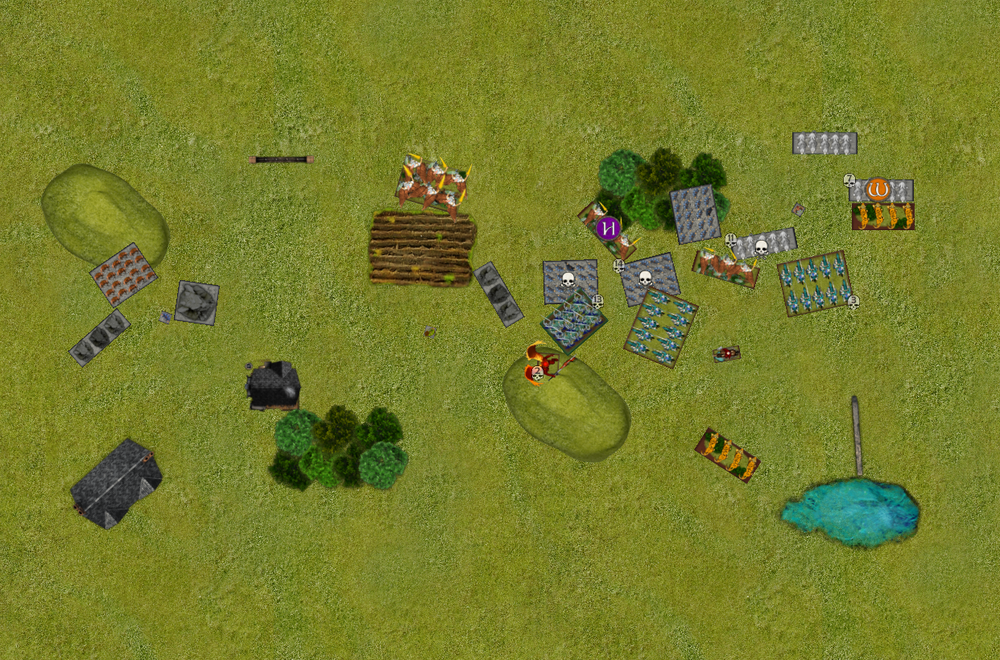
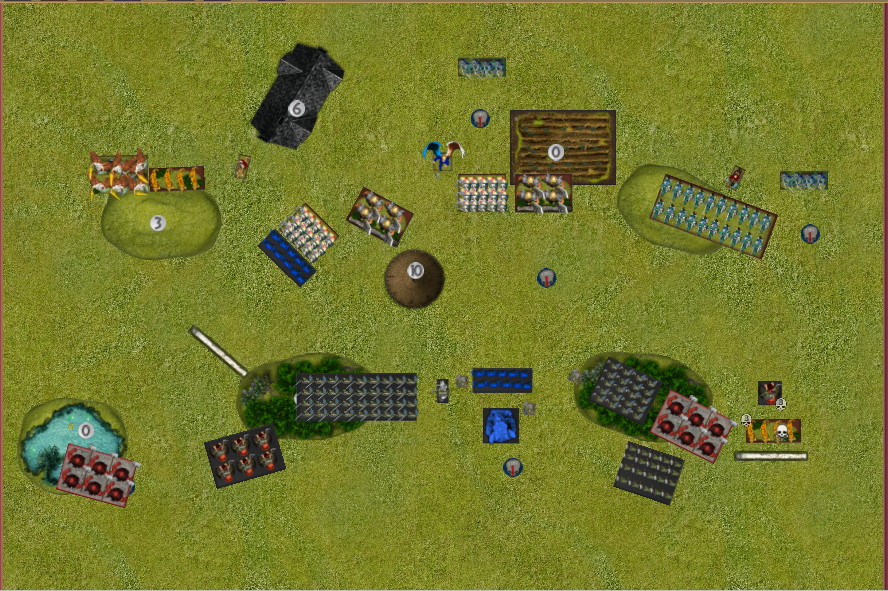
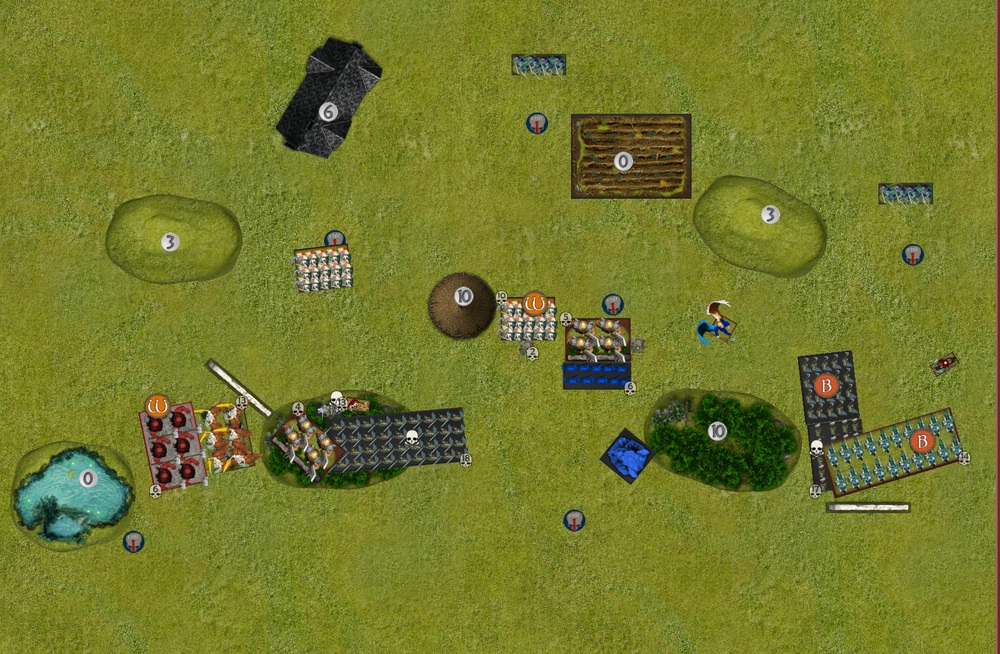
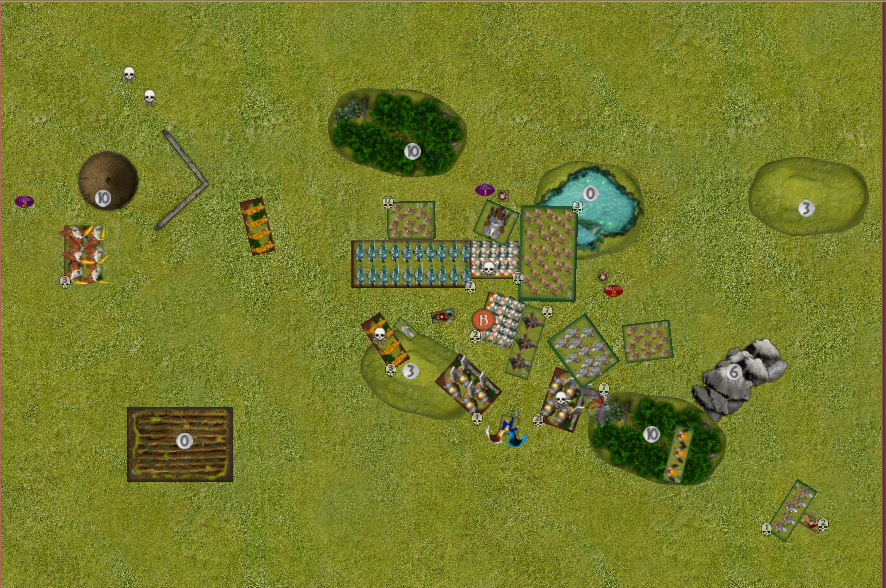
Currently its 3-0 so i Jump my EJ’s over to claim the left token, My braves hit back and delete the mastiff back and turn to receive the brocs next turn. My aeros and feast master chew into the brocs but massivley fluff the role and they end up fine.
In the center I turn to face the juggers towards the right.
My howitzers put a lot of wounds on the shield breaker horde but dont waiver,
on the right, Greedy takes out the right shield breaker regiment and my braves waiver the mastiff pack, my pride finally chews through he broc lord but its a turn to late to have real impact. with my sauceror disordered I just leave him be for some reason and my not so mighty sergeant pins the right broc rider regiment in place.
Yes I killed a lot, but im no closer to my tokens on the right so its pretty well me done here.
Matt:

How I move my king and my mastiffs gives me headaches this turn. I really need to properly look at UB as I forgot greedy existed and again couldn’t see a character cause of green on green and a unit is gone, but it’s not hard to check the board so I’m just a dumb idiot.
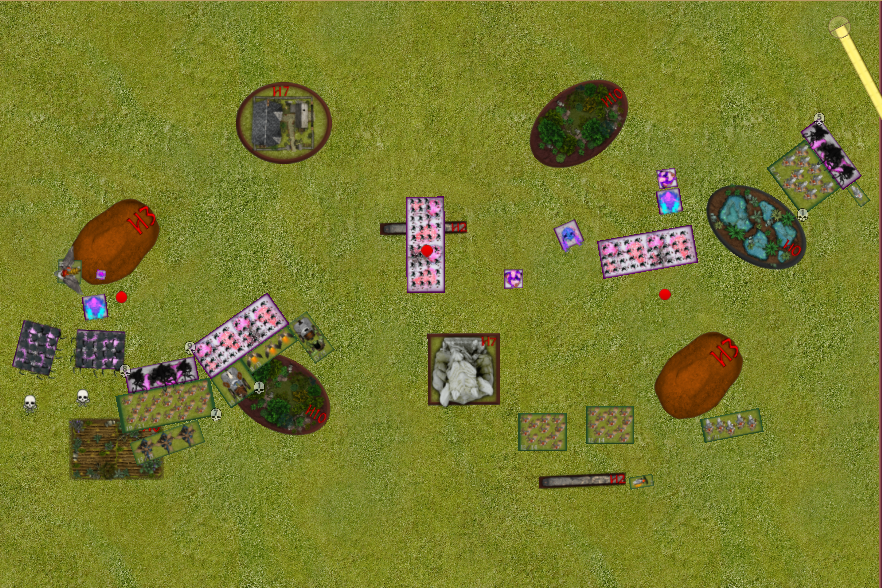
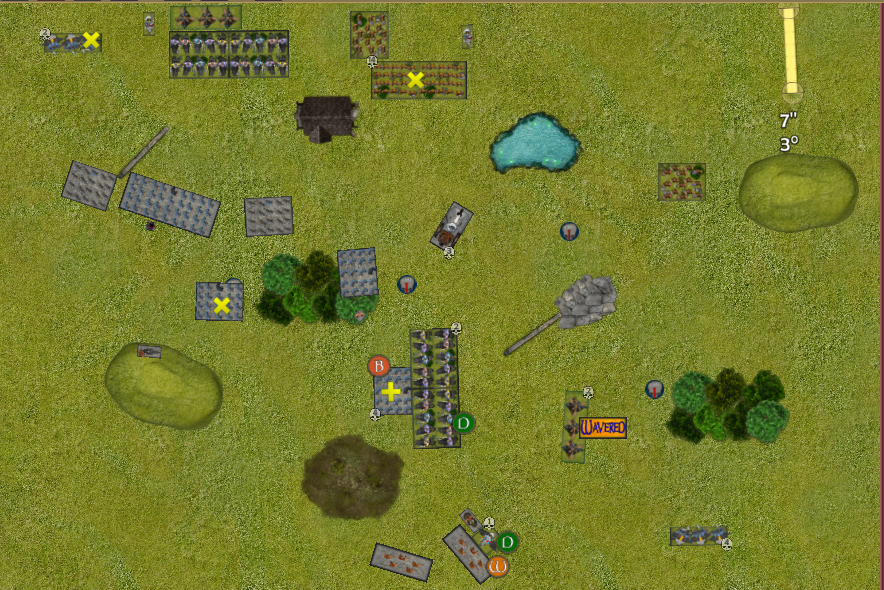
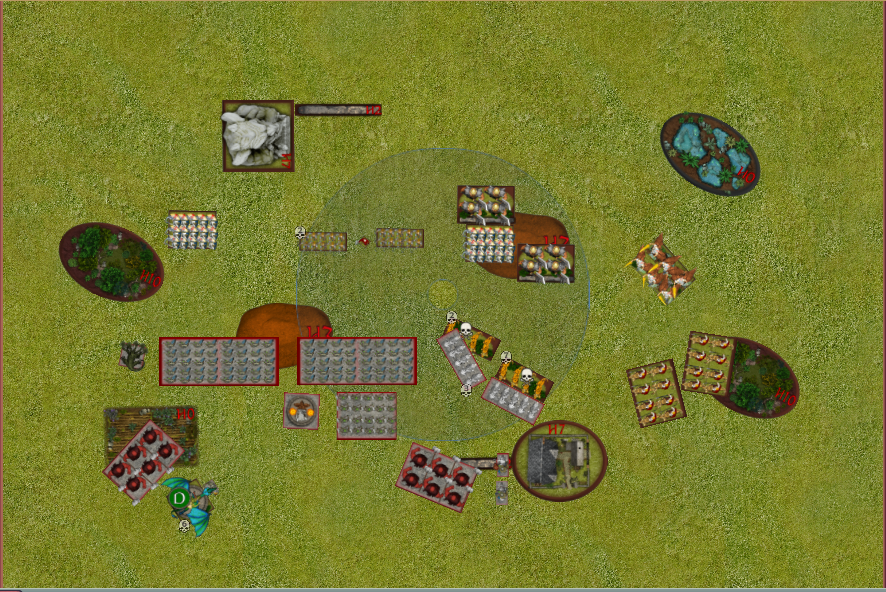
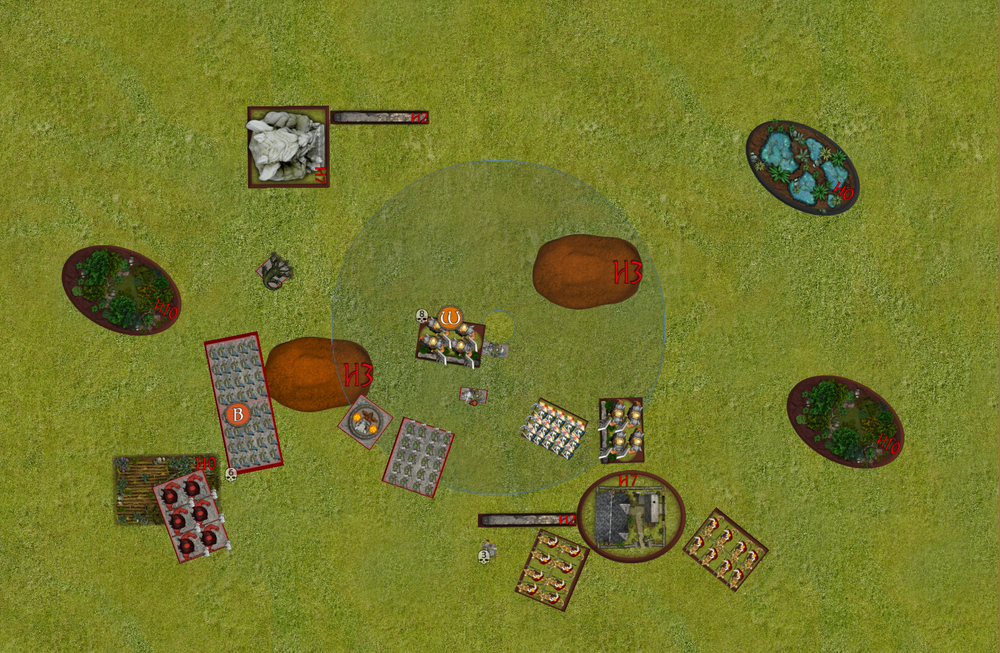
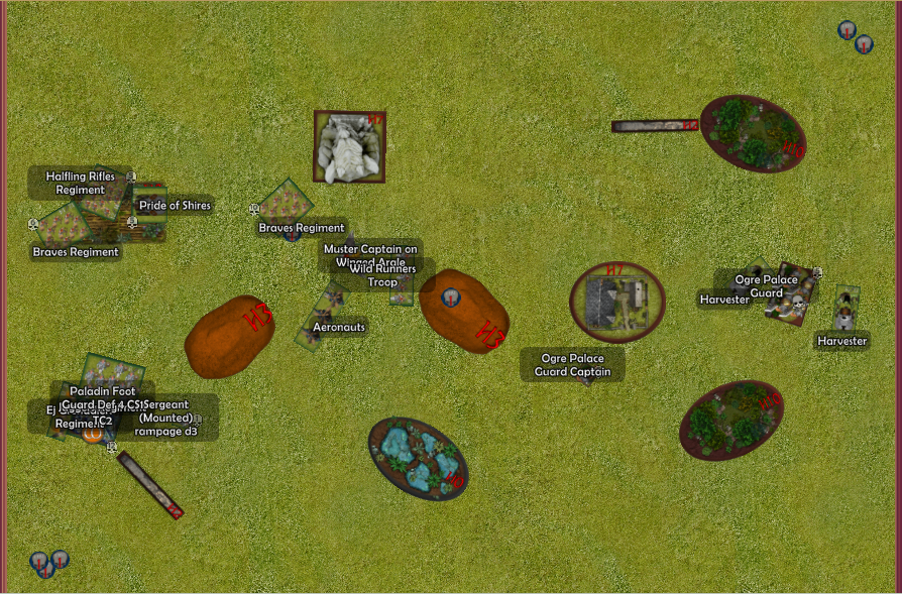
Any how, the mastiffs charged him, the king charged off to block up the juggers which will be critical for him to do a wound and the horde took a hindered charge into the pride, not going to do much damage but I will be able to steal that token and hold him up for another turn, making it less and less likely that he gets the bottom two tokens.
The left brocks go into the horde of braves, the middle charge the aeros and the other charge the sergeant.
In combat the sergeant is saved on the re roll after having 4 wounds put on him. Greedy has two wounds put on him, 2 wounds go on on the pride with no wavering. 3 on the jugger for the mighty king with a ballsy nerve roll wavers them. So perfect as sveri has moved up to sniff their butts.

The brocks on the aeros hit only 8 times and do only 2 wounds so they will likely be dead next turn whilst the others do 20 on the horde and pop it.
I claim the two tokens and it’s 3-1 to me so far. Looking good Croger!
Turn 5
Dave:
Well here is a lesson I leant the hard way, never… ever… ever… ignore a nimble flyer. Matts stupid king with wings has pinned my juggers and signed their death warrant.
on the left I decided to block both brocs front he center, so i charged my feast master across.. turns out I didnt have LoS, so we just added both wounds on the right broc regiment and this was enough to take them off.
I sent every thing at the shield breaker horde and missed the rout by 1, this will be a costly waiver as it stops my units over running near objectives.
My howitzers hit again, this time the left mastiff pack and manages to take them off, greedy for once rolled super low and failed to break the other mastiff pack. My plan here was to have greedy break the mastiffs, and over run, while my right most braves shuffled down the board, only to pivot and advance into token territory next turn. This didn’t happen, so that right token is officially out of reach.
Some how my sergeant survived so I counter charged but he did a no more wounds.
So between that waiver on the horde, and greedy failing to break the mastiff i’m well and truly screwed, maybe turn 7 I draw… but I’m not winning
Matt:
Time to play the death march. Brocks charge the aeros and the fire oil brocks go through the wavered segreant to the EJ’s, Sveri rears the juggers and the king withdraws to block up the rifles. The mastiffs charge Greedy. Greedy and the rifles survive the rest die a horrible bloody death
Turn 6
Dave:
Tried to get petty and blow Sveri off the table with my howitzers but that didn’t happen, also routed the shield breaker horde and last mastiff hunting pack. but didn’t get tokens so I’m screwed.
Matt:
I mopped up and win 4-1.
Wrap-up
Dave:
I’m really surprised with how much off Matt’s army I killed, once again greedy did amazing work, I’m a little disappointed I let the juggers and harvester go so cheaply so I think I need to have a better look at how I use characters.
My biggest let down was again deployment, so someone please get on Dash/28 and write a good article on deployment for me.
My howitzers rolled so hot I think I need to give them another go, but at 2000 I will struggle to keep them. Not sure on this list but I like it enough to keep the core together. I might look at one brave regiment going to give me some options
Well played Matt, you deserved the win here.
Matt: I probably like having the bit of extra speed in the list. It is likely I will look at a BC option as not all lists will be as squishy as Dave’s . Probably a mastiff pack will go to get it in.