Author: KoWAU

Game 14 – 2300 Free Dwarfs vs Basilea, Invade

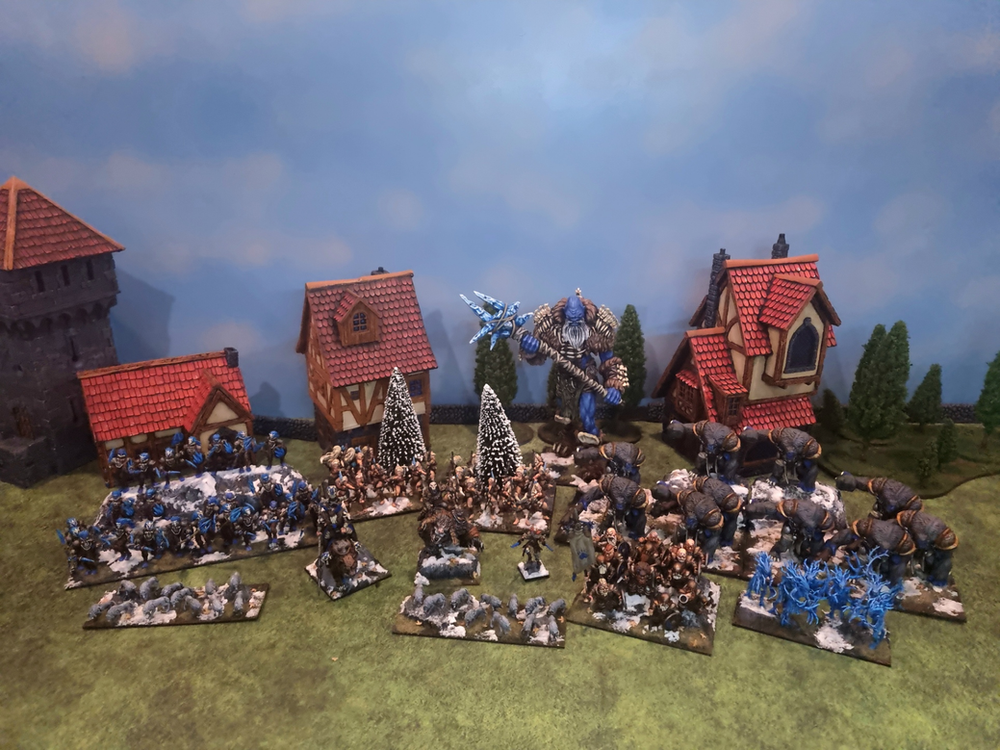
Free Dwarf List thoughts (Matt):

I built this list around models I had. I have lots of different type of infantry which typically in a WYSIWYG is a mix of iron clad, iron guard and shieldbreakers. I don’t have enough regiments of shieldbreakers for the formation so I wanted all the infantry to be the same. Therefore I thought I’d try them out en masse.

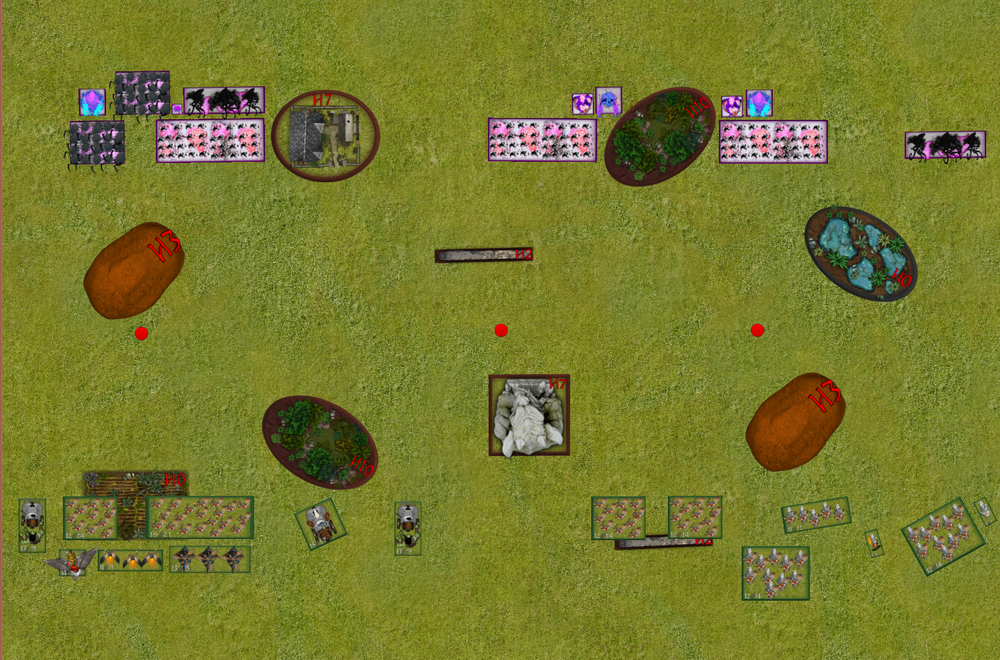
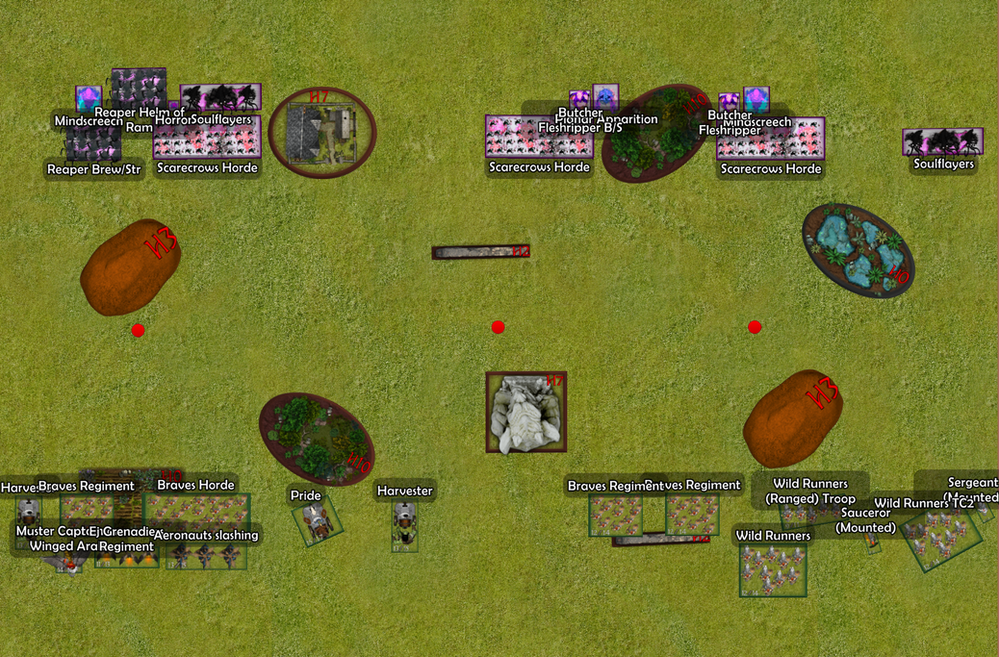
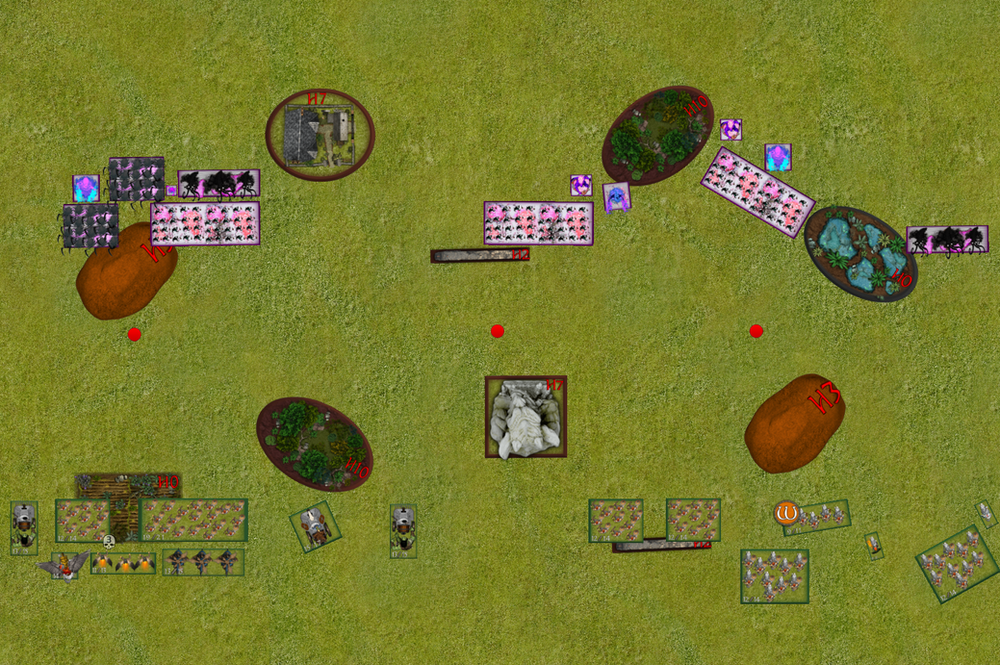
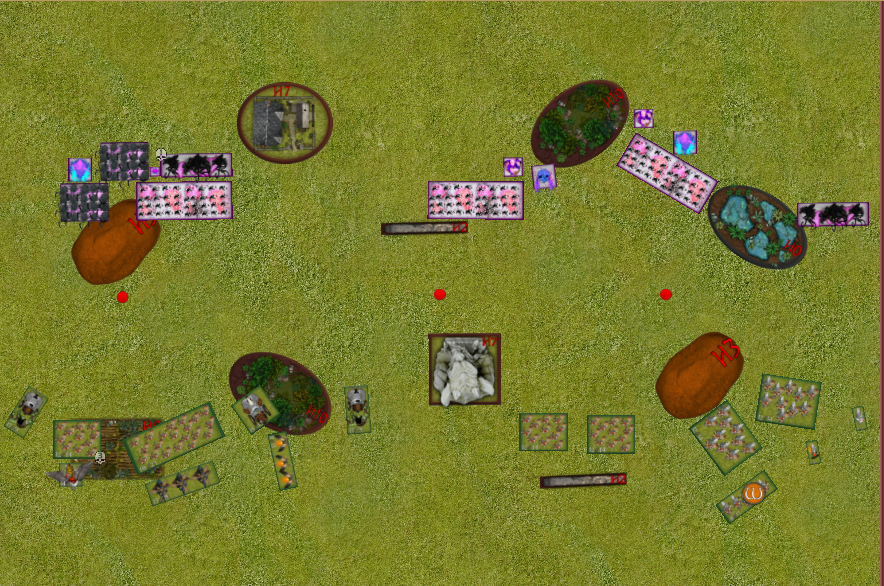
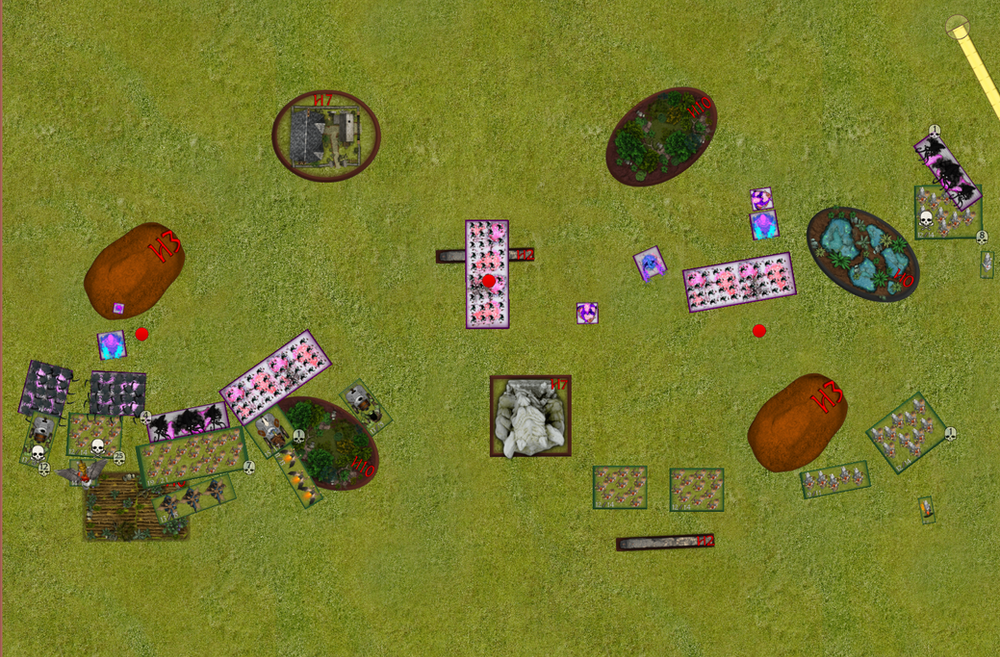
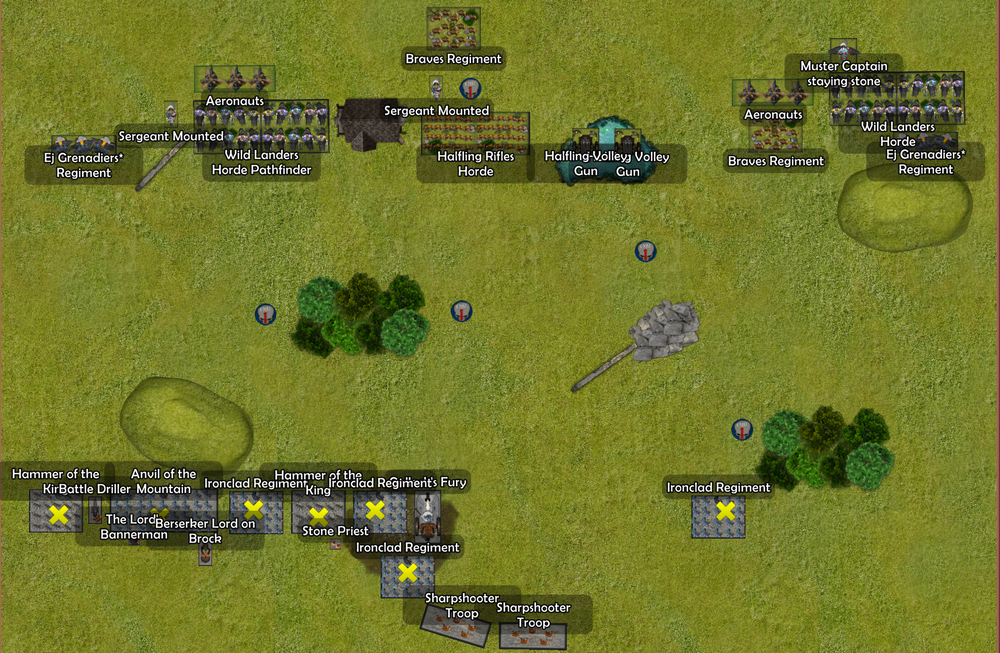
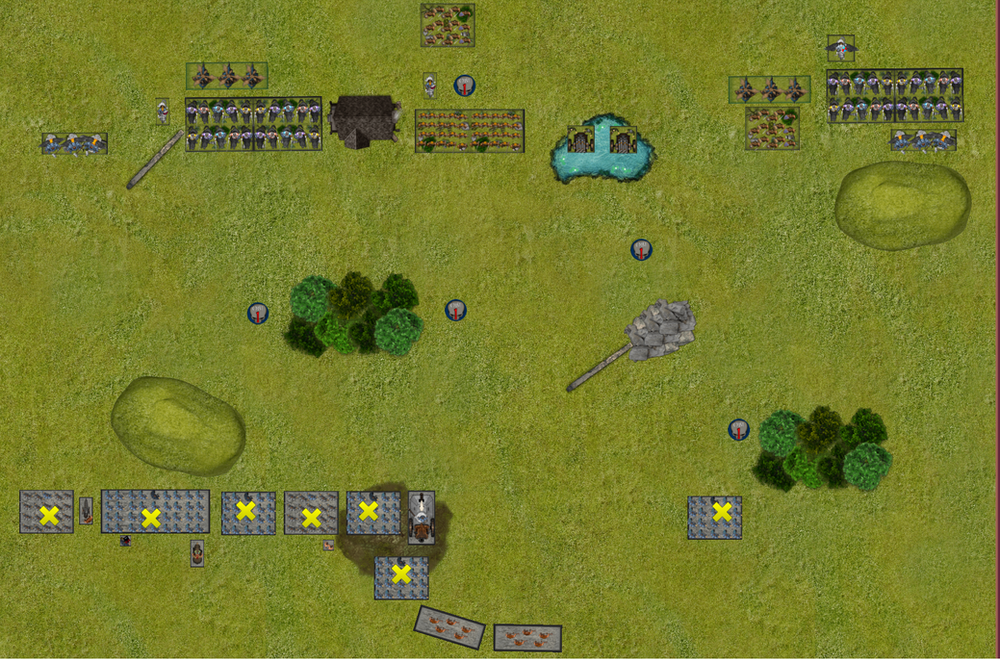
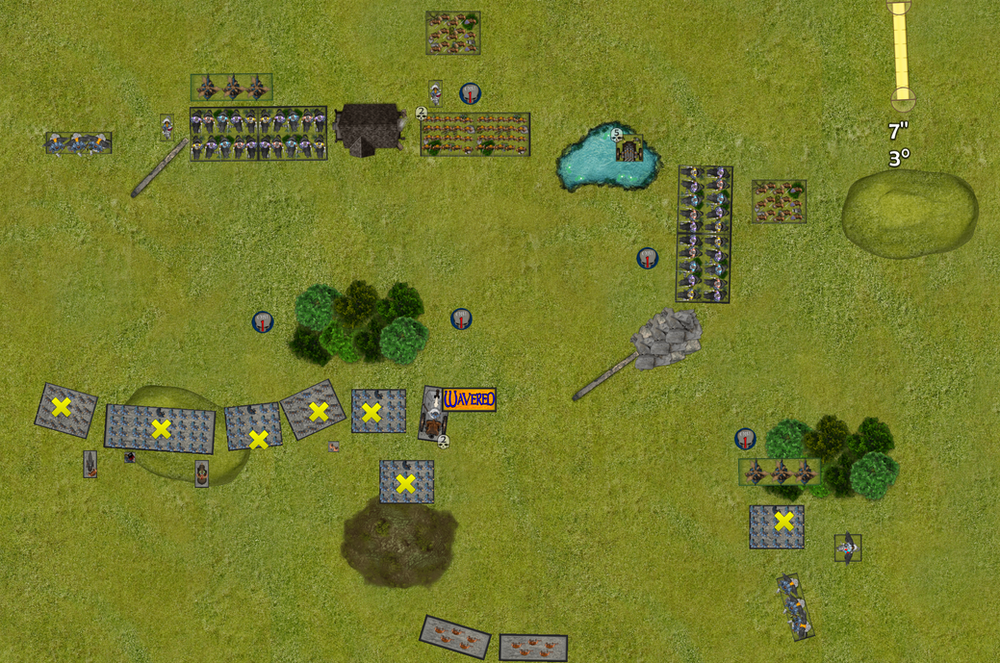
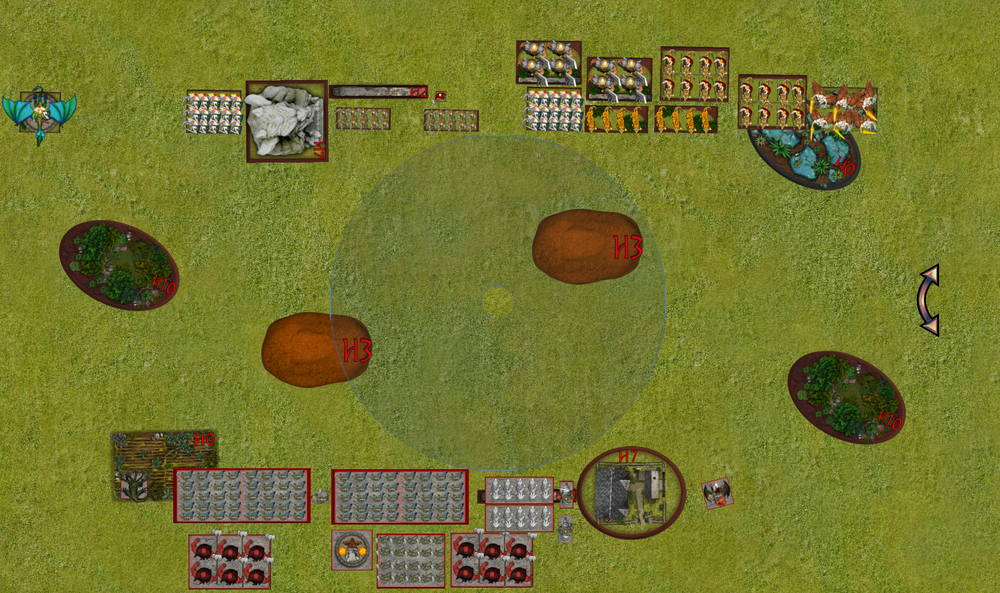
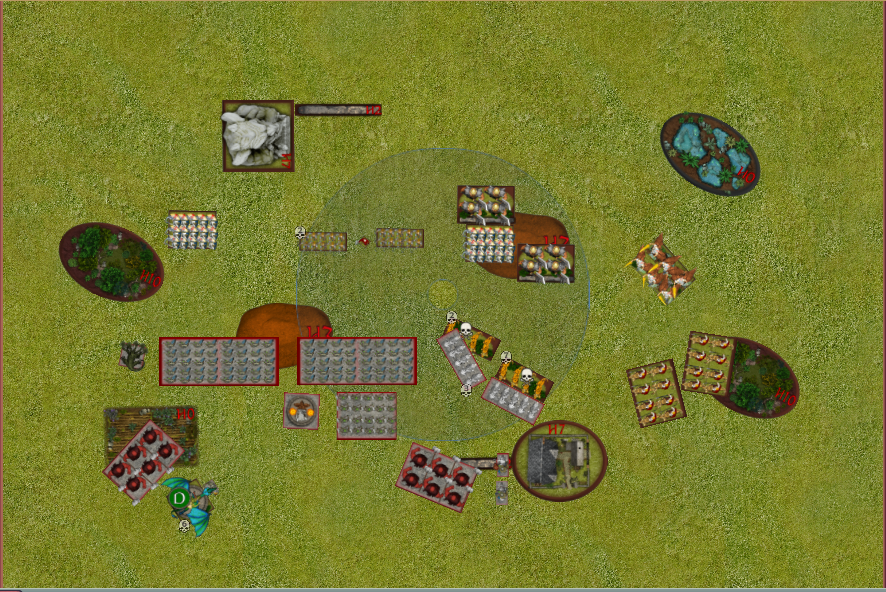
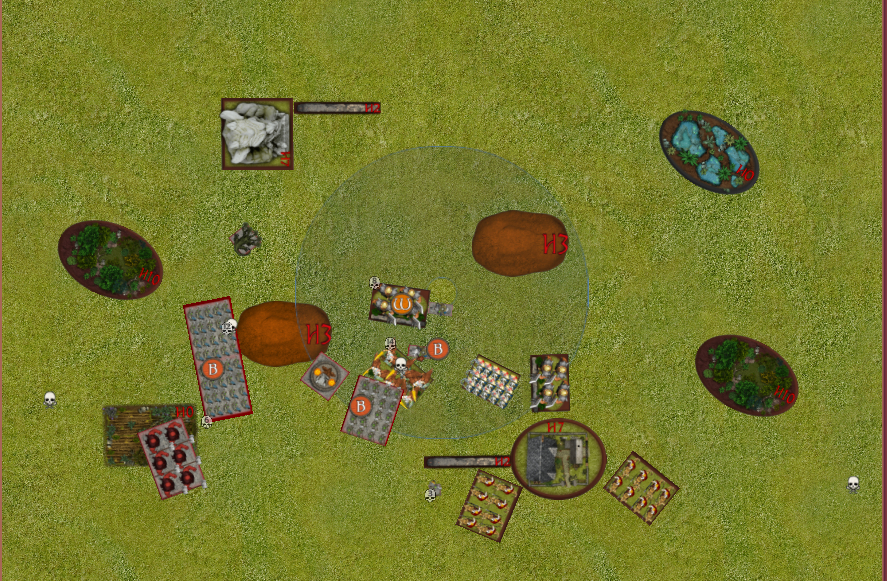
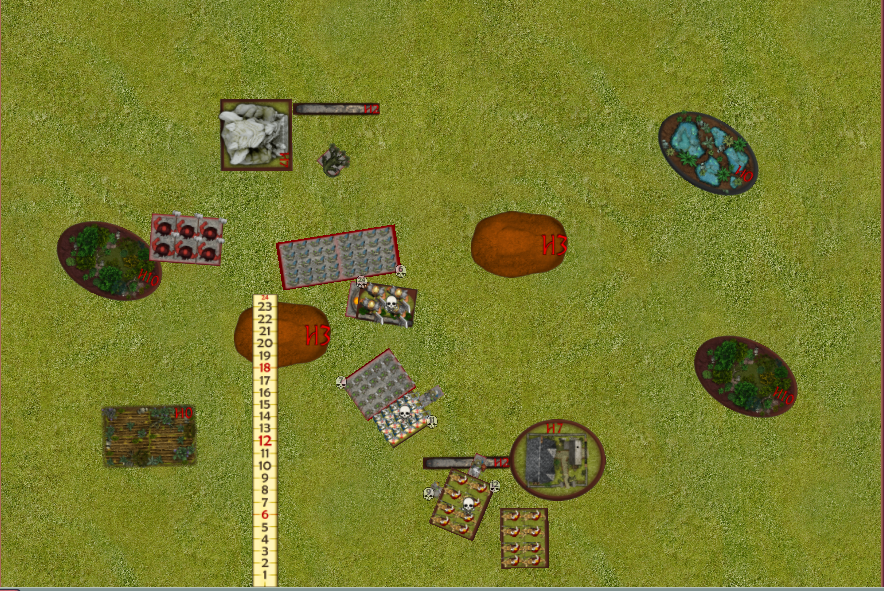
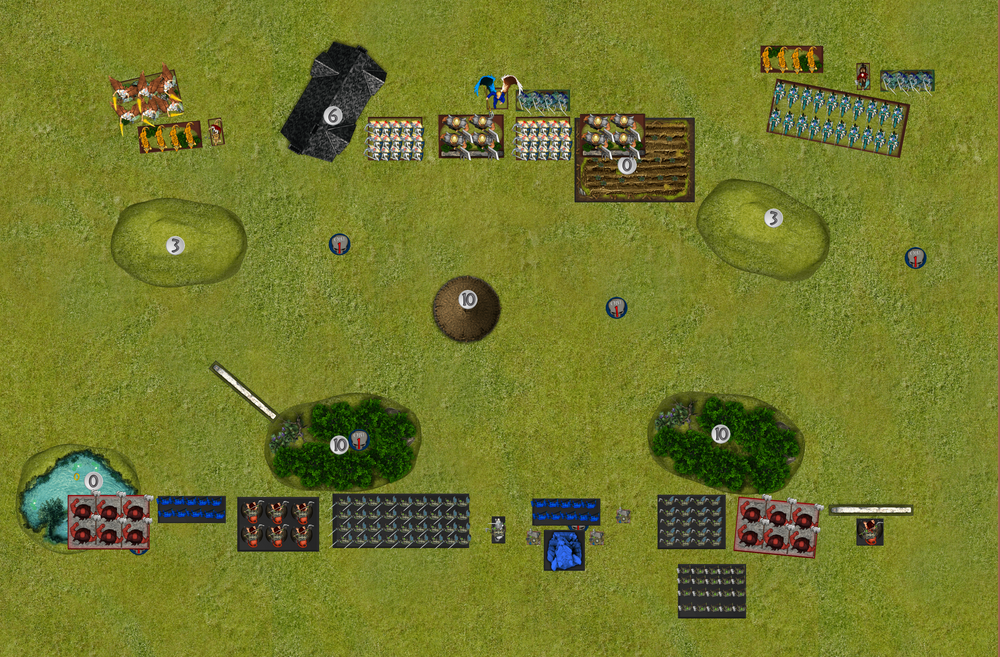
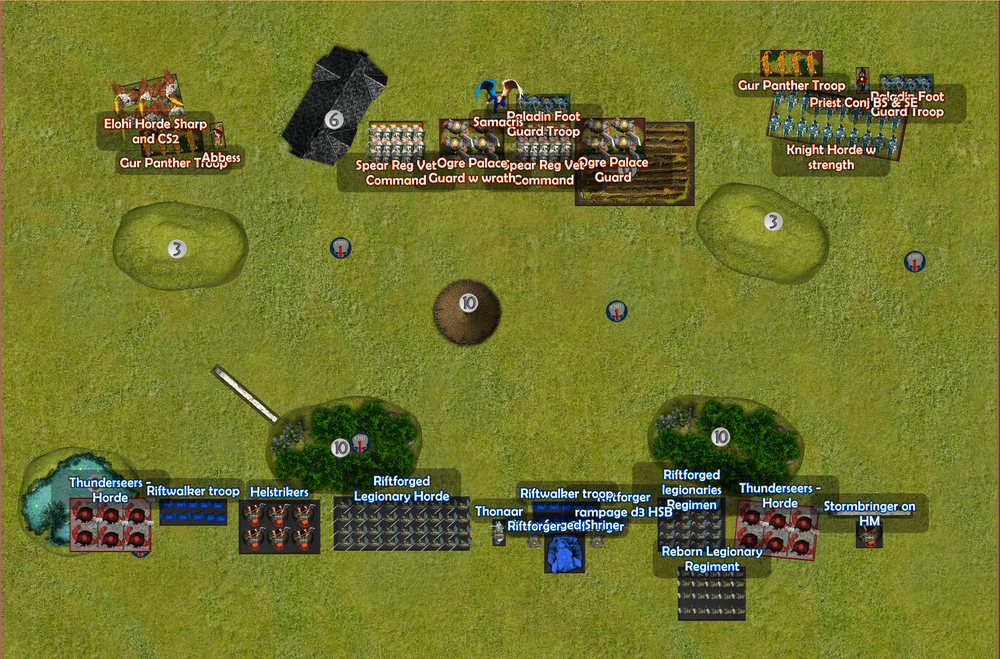
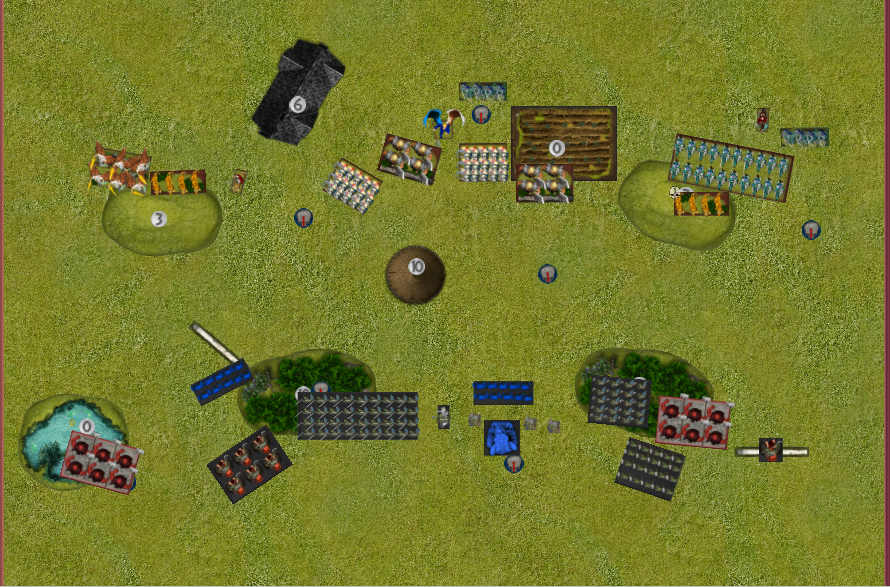
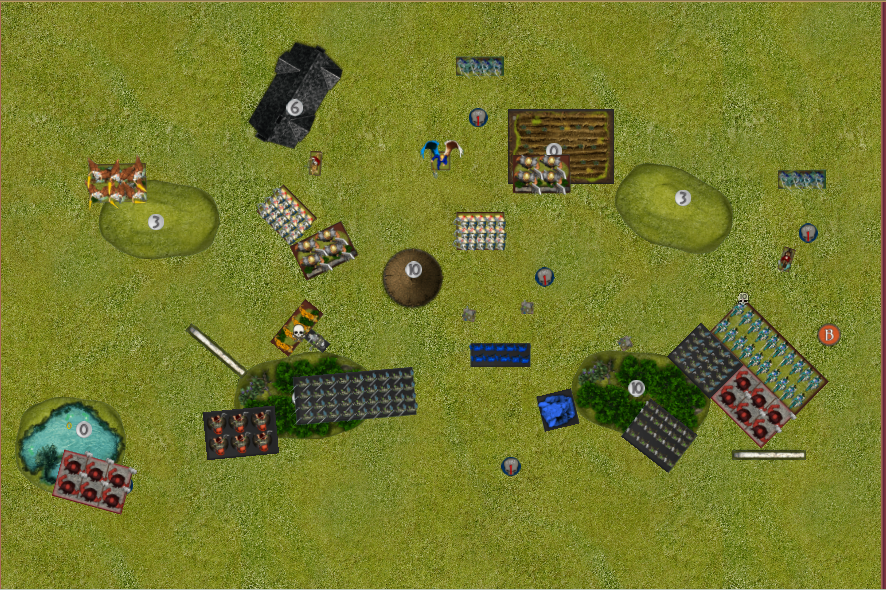
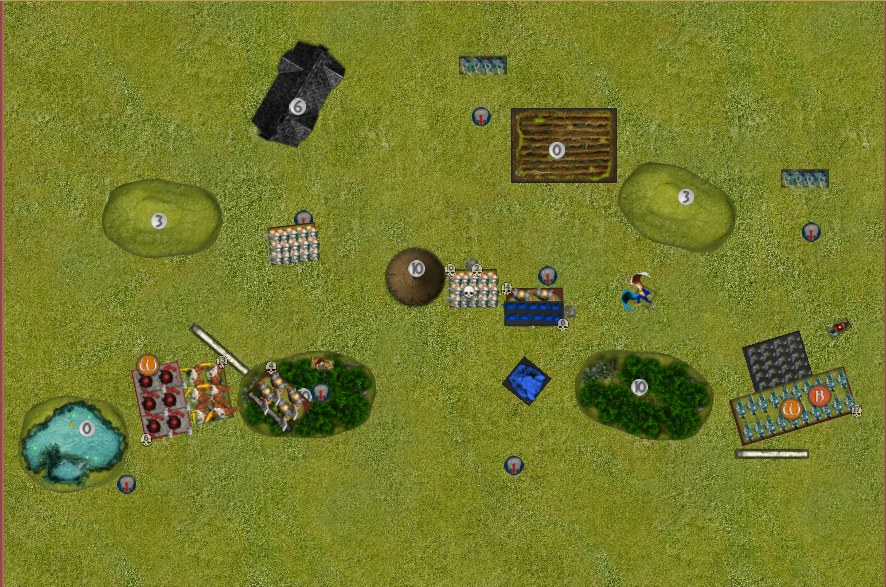
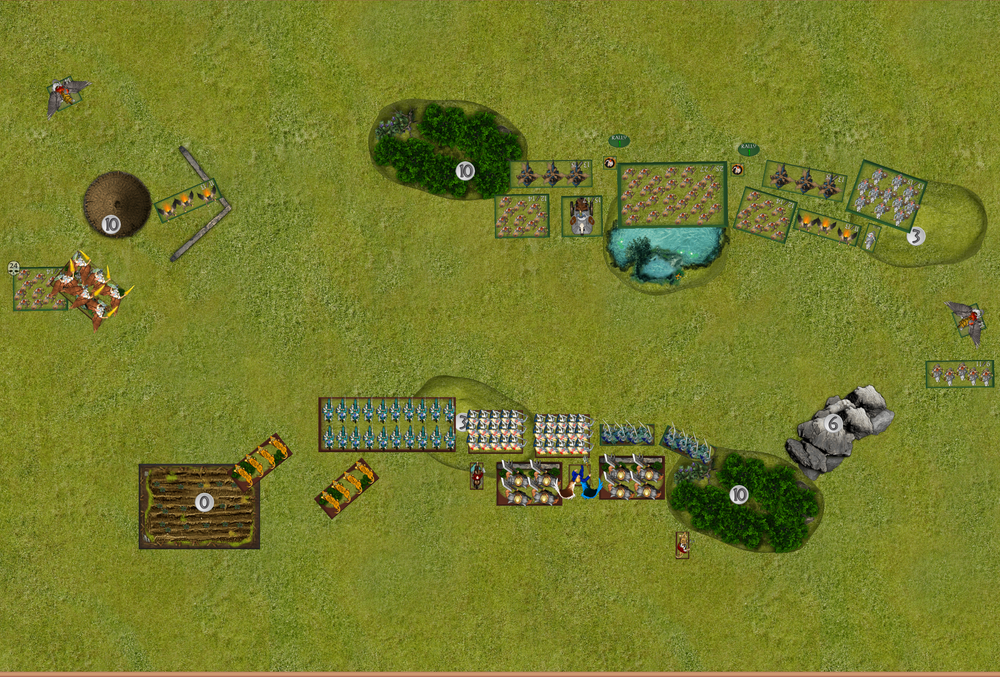
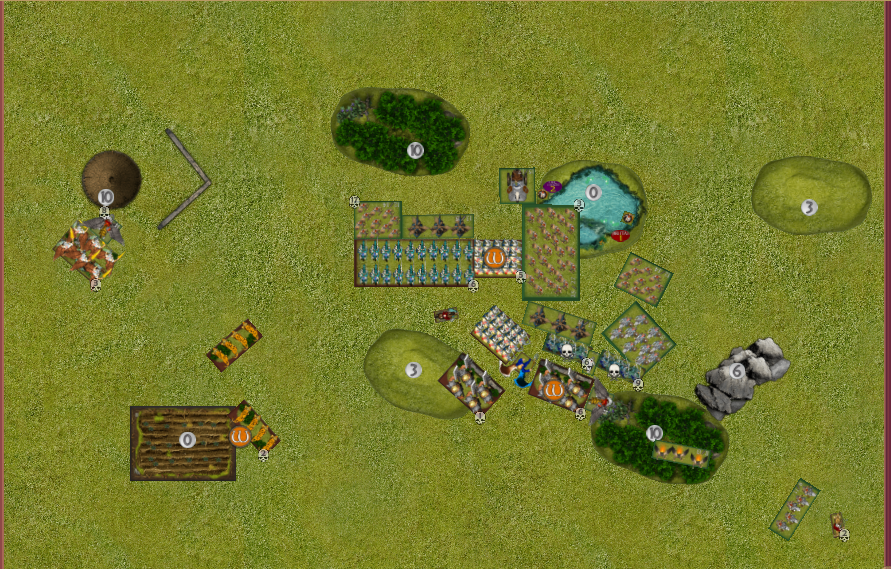
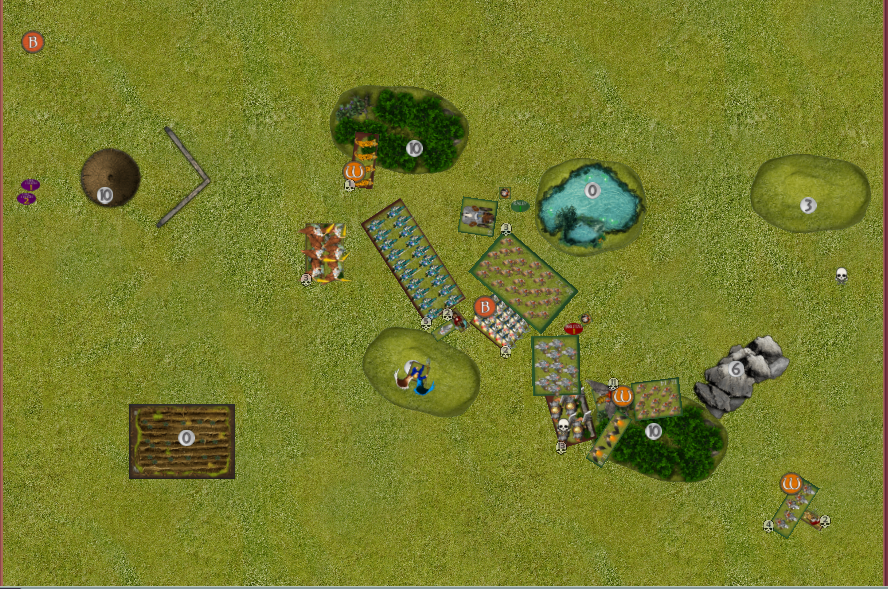
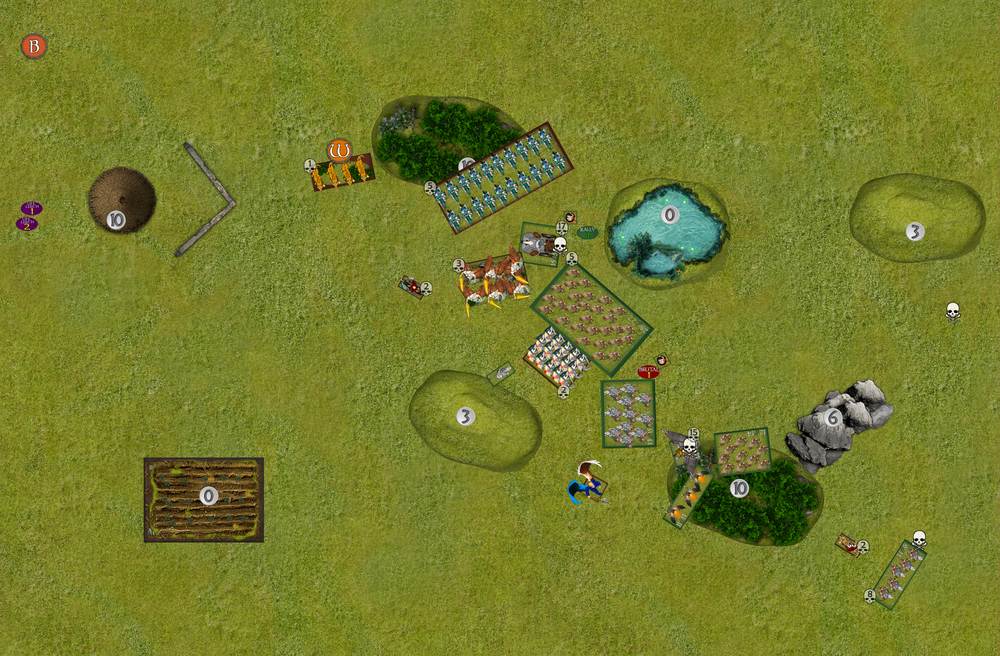
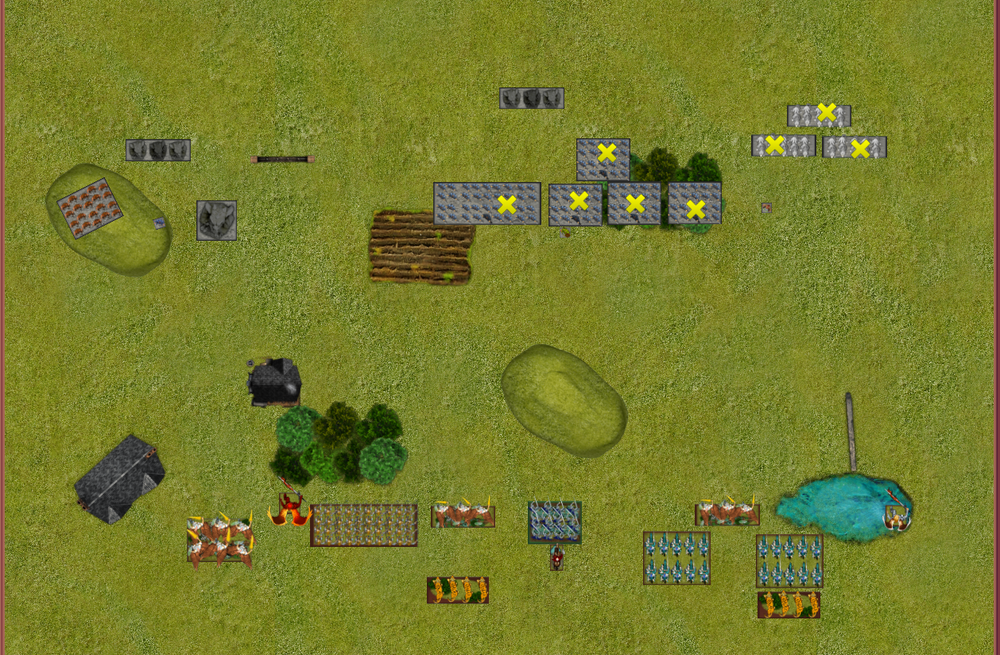
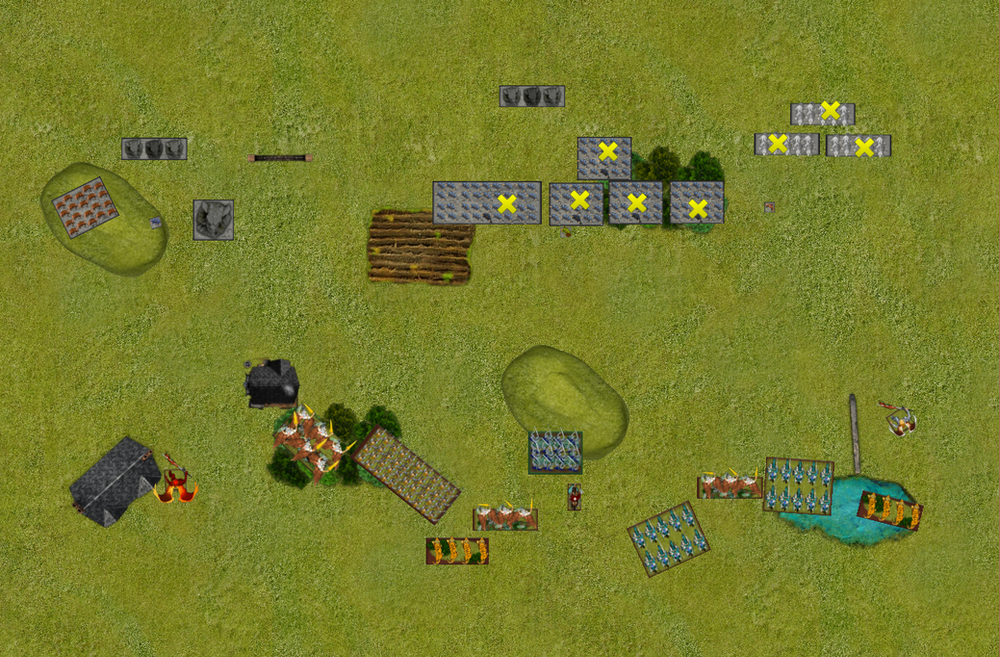
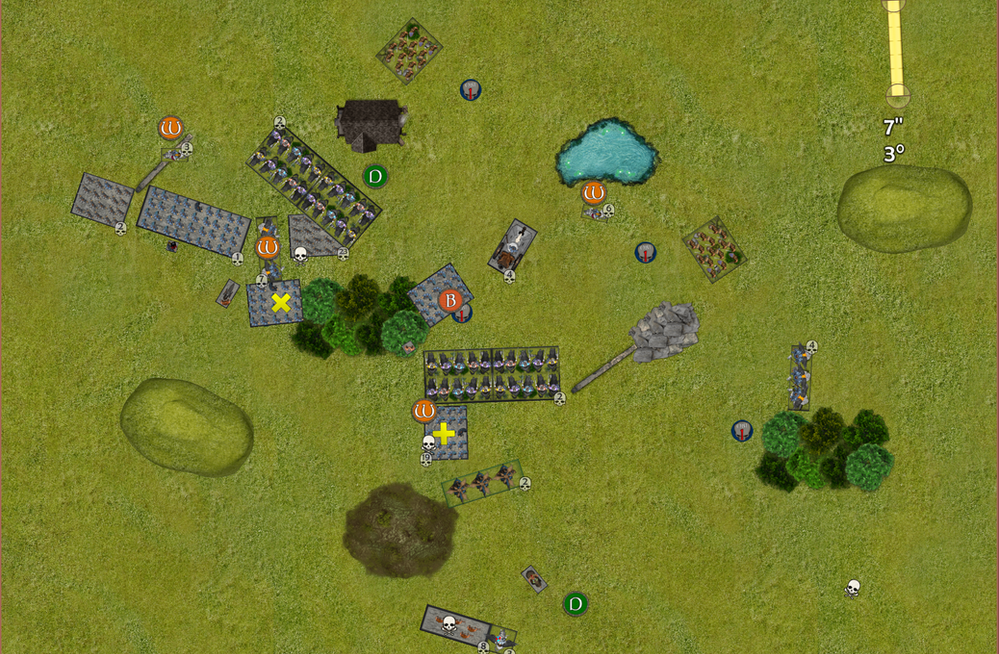
Deployment (post scout)
Nick:

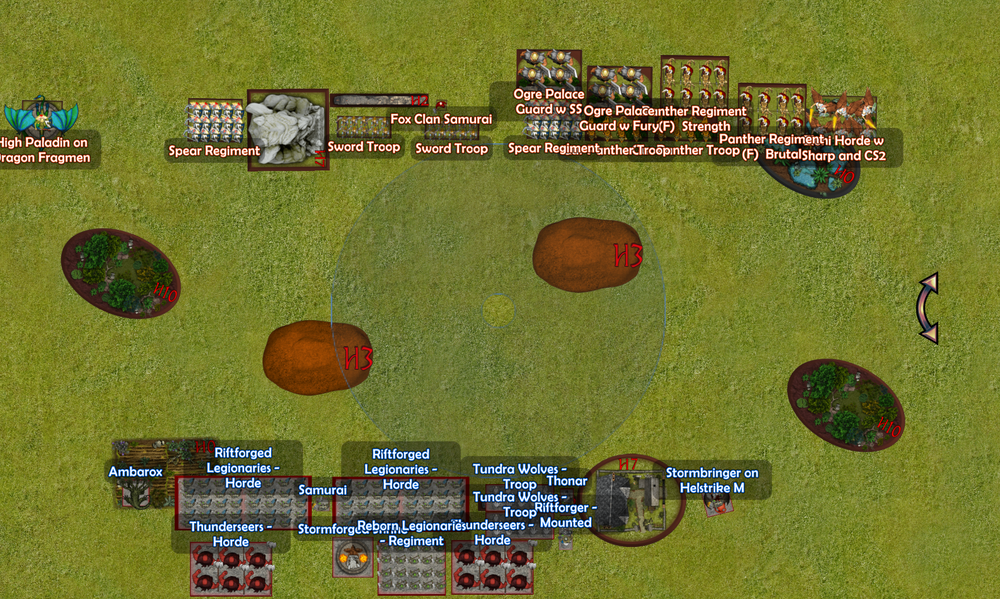
I need to be careful here not to get zapped too hard by all the dawgs. The idea was to deploy a bit back from the 12″ line so I don’t get jumped by all the scouting. I focused on deploying in the middle 2/3 of the board so I was somewhat compact but also able to project threat to the flanks if he tried to sneak some high US into the corners given the scenario was invade. The elohi horde was deployed out on the flank, hoping that it’d attract a bit of attention in counter deployment from which I could shimmy onto the other side of the building through the forest.

Matt:

Invade is my least favourite scenario even with the free dwarfs. I like to play a particularly defensive style with the dwarfs and having to bring everything forward bothers me. Especially against a fast high def list like Nicks.

First run with this list I’m not entirely sure what I am doing. I ended up with a really bizarre deployment as I was focussed on being able to get all my dogs off at some point and stressed about all the high speed coming at me.

Turn 1

Nick:
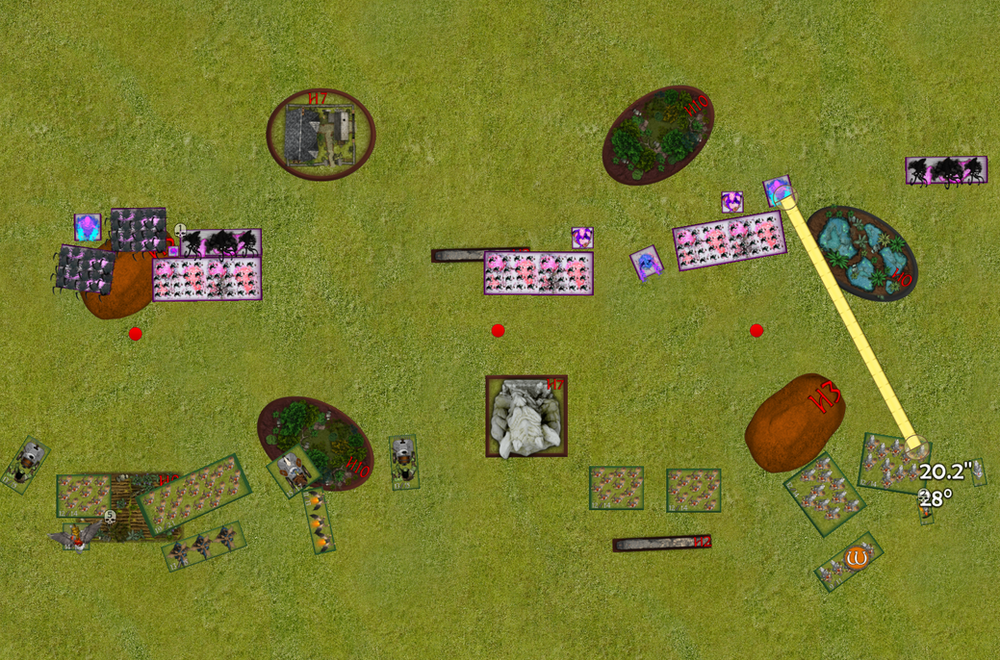
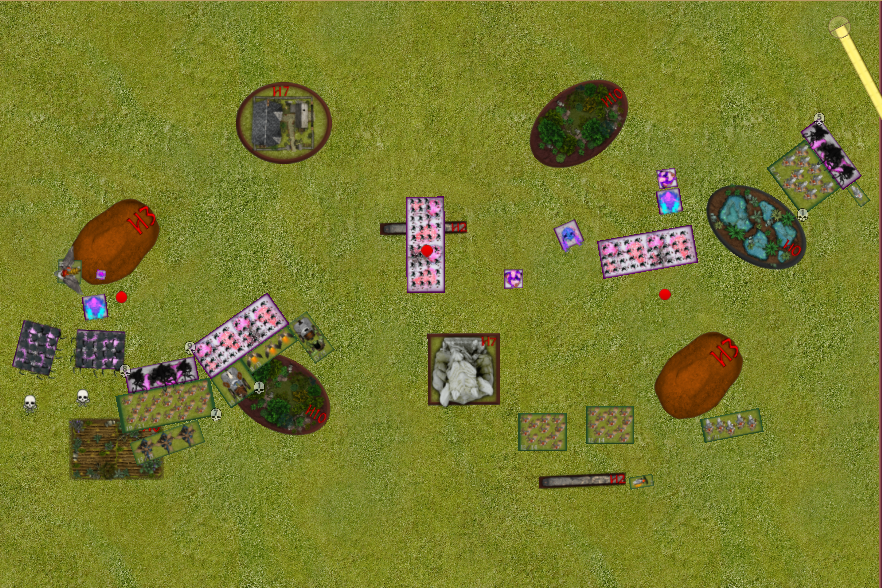
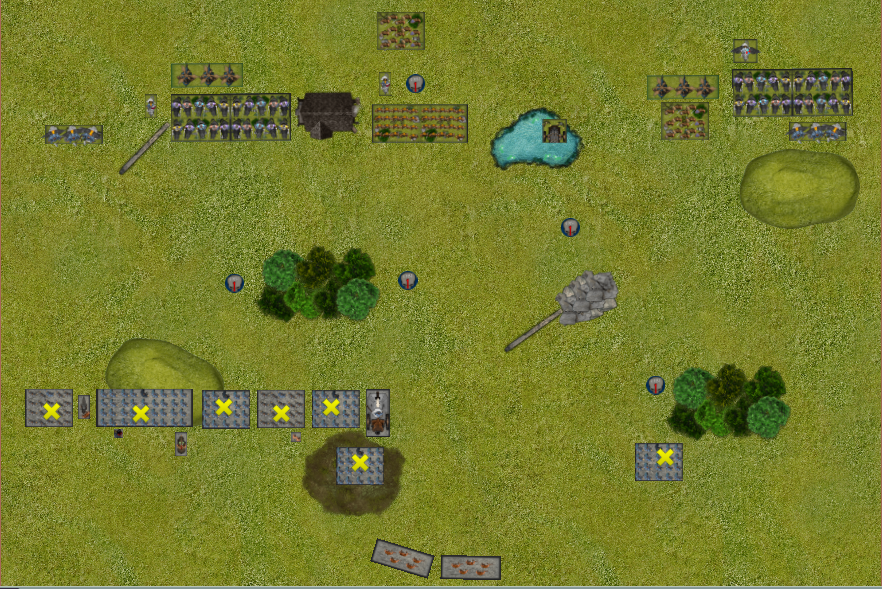
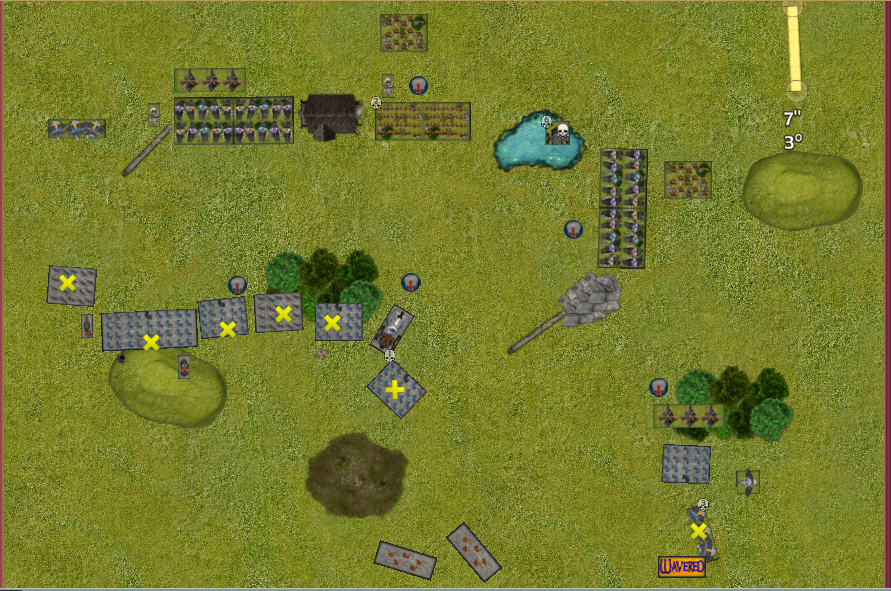
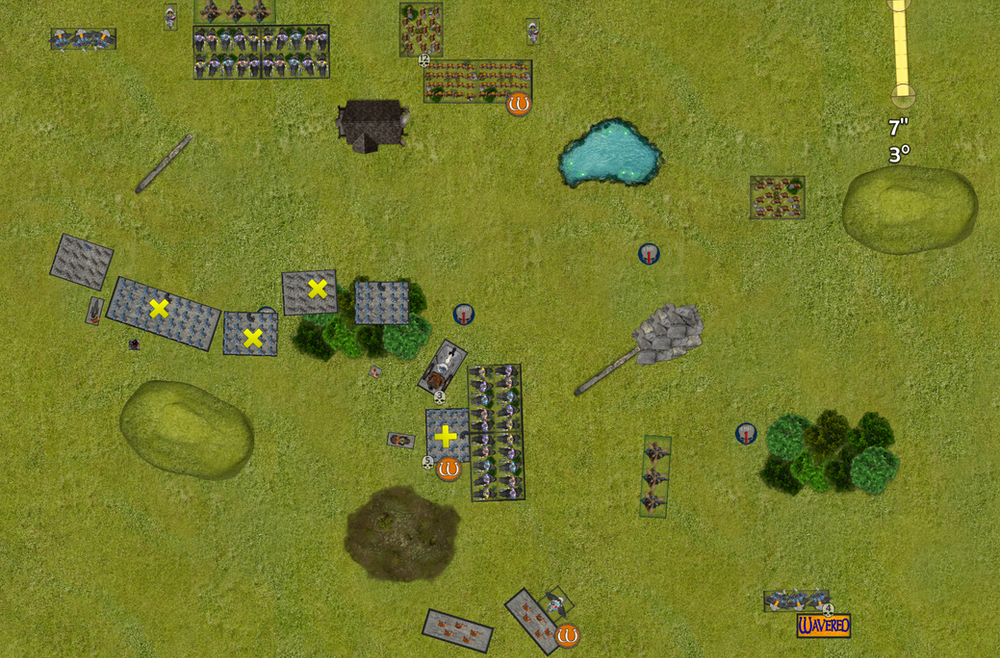
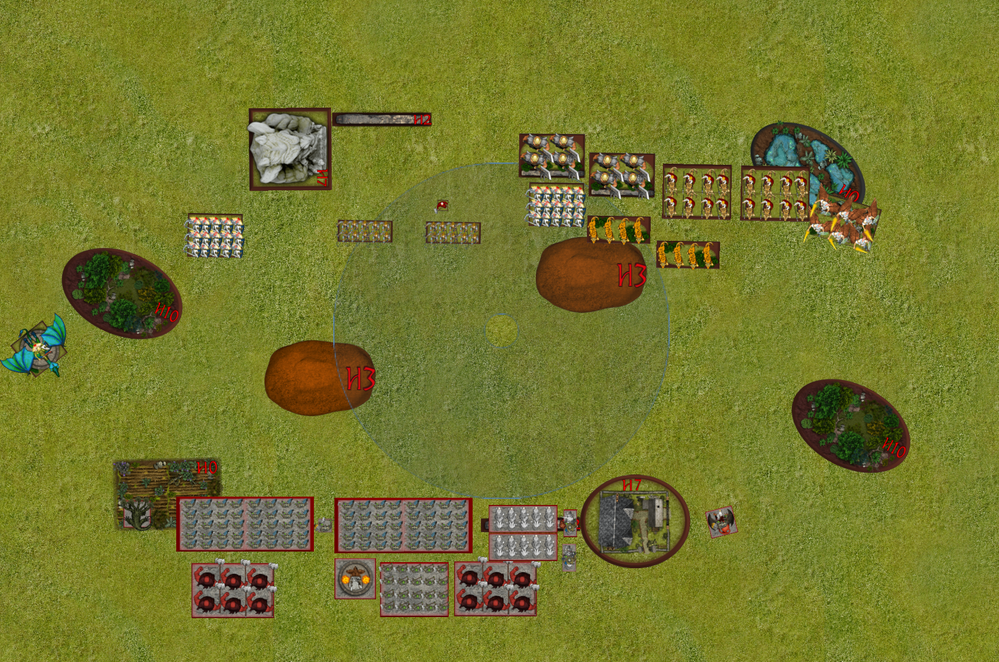
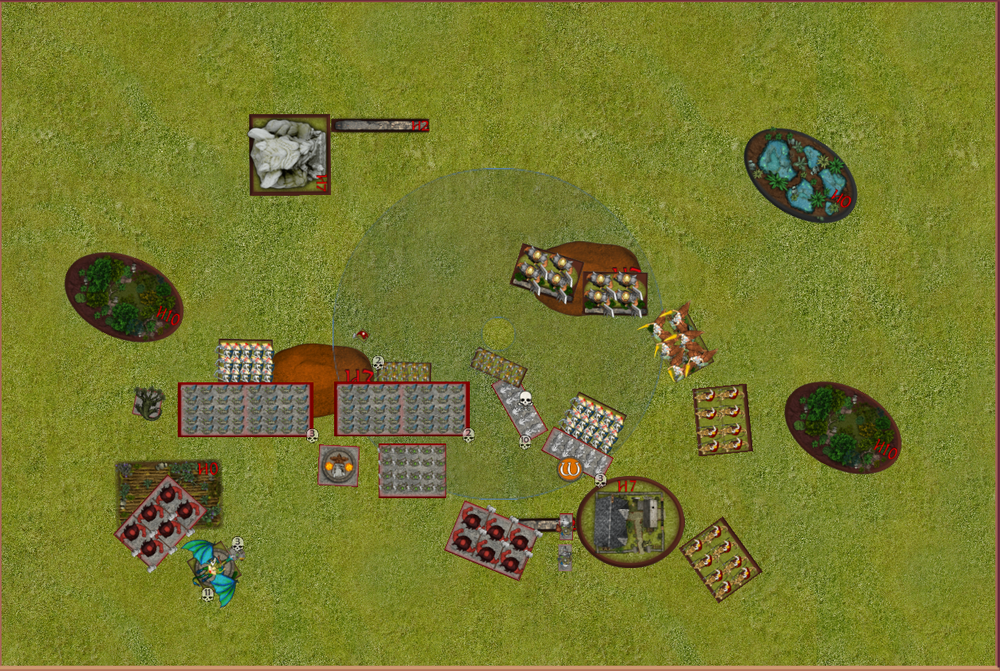
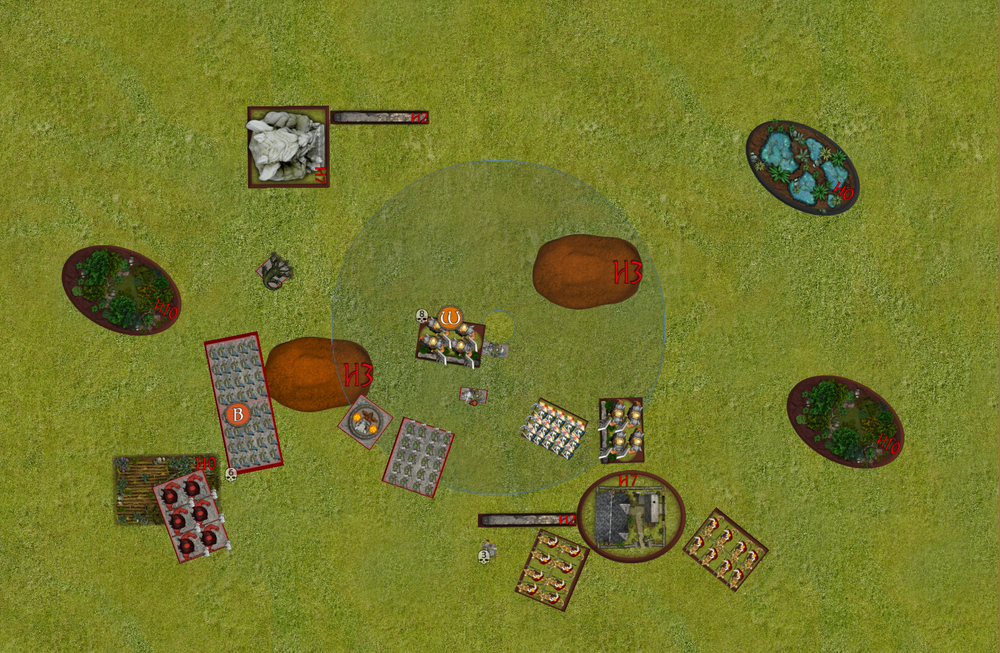
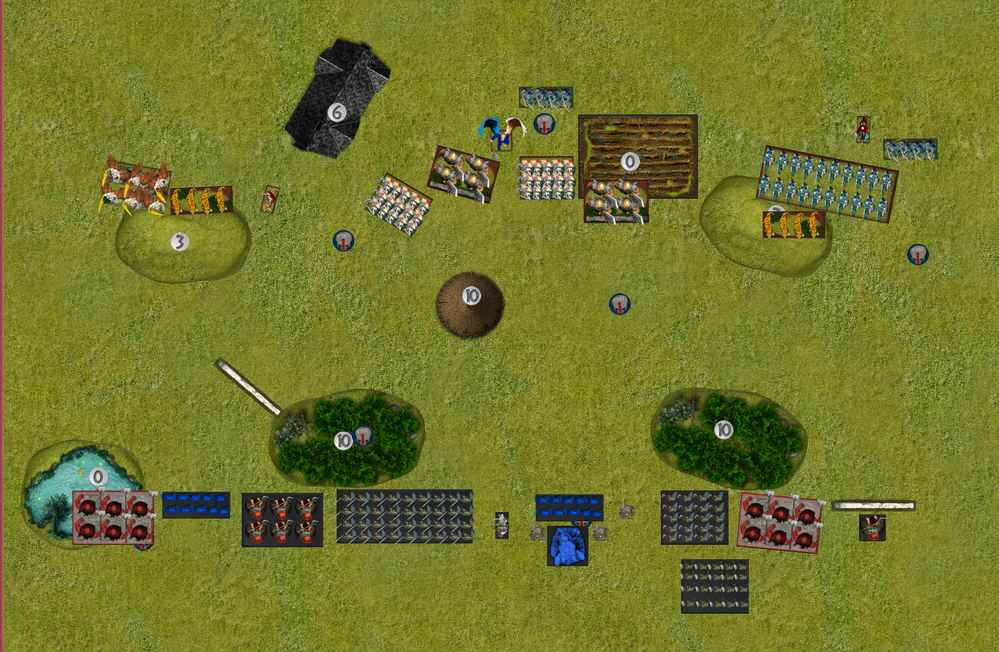
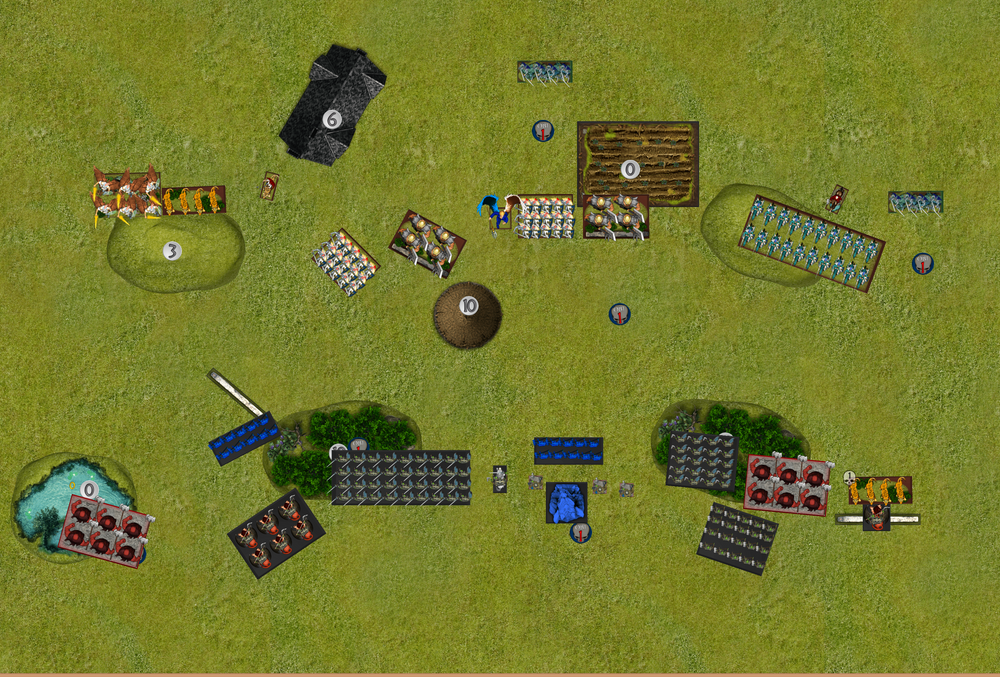
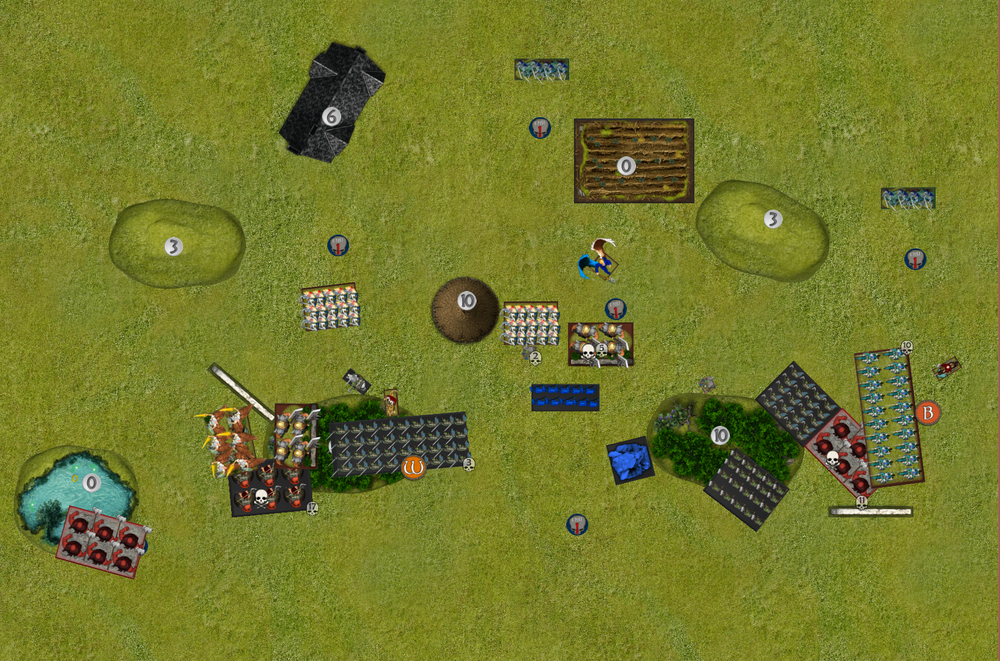
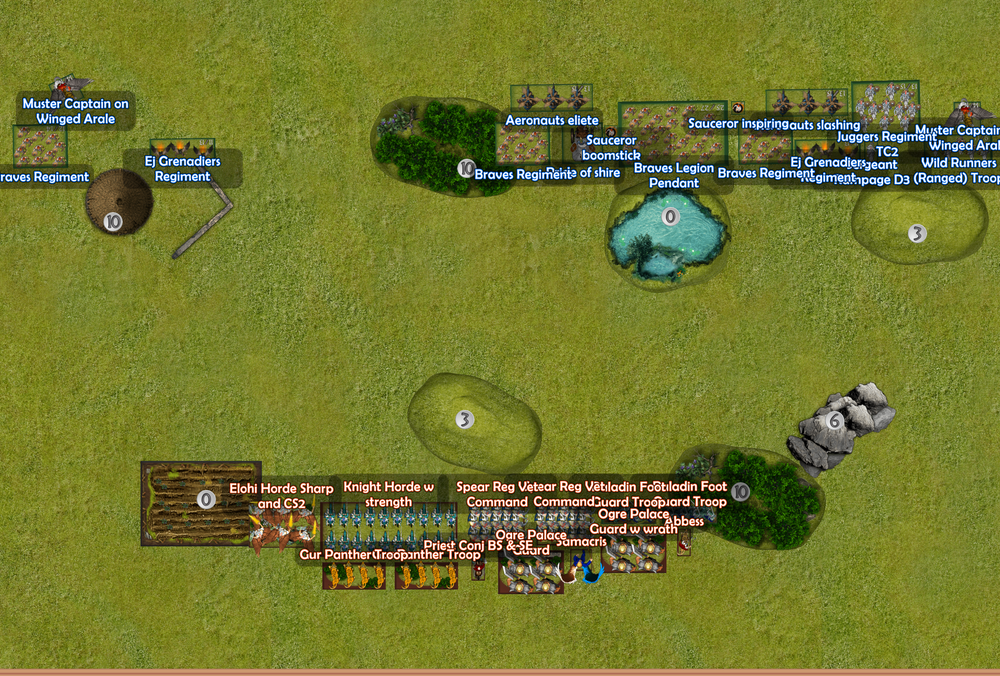
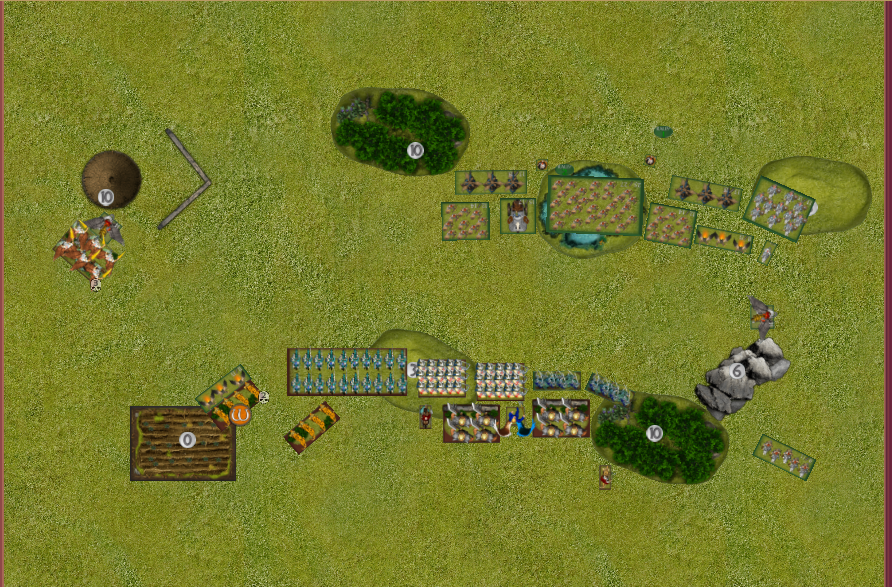
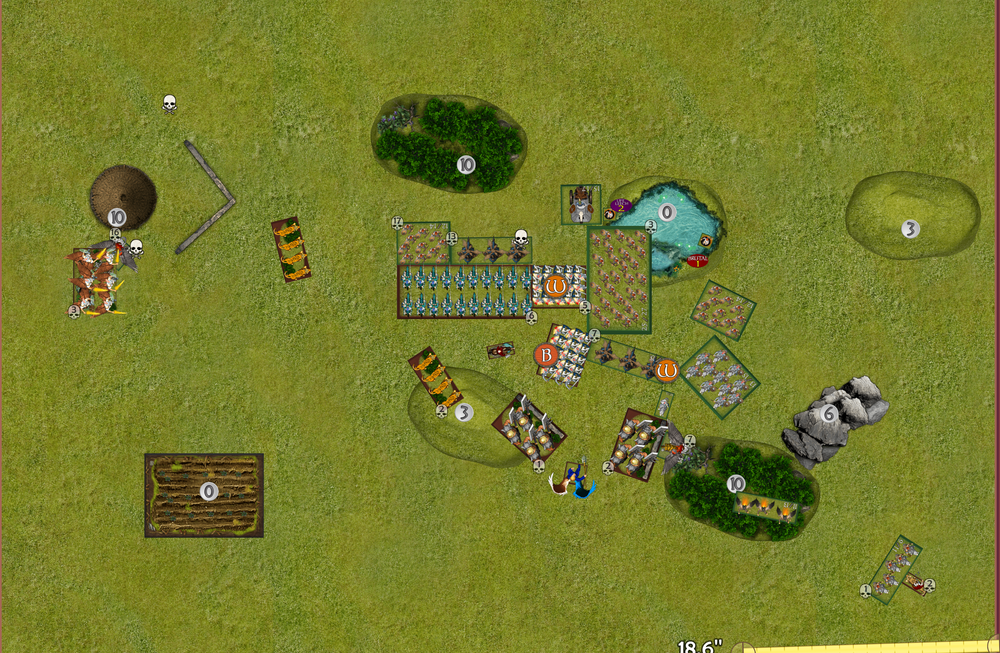
I advanced cautiously here. The left could be a problem here with craggoth scouting up and a few units there. Julius hung back to make craggoth think twice about turning a flank and moving towards the centre with the elohi having redeployed. The plan on the right was to try and get the Ur-elohi and gurmanthers into his mastiffs to shut down that source of mastiff shooting. Elohi and Paladin Foot guard in the centre were the ones I’d hope would eat the dawgs on the way in. The flying lord is a problem but the way I’d set up is he couldn’t land behind my lines and even if he came up full 20″ he was facing a charge.

Matt:
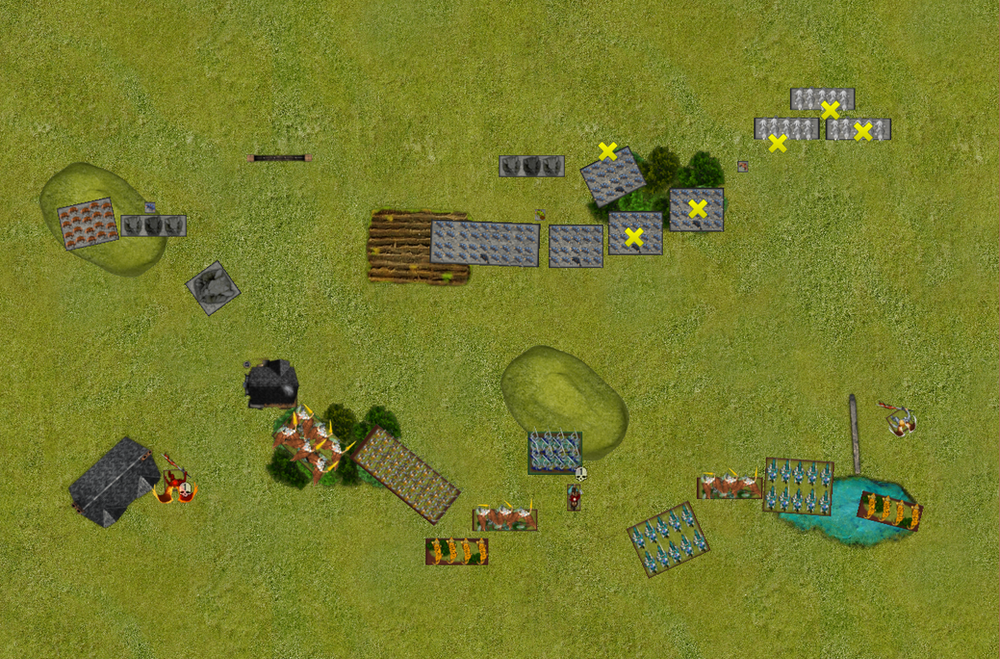
Nick is a master of movement and I am pretty confident his fliers are going to out maneuvre me. On the left I make sure I protect Bannick but position to get a dual shot with Craggoth and the rangers

In the middle I push most things forward trying to not give a flank to the horde of Elohi on the right I leave open some charge options for the ur elohi and elohi regiment but I push the mastiffs back to save their dogs

In shooting the rangers and craggoth do 2 wounds to Julius which isn’t enough to cause a problem and her IR’s back 1. The two most central dogs do 2 wounds also and the paladin regiment IR’s back 1

Turn 2

Nick:
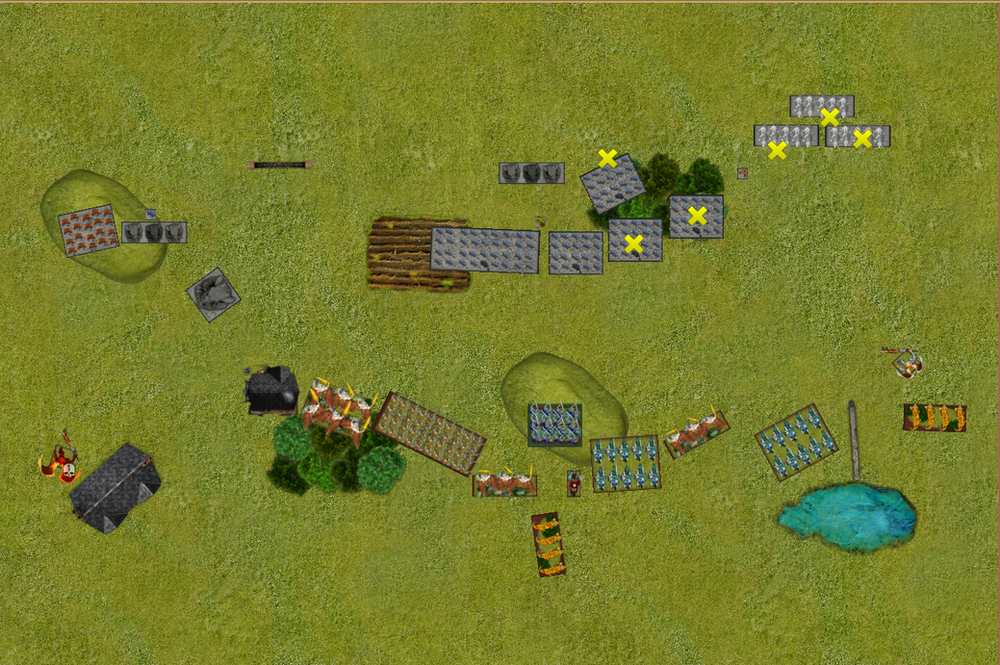
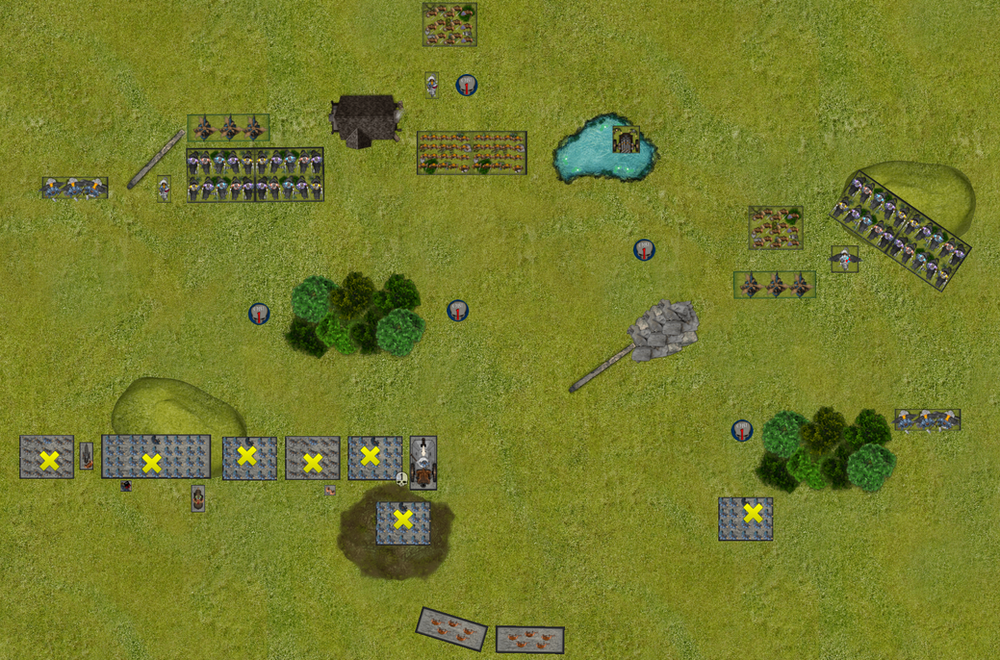
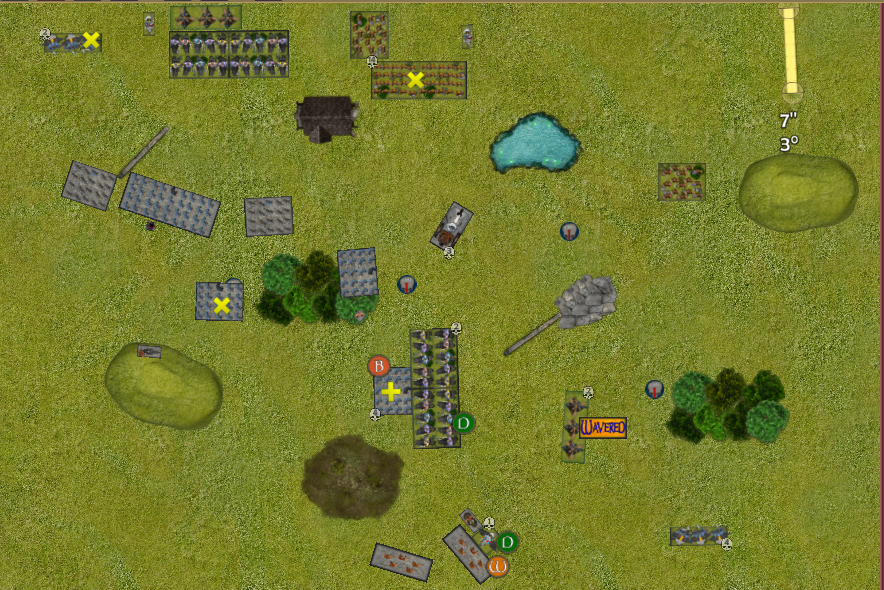
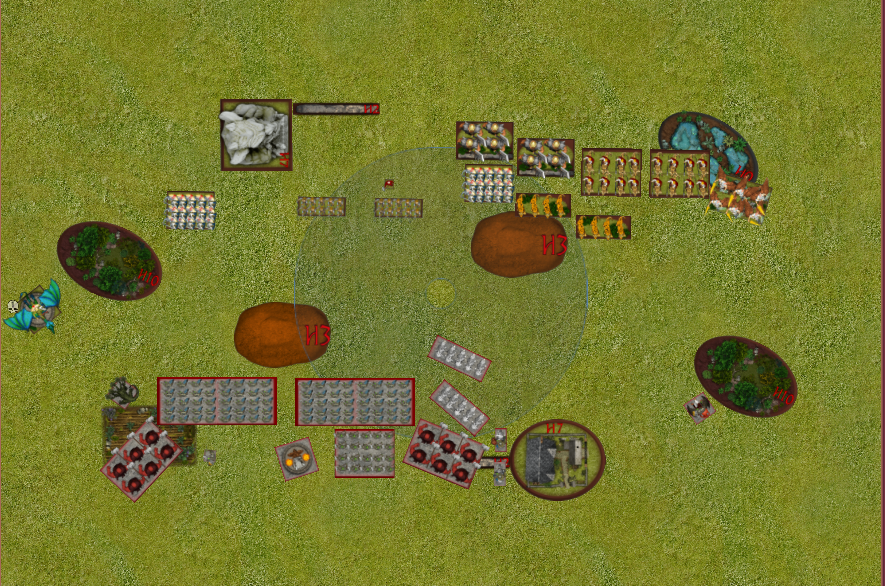
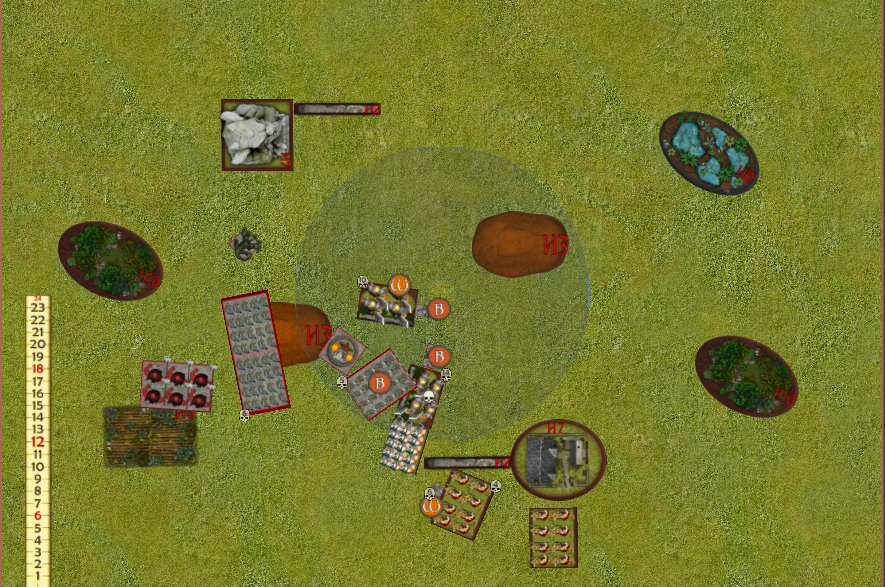
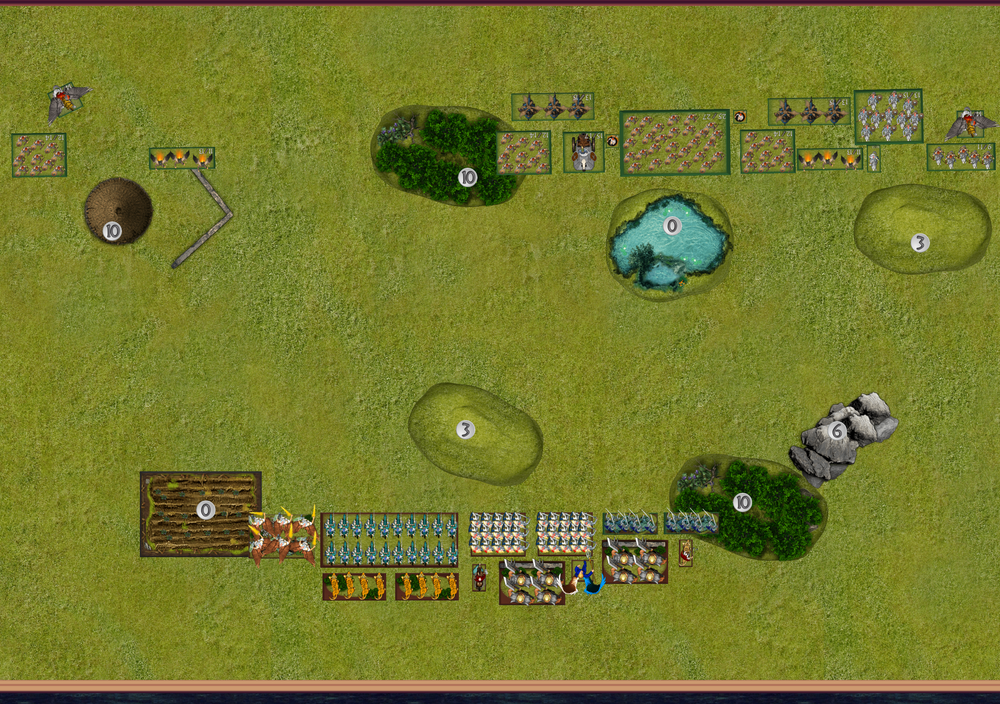
Yet another cautious advance, the key here is to not let too many dawgs focus on one unit to take it off. I’m hoping next turn will see a bunch of charges and start to encircle him. Matt will get a bunch of unit strength across the table on the left but as long as I kill the stuff in the centre and right it should be good. Idea is to fly julius over next turn and to start the killing process

Matt:
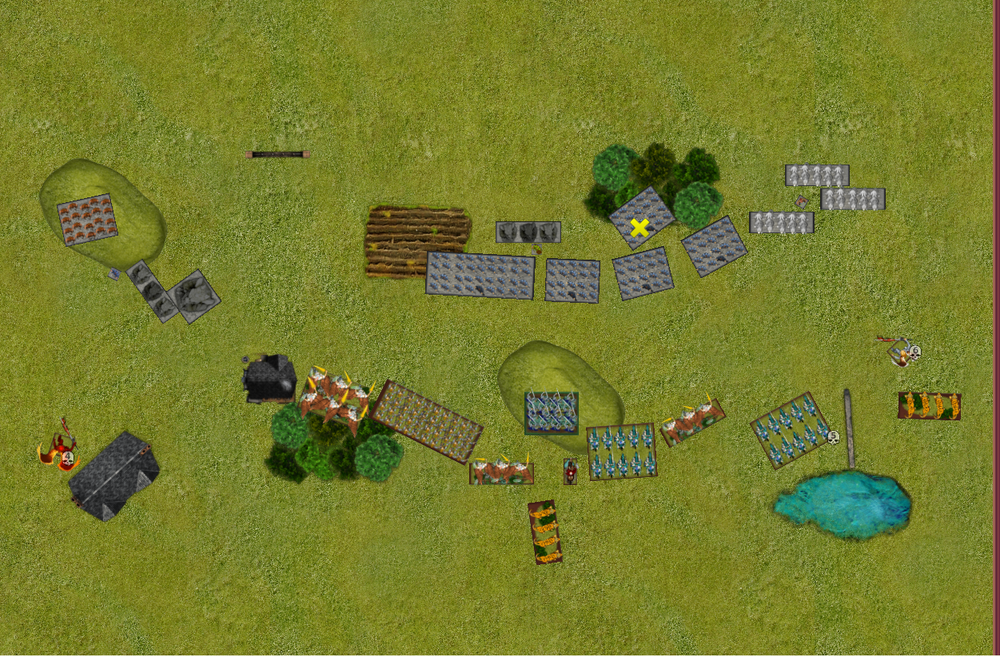
I realised I have had a deployment mistake. I always run my horde of shieldbreakers as a second line and I don’t know why I haven’t here. I am not going to be able to protect anything well enough and it’s going to go badly quickly. In deployment I also got stuck in my head of trying to protect mastiffs so I could get their three mastiffs off but I should’ve just prioritised their actual role which is protecting everything else.

Jullius is such a pain in the arse I can’t afford to ignore him so the four units on the right all focus on him with three looking to shooting.

The middle pushes forward in a staggered fashion and the right mastiffs stagger to get some shots off too.

Shooting

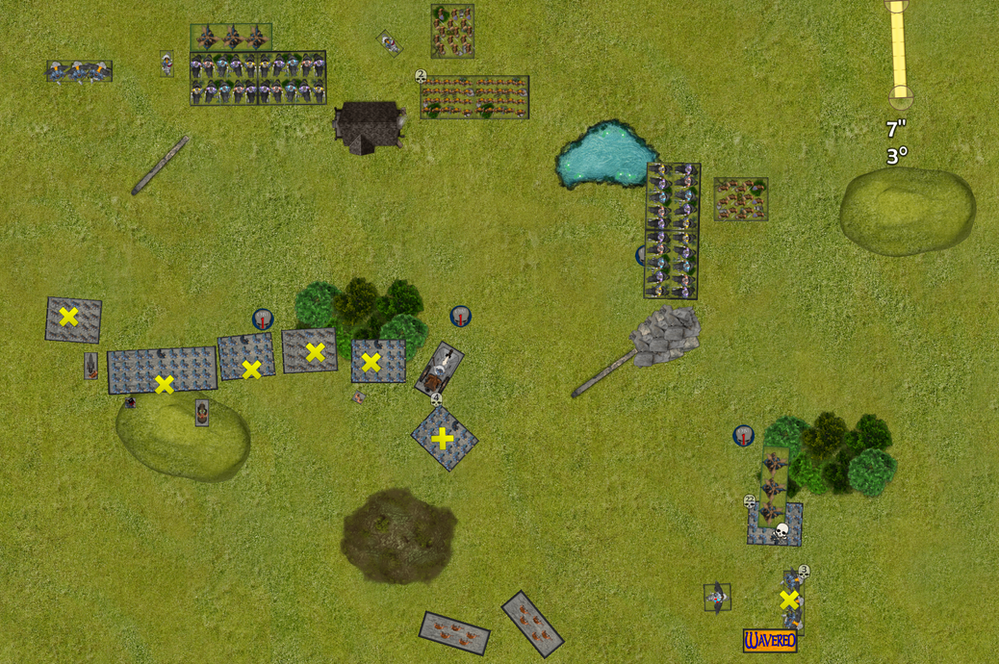
On the left a combined 5 wounds on Jullius with an 11 neve roll pops him! But he is saved on the re roll. Mastiffs with a combination of vicious and non vicious do 7 wounds on the ur elohi and 5 on the knights I fail to pop both and IR brings back some wounds.

Turn 3

Nick:
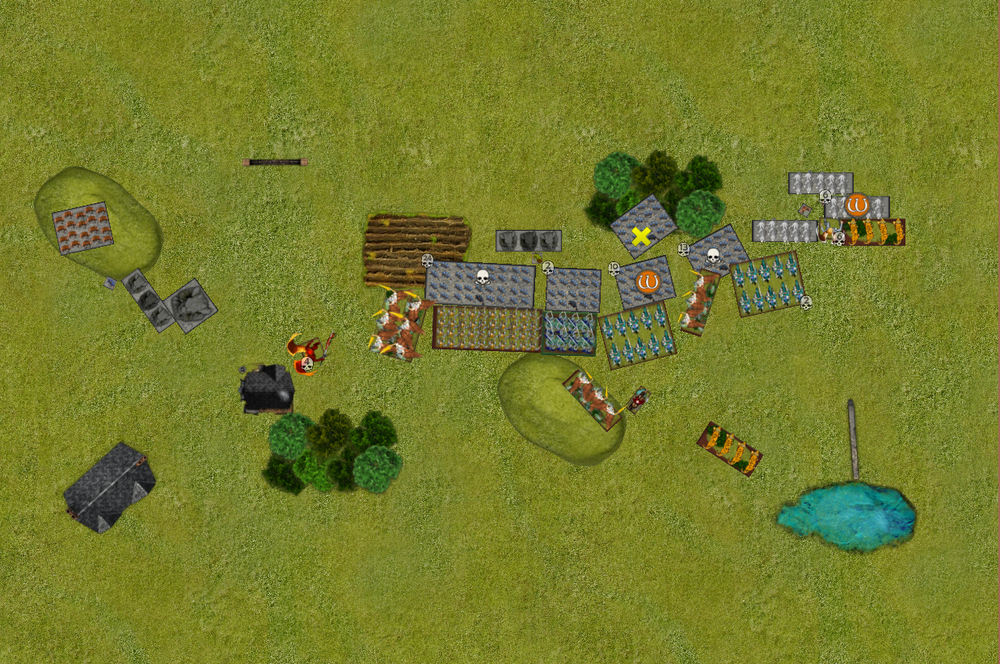
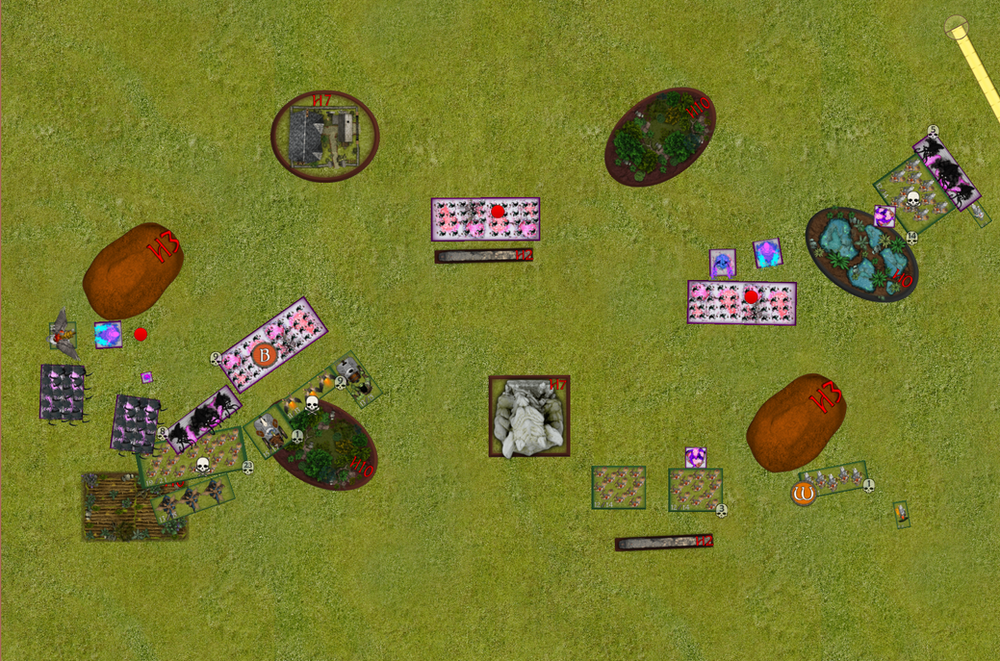
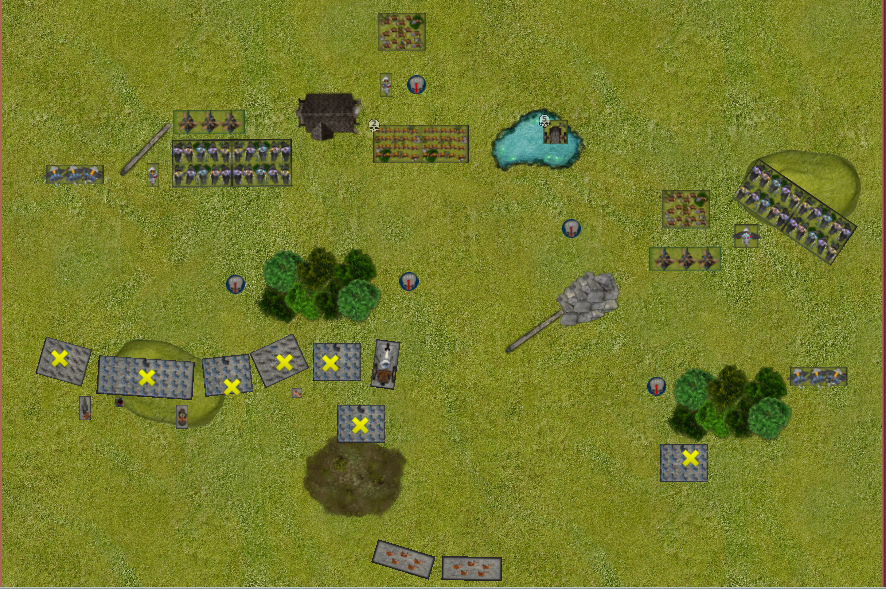
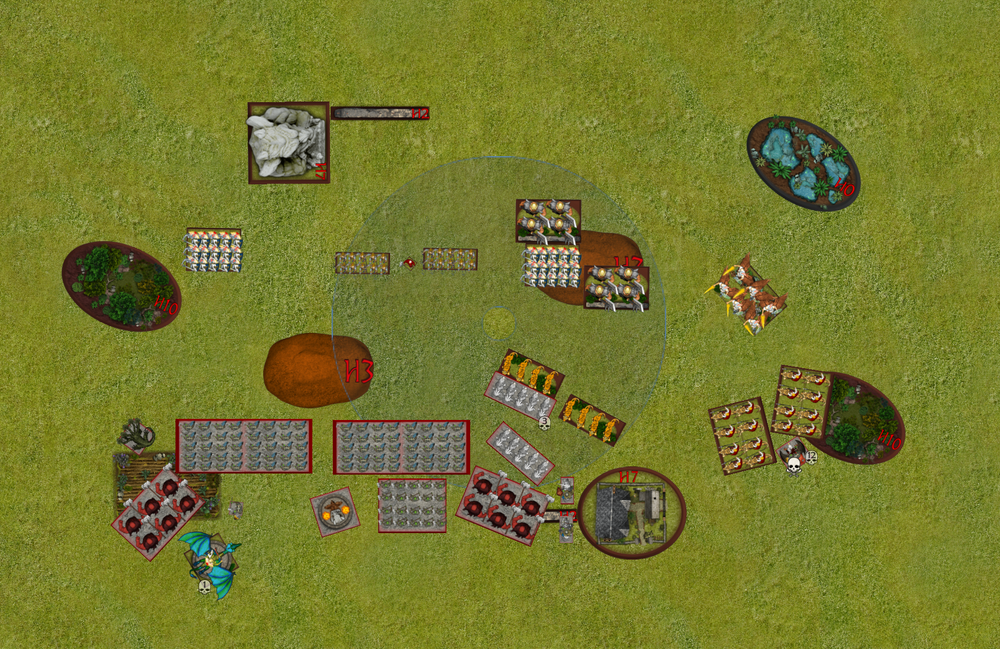
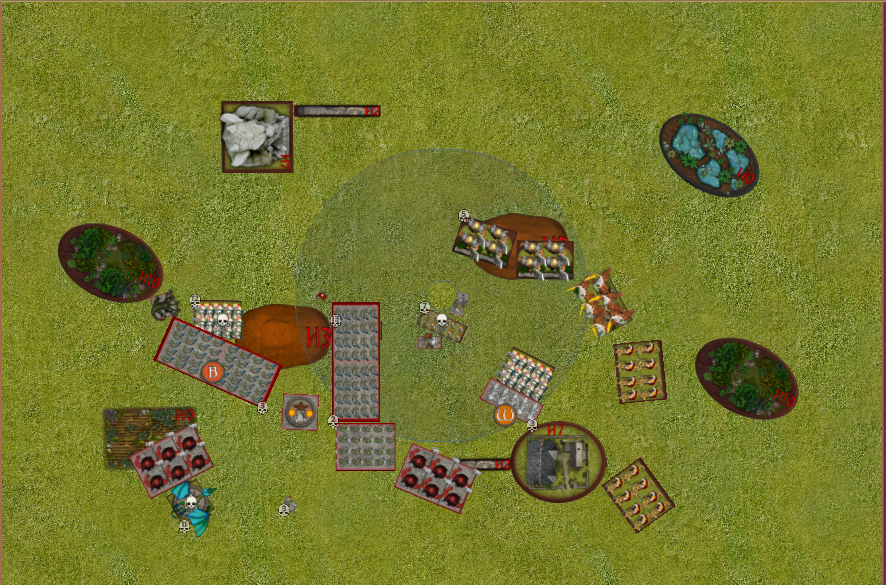
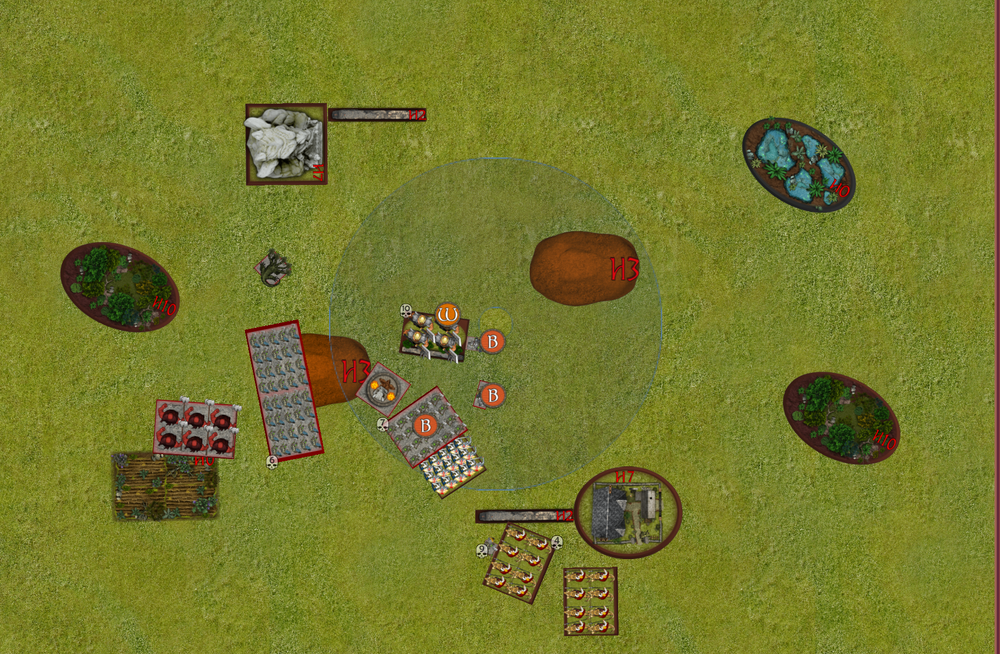
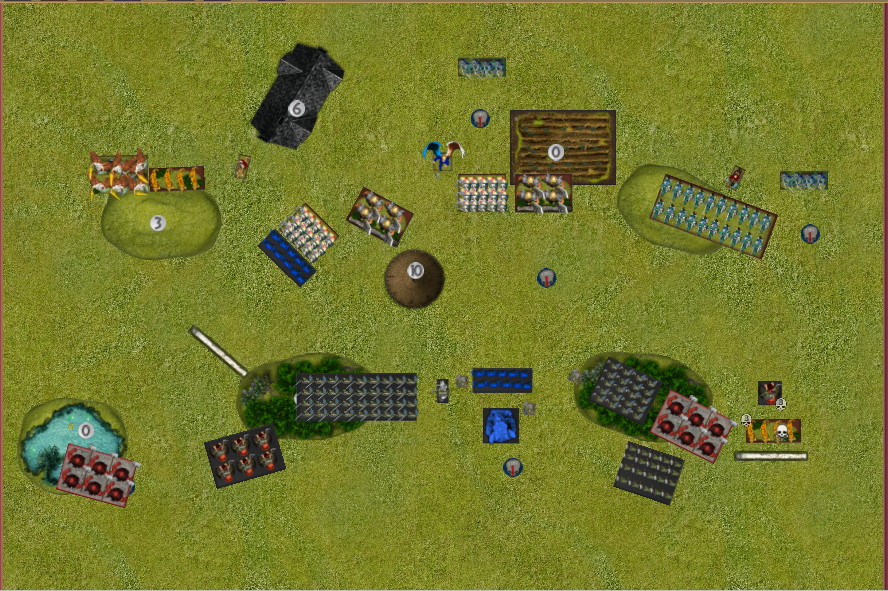
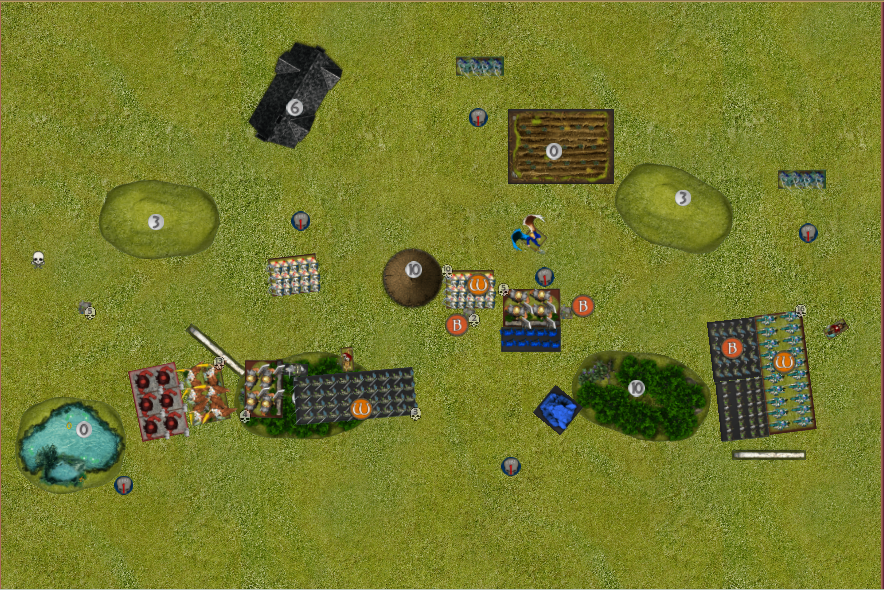
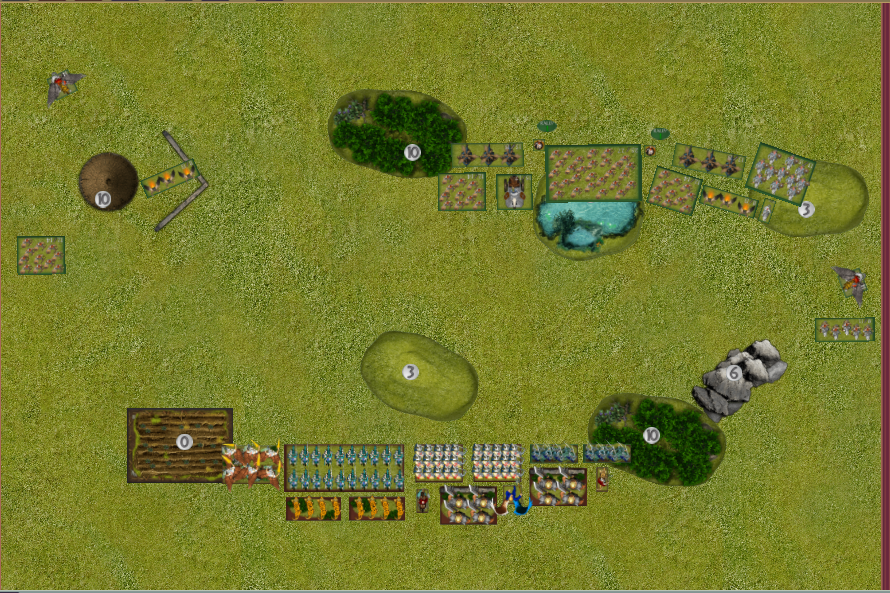
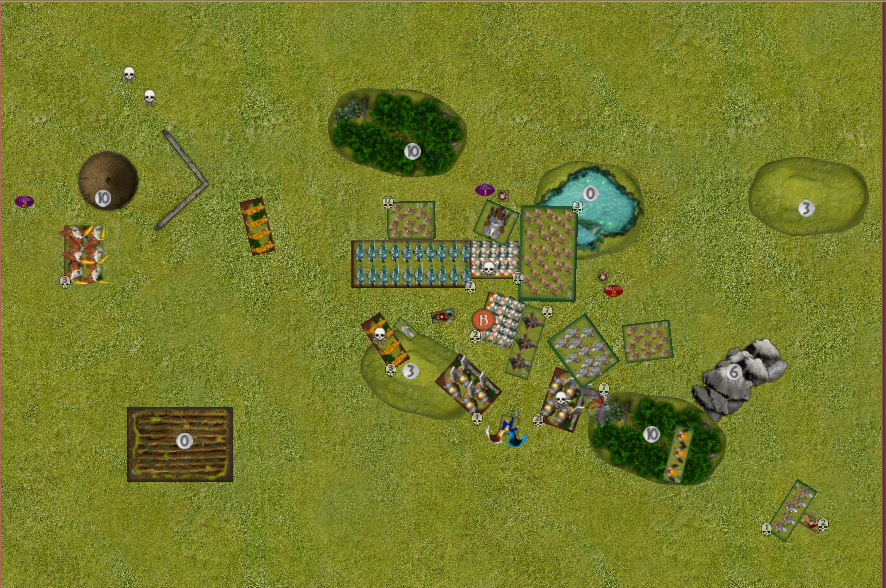
No losses from dawgs. It’s showtime! I charged in with basically everything I could and positioned the remaining units being the elohi and second gur troop to charge in my following turn. Priest decided to do heal on the knights as I wanted to try and make sure they stayed alive as I’ll need all the US I can get given I’ve resigned myself to Matt getting 6 US over the line on the length. Julius flew over past that group as I had planned in my last turn with the hope of causing havoc on the flank of what remained of his main line next turn. The flying king was a potential issue holding him up. So the way I placed julius in a position where he’d ideally be blocked by the reforming elohi horde next turn. The charges were all successful. Both big double charges led to routes and I had wavers on the other two charges. The elohi reformed to further keep that left flank of Matt’s honest.

Matt:
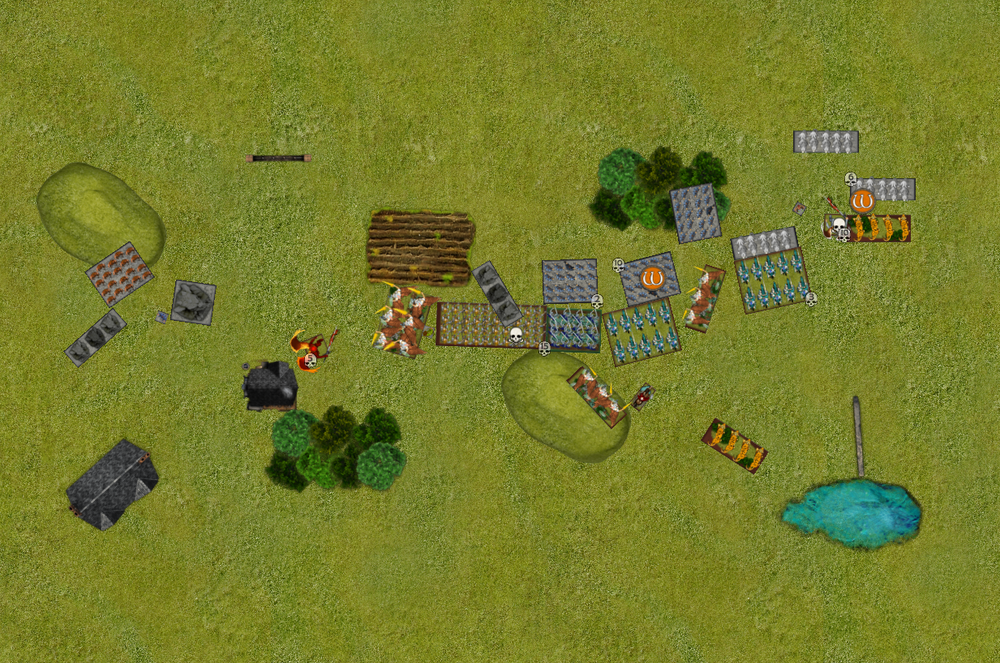
Nick has me on the ropes here. The left hand side of the board reposition to only allow charges on def 6 from the elohi. In the middle the king went into the back of the elohi to try and ground them and do a wound, the earth elementals went into the sisters whilst the shiedlbreakers that were in combat with the paladins withdrew and flanked the sisters.

The top shiedlbreakers repositioned allow to get a dog off on the ur elohi with the packmaster, Whilst the mastiffs at the top both backed up to allow this.

The third mastiff pack went in to hold up the knights.

In shooting craggoth and bannick did 2 wounds to julius but failed to do anything else, herneas rangers couldn’t see. The packmaster and shieldbreaker mastiffs did 4 wounds on the ur elohi and popped it.

In combat the king did no wounds on the elohi. The combined 15 wounds on the sisters and then got two very good nerve rolls to pop them. The mastiffs did 2 wounds on the cavalry but failed to waver so one came back.

Turn 4

Nick:
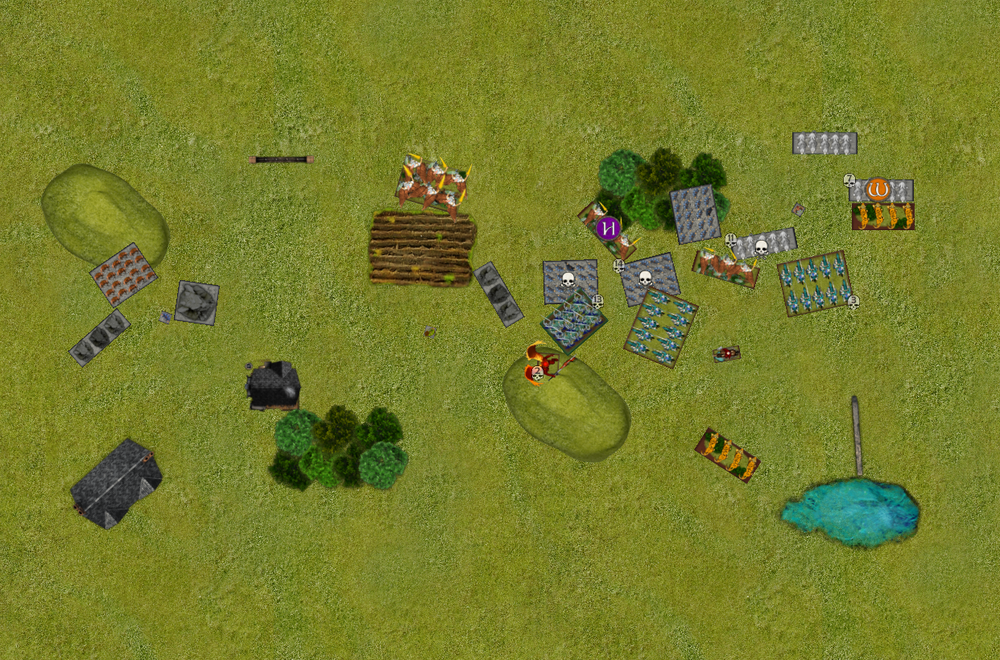
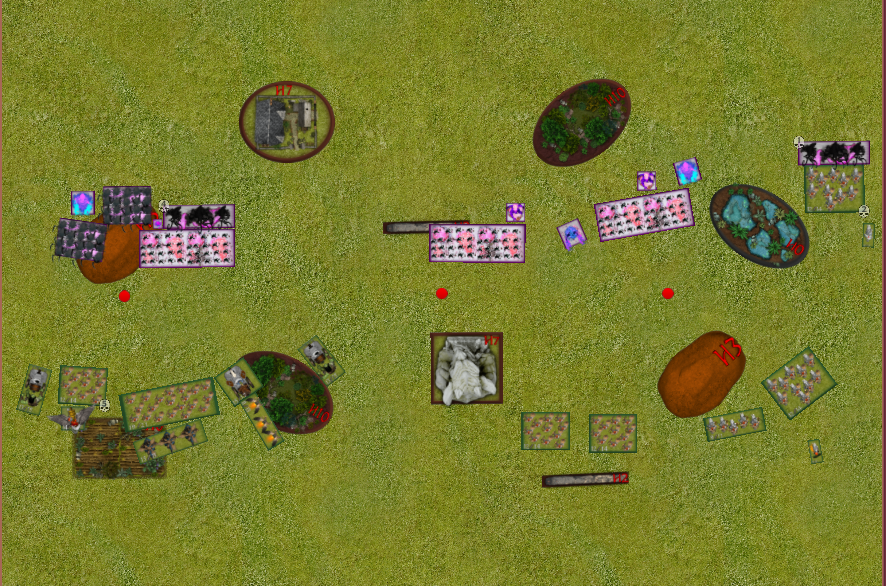
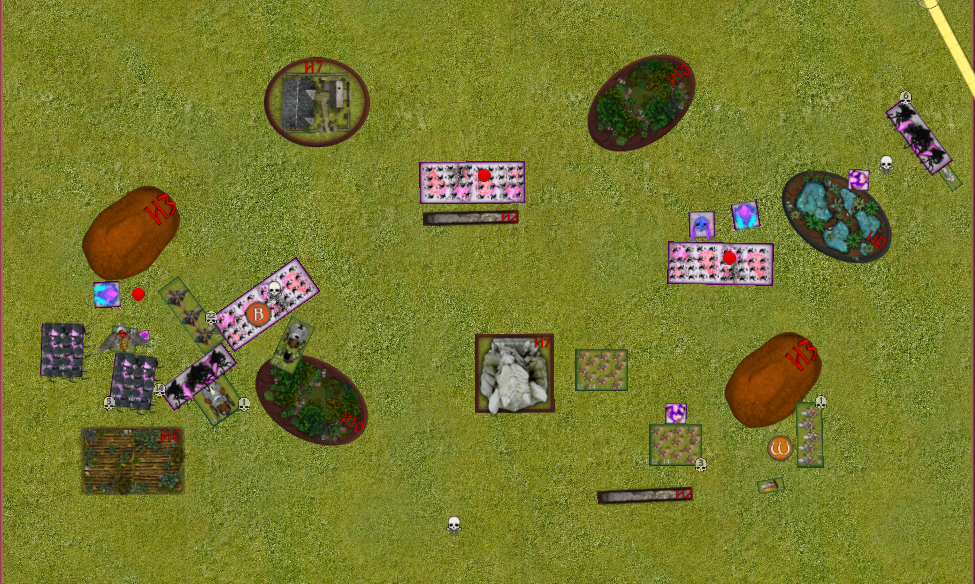
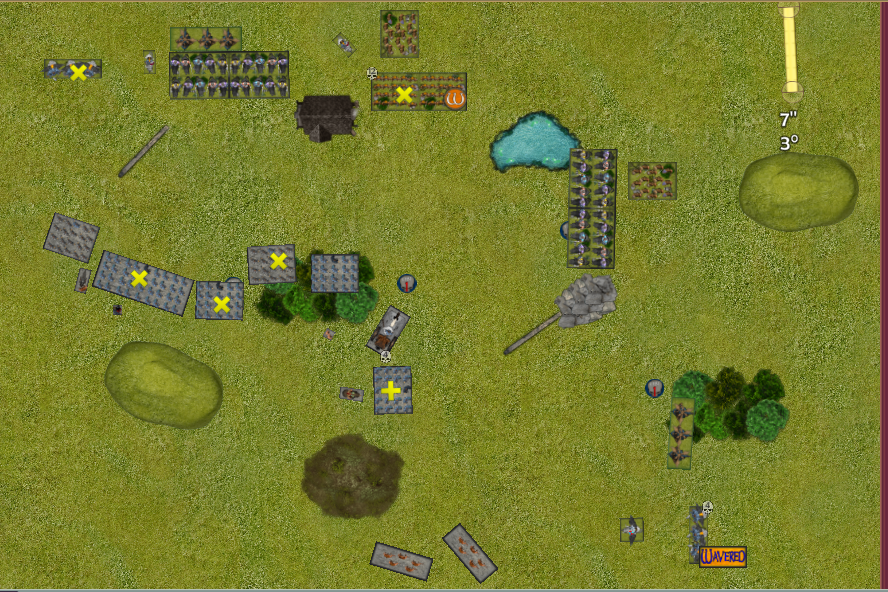
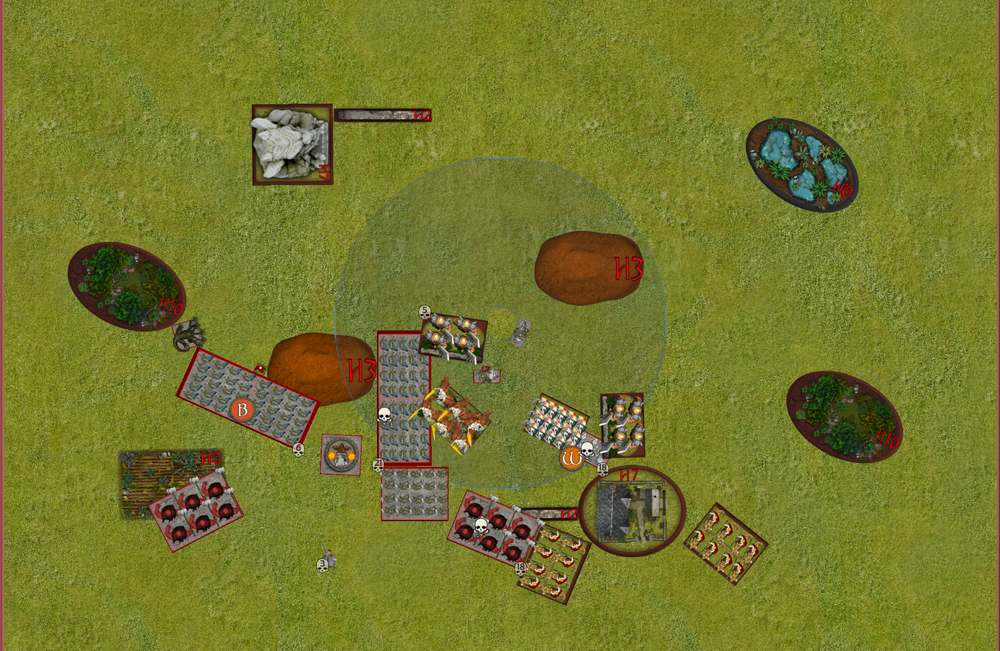
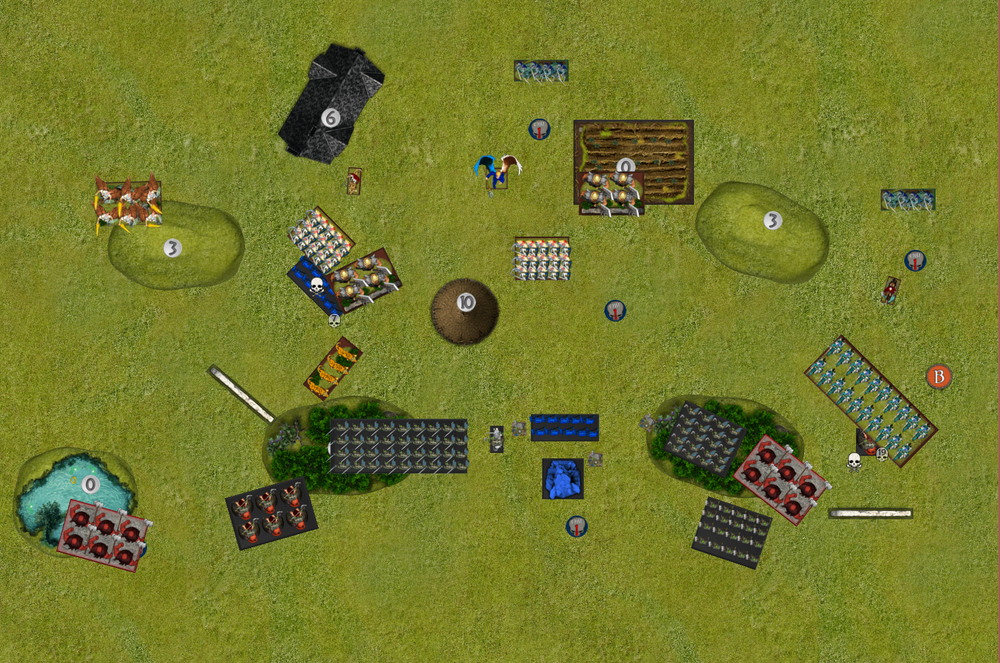
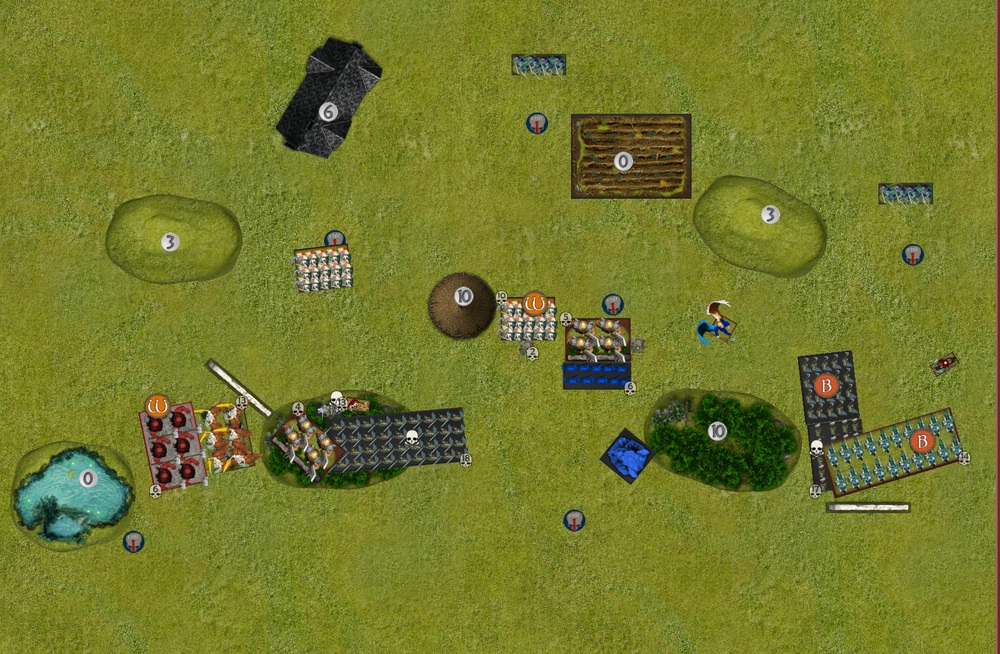
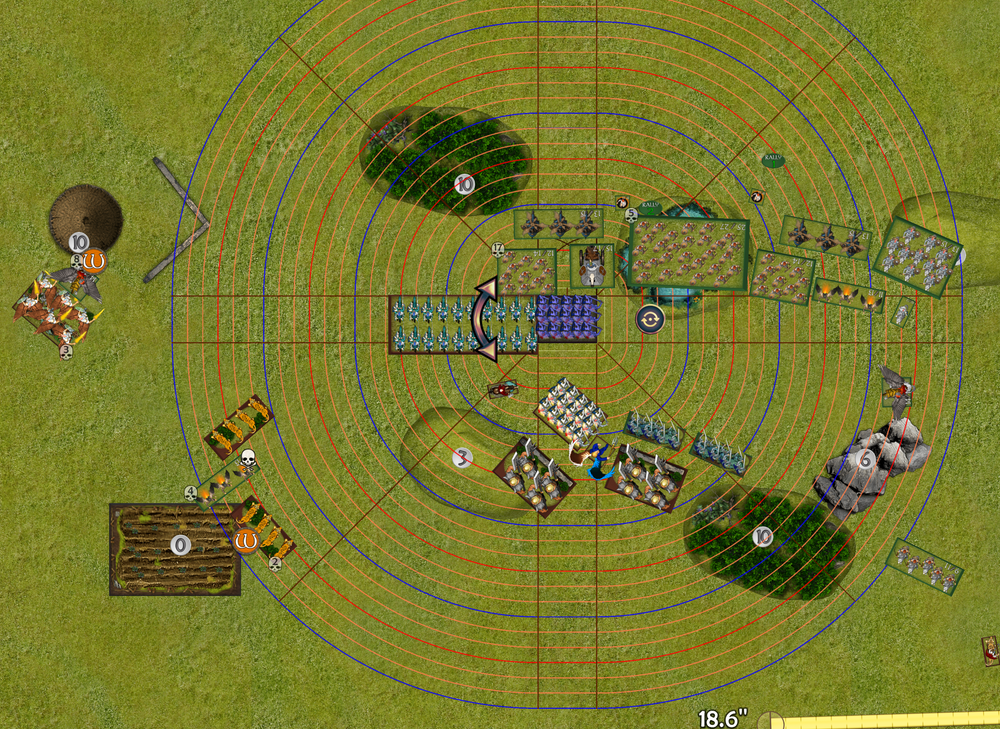
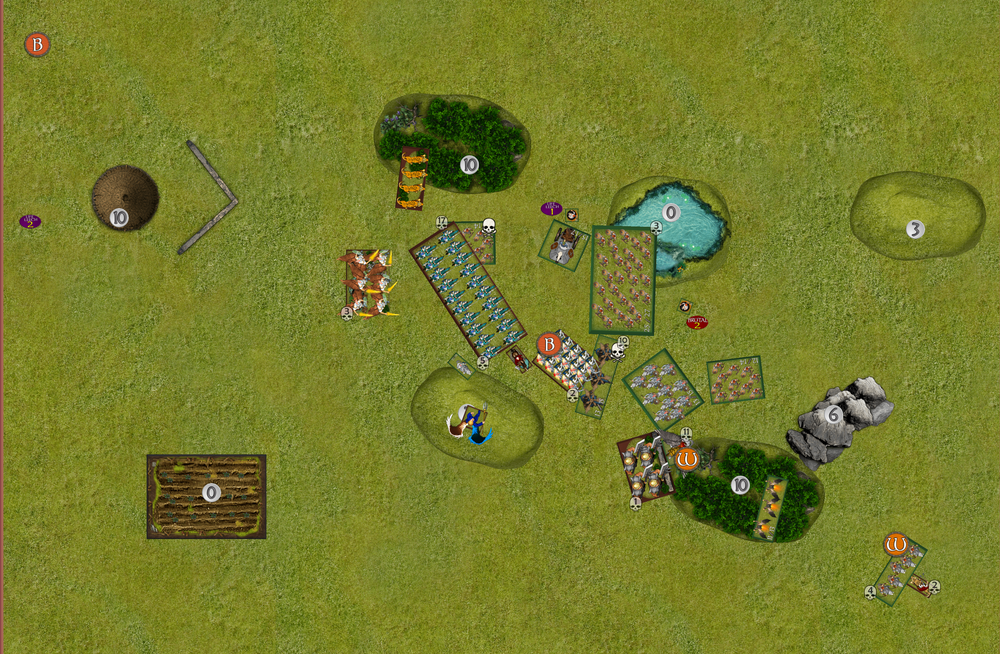
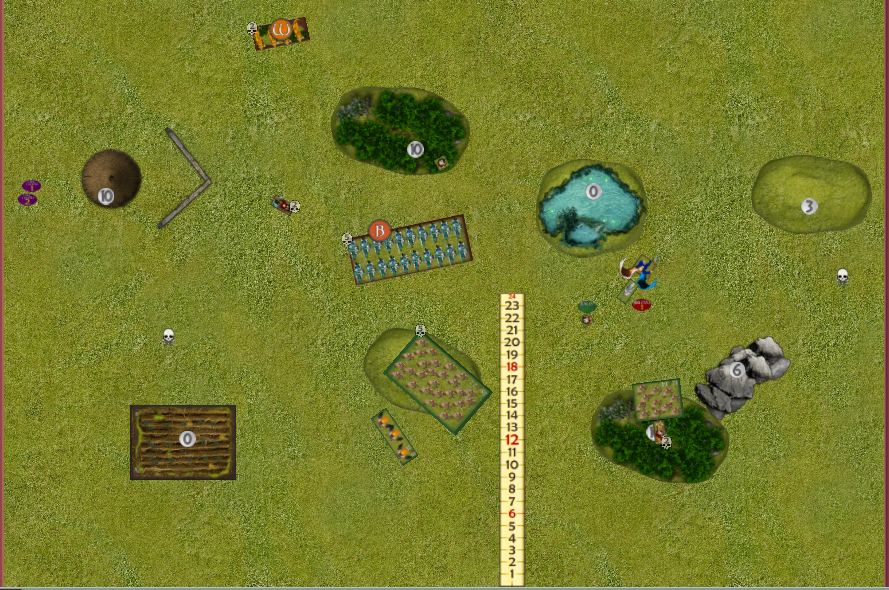
Key lesson time. Communication is key in KoW and ESPECIALLY in PBE games. I was quite surprised to see my sisterhood horde routed with 15W after only the earth elemental regiment could charge them, or so I thought. I had just assumed that Matt’s lines were uniform, meaning my paladin foot guard and sisterhood horde were in line when charging his units last turn. Therefore I didn’t think I needed to do anything with my sisters to keep them safe. I could have very easily gone back d3 and been safe in this instance or even stated that it looks like they were in line and therefore were safe. Lesson learnt! At any rate I still felt the game was there for the taking. I continued to dance around his left hand side and sent my elohi up towards the board edge and out of charge of his units on the left. Without surge, the threat of Craggoth and the earth elementals was severely limited. The priest healed Julius for 3W after he’d suffered 5W from multiple turns of light shooting which meant he should go on to survive the game and hopefully mop up some stuff in the final turns. I got some great flanks seeing over the H2 infantry with my elohi regiments and proceeded to take off the mastiffs and SB regiment while my knights made short work of the heavily wounded regiment they went into last turn which already had 10W. At this stage if I played carefully I was confident I’d have enough US remaining on the right to offset Matt’s units on the left.

Matt:
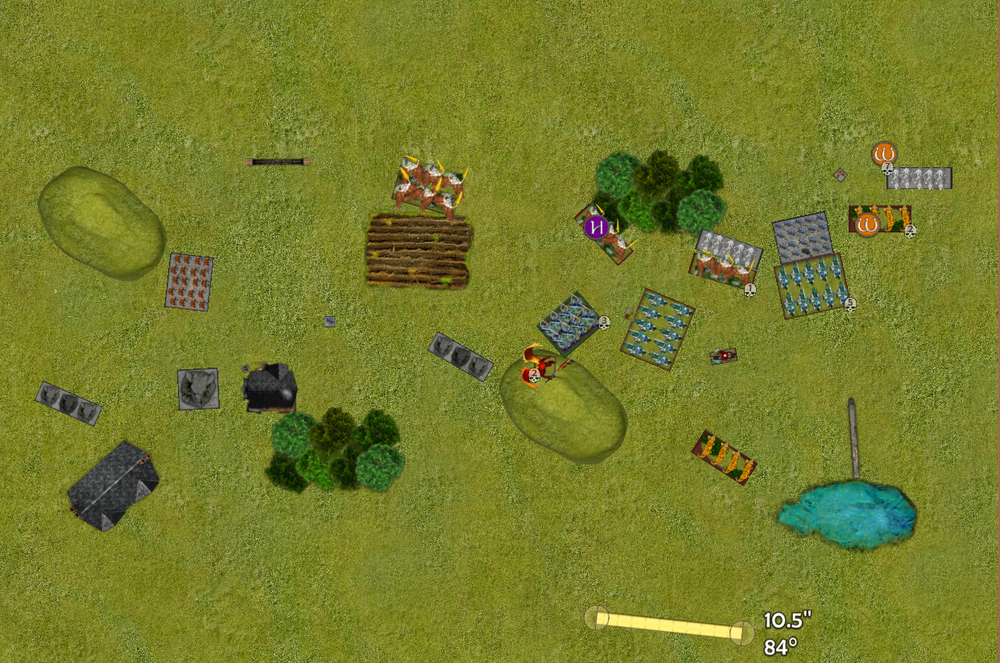
The rot is in and there’s not much to do here.

I decide to basically save the left hand US and move down whilst herneas rangers will get a couple of last shots off. The tope right take charges where they could and the king charges the knights.

Overall shooting does some wounds but fails to do much other than waver the top gurs. Combat does some minor damage although the king for the second turn in a row does none! haha. That’s pretty much game over

Turn 5

Nick:

My final charges took out the rest of Matt’s stuff on the right (except a snake eyes on the mastiffs up the top right with ~20W now on them). This meant that he had 9 surviving US to my 19 and we decided to call it at this stage.

Post game thoughts

Nick:

Patience was key in this game to ensure I didn’t charge in straight up and get countered. Matt spread out a bit too much and it meant I could take him apart piecemeal. We discussed during the game the placement of his mastiffs. While the pack of dawgs all deployed together with the packmasters is cool, he needed to have them shielding the shieldbreakers (which can still throw dawgs over the dawgs who can also throw dawgs) so I couldn’t charge in and take them out without suffering a counter punch. The lack of surge was also a big consideration and I’m sure it’s something Matt will be including in the next rendition of the list.

Matt: I am happy that the core of this list (the formation plus a horde) can work but some tweaking needs to happen around the edges. The next type will be a little different. As discussed above I pretty much shat the bed in deployment so need to address that
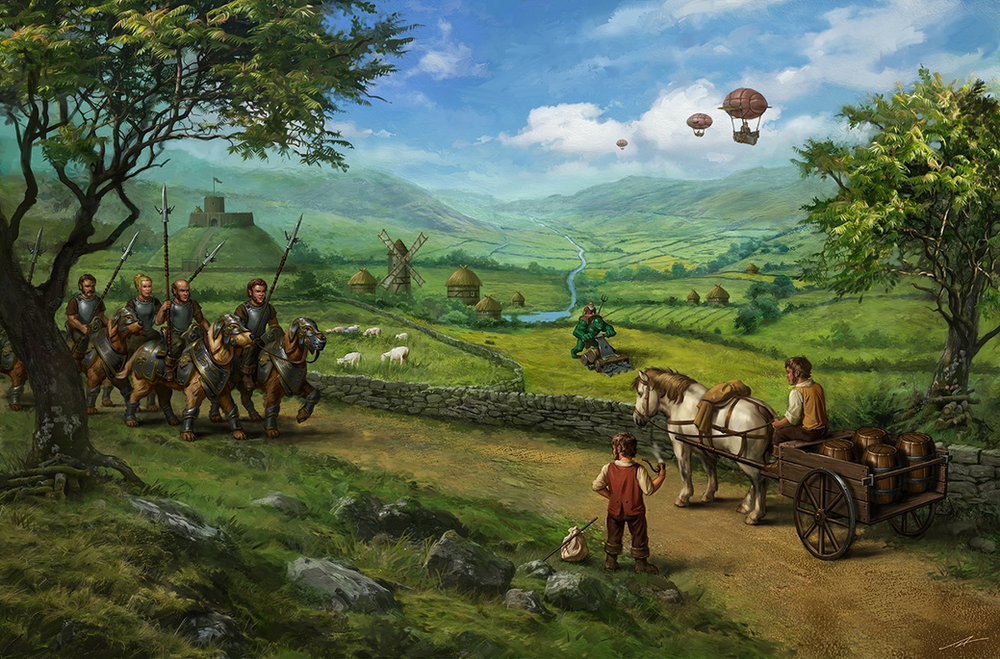
Halfling hobby update #3

Hi all, Dave here with another update on my halfling force, I know its been a while since my last post but progress has been slow so I figured I’d wait till a had a few more units done to report in.

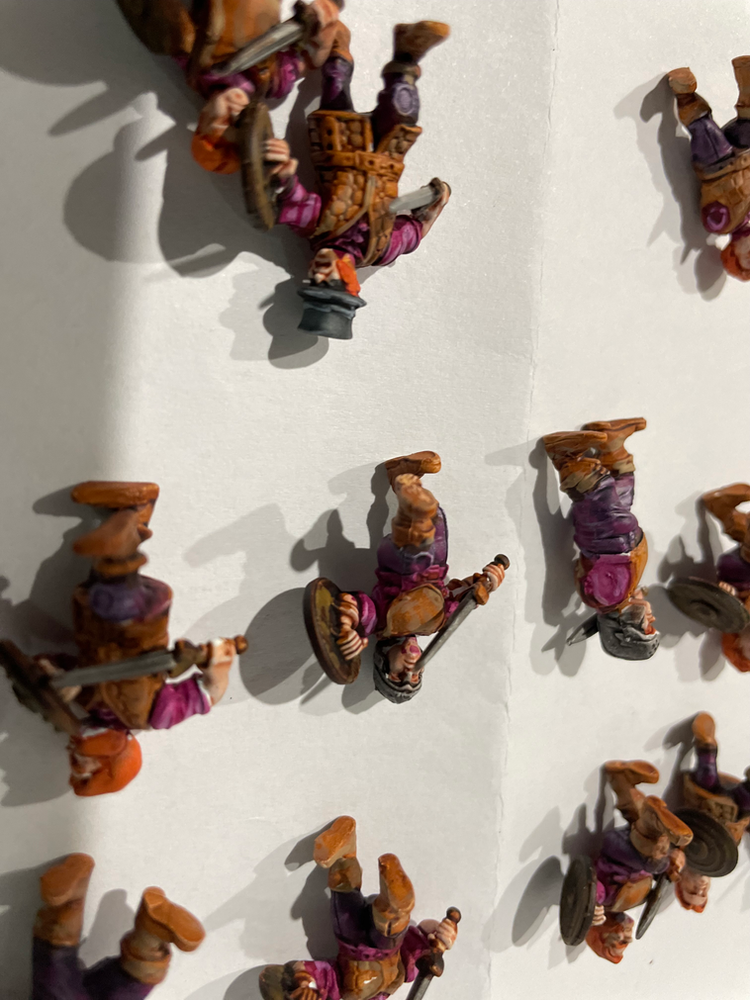
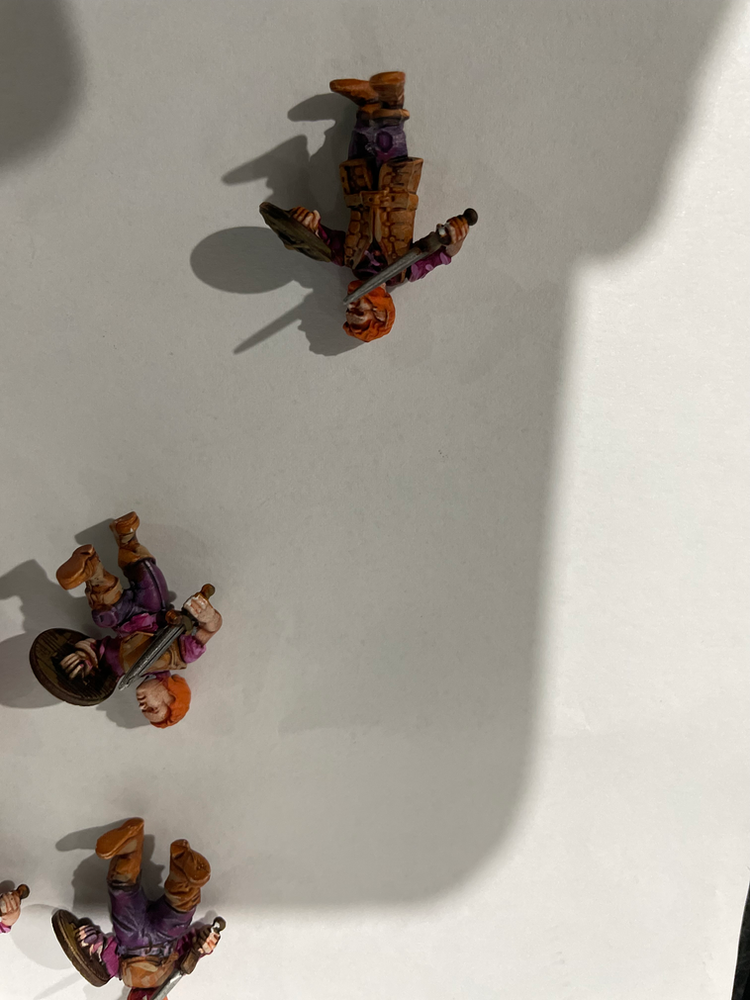
First up was yet another unit of braves/spears which takes me to 4 in total (only one to go).

I went for a slight hill in my basing to try and link into the rolling hills theme i’ll use for my cav.

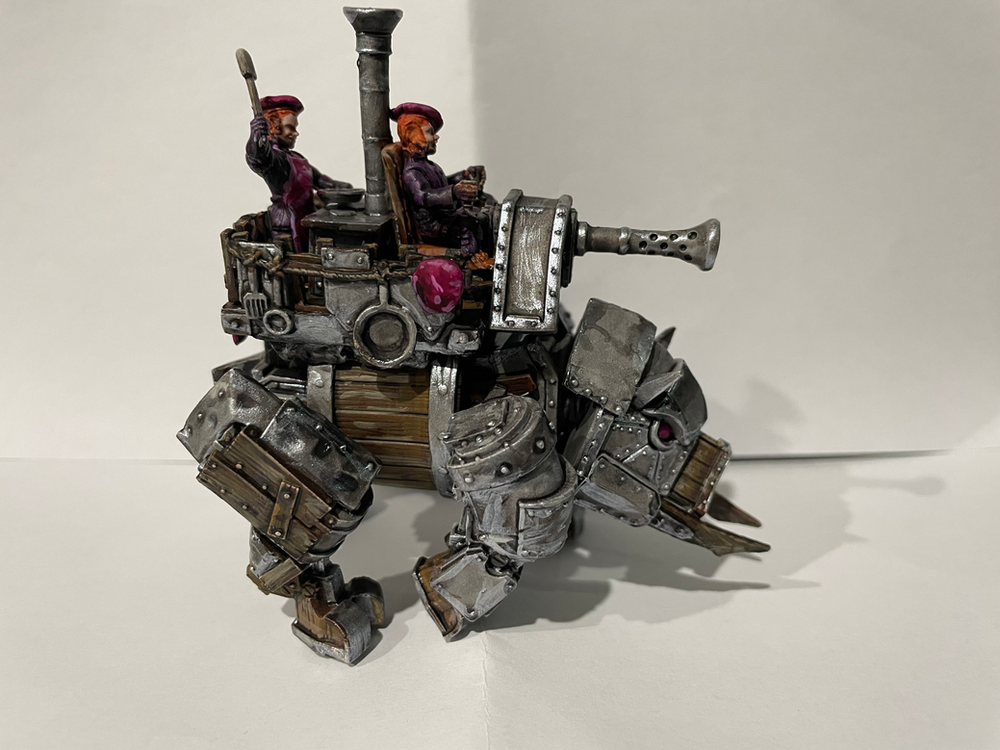
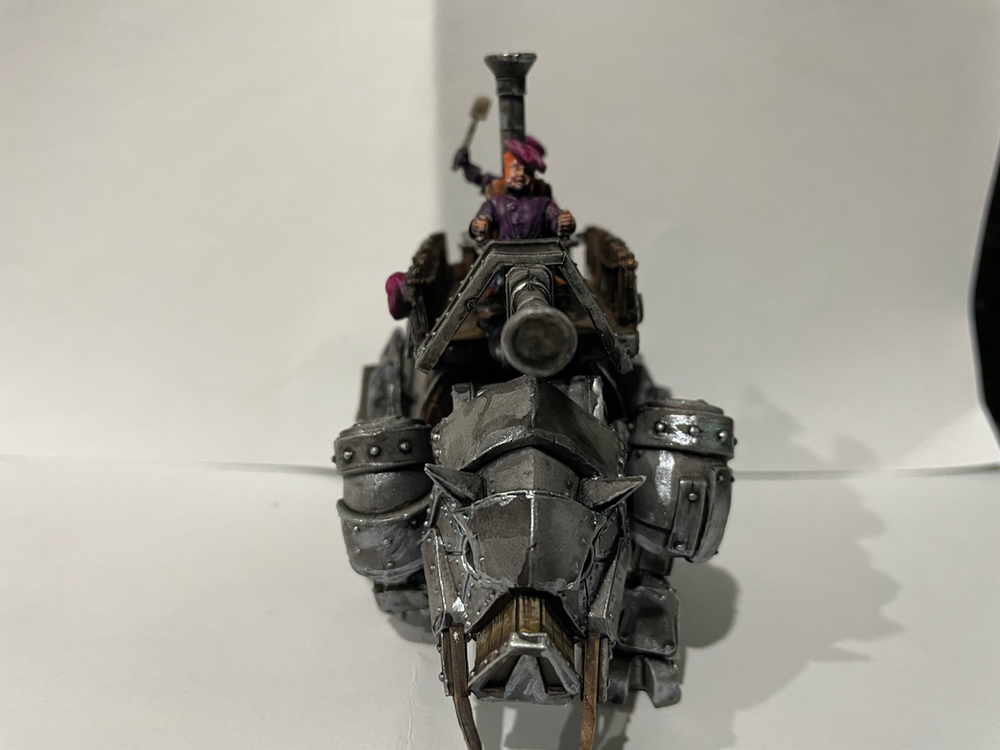
Next up was the battle pig… I mean iron beast, this thing takes some painting but i’m pretty happy with how it turned out. The challenge with this one was to make it pop considering it’s pretty much just all metal, so I went for some war paint to tie in with the shields on my troops and balloons on my aeronaughts.

I managed to finish one of my favorite units rule wise next, the lawn mower…. I mean harvester. I actually remember to take some WIP pics along the way so I threw them in too.

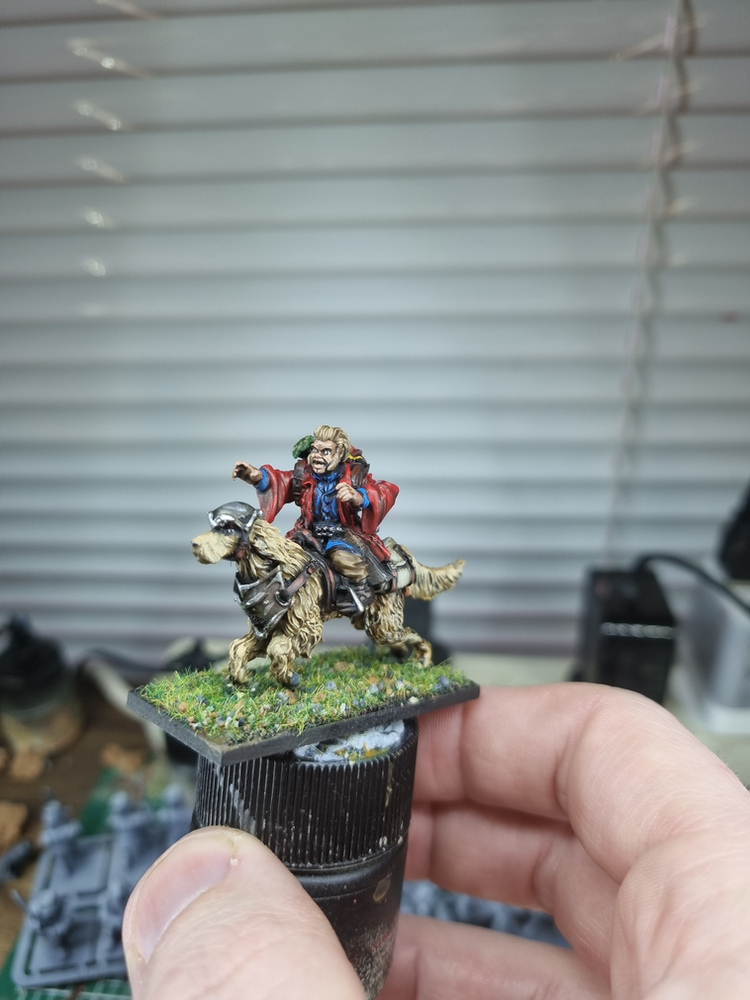
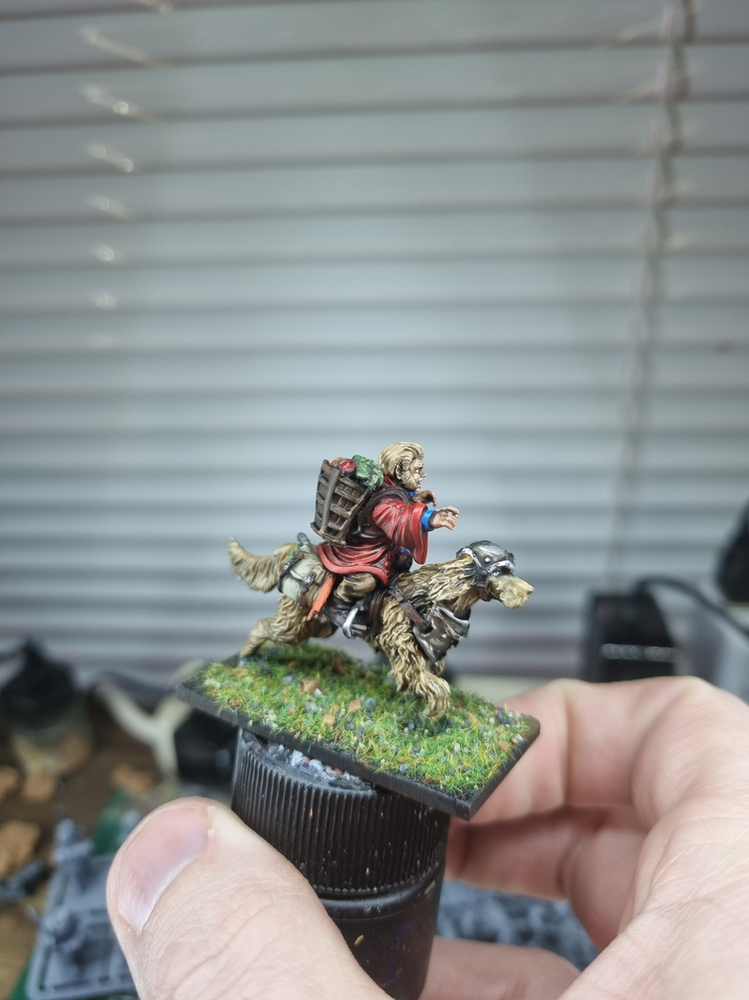
I decided to tick off a hero option next and worked through what I had primed and ready to go so this mounted sauceror got some paint, and i’m pretty happy with how it turned out.

I finished up August ( I know I still have a few days left) with a troop of stalwarts. I’m working on four troops that I can link together to form a horde.
I only have 1 regiment of spears left and 2 heroes primed and ready for paint, so it’s time to start assembling more. I’ll aim to get my EJs done in September and probably greedy guts and my feast master.

Thanks for reading, hope you’ve enjoyed.

Dave

Game 13 Halflings vs Nightstalkers

Game 13

Scenario: Loot

Points: 2000

The Lists

My thoughts with this list:

Dave:

I’ve dropped my Juggers to free up some points and now I’ve added two lancer regiments. I’ve added in a mounted sauceror to help get the best from the lancers. Everything else is my usual flavor of halflings as I continue to try and understand exactly what make them work…

Matt:

Dave wanted me to write a list with some lower defense to play against and he suggested Nightstalkers. I’ve been wanting to try them as even Captain Grumpy, Michael Clarke has been able to do well with them recently. I didn’t want to go down too much of a spam path. Once I started list writing I found it pretty hard to write a bad list. I think the reapers with horror combo will catch Dave by surprise as they did with me the first time I played them and the sould flayers with wind blast just give so much board control.

Deployment

Dave:

I’ve gone for two battle groups, so I’ve split my army in half to see how this goes.

Matt I decided to have two hordes with the closer two tokens and support them with about half of the rest. Then the other half went to compete or delay on the third.

The Plan

Dave:

I don’t think I Have the staying power in this list to keep all the tokens, so I need to set up to take two late in the game from Matt… exactly how I do that is yet to be determined…..

Matt:

Draw Dave left and take the right two tokens. See where the third falls.

Turn 1

Matt:

First turn I pushed forward across the board. The mind screech plinks at the runners over the hill but fails to hit. The other mindscreech plinks at the braves in cover on 6s and pulls off 3 wounds! Mind fog from the planar apparition forces a nerve check on the runners and gets a waver.

Dave:

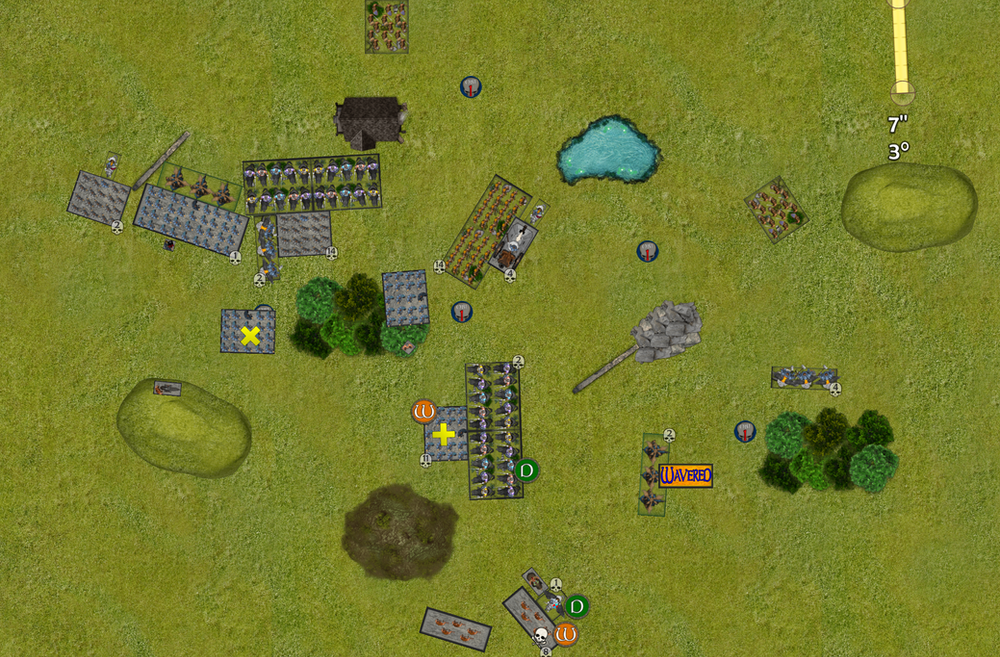
Windblast…. Dam you Matthew!!! Ok so my plan is already going south, I didn’t expect to be pushed back so early. I’ve move to position some back stops now which will tie up units with poor positioning…. But being the resourceful genius that I am I decided to send my sauceror over, roll wild charge and send my sergeant charging in to disorder the soul flayers while I move into position….

But instead I rolled WC1 so that plan turned to shit…. And now my army looks like this… I’m expecting to lose my lancers with the helm of the drunken ram, but worse I’ve waisted a turn positioning now as Matt moves on the tokens
Turn 2

Matt:

My first game with nightstalkers and I am finding them slightly more finesse than I expected. This revolves mainly around the shooting, what options I want and where. Everything pushed forwards slightly except the soulflayers on the right flank which pushed back to stay out of range.
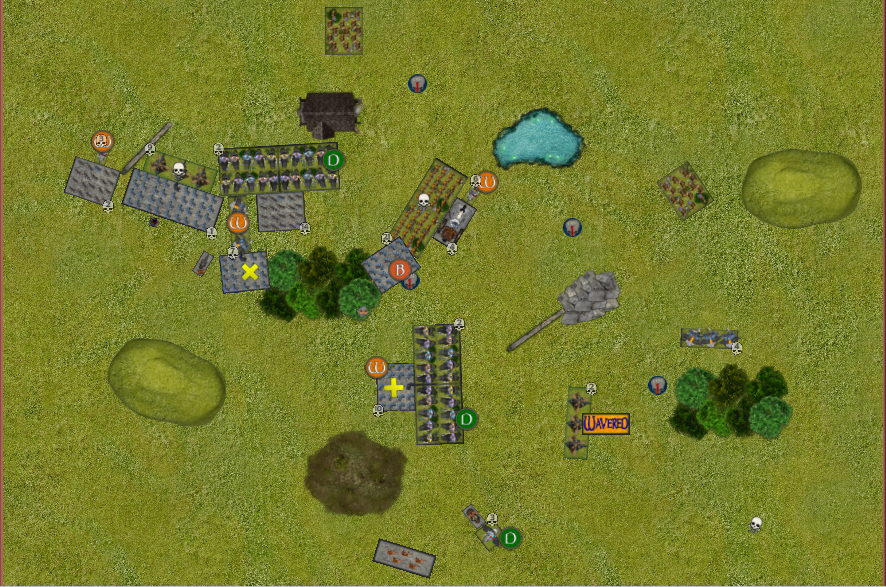
They used windblast to push back the TC runners by an inch. The soulflayers on the left used it to push the pride out of range. The Horror and mindscreech on the left did 2 more wounds on the braves regiment whilst the other mindscreech did 2 on the TC lancers. Unfortunately mind fog from the apparition failed to go off.

Dave:

I’ve crept up a little more to put pressure on matts left flank. I’ve got some strong def 6 units and some soft braves protecting my main hammers so I’m happy with how this will go. I’ve positioned my EJs to now to stop any wind blast bullshit on my battle pig.

I launched my lancers with TC2 off into matts soul flayers to touch them up and get a good reface, I expected about 8w (scratch that, got hindered, so 5w) here and a 7 for nerve… so im in waiver territory if I miss the kill….. and I manage 1w…. so now they are pretty well doomed.

I also threw some chip damage on the soul flayers but just missed the nerve

For some reason unbeknown to me, I decided to do nothing with the braves…

Turn 3

Matt:

This should hopefully be a turn where I can set up for the win. The lancers only doing one wound to the soulflayers on the right is big for poor old crappy Dave. I want to surprise him with how much damage the reapers can do so they come into the harvester and braves, the soulflayers go into the brave horde and the scarecrows go into the pride of the shires. This is all about delay because with enough delay I feel I should win the other two tokens.

The middle scarecrows pivot to take the middle token whilst the fleshripper moves forward but stays out of range of the braves. The right scarecrows, planar apparition and mindscreech move forward, the mindscreech staying behind to not allow a charge from the lancers. The other fleshripper repositions behind the screech to run to the flank to help out if required.

In shooting the mind screech does one wound on the right to the regiment of lancers, mind fog also goes off from the apparition. On the left bane chant fails to go off on the reapers into the harvester even with the conjurers re roll, the mindscreech shoots at the aeronaughts but fails to wound.

On the nerve roll I pop the lancers with a double 6 but they are saved on the re roll thanks to the talisman on the sauceror.

In combat the reapers delete the brave regiment and the harvester. The left regiment reforms whilst the one that deleted to the braves bounces to the right. I probably should have just stayed but that’s ok. The Soulflayers delete the lancers and reposition to face back towards the middle but keeping the other lancers in their front arc.

Game on baba ghanoush

Dave:

Well dam reapers hit hard….. I did not expect that level of damage and it cost me two units. I went back in with the braves but failed to break the soul flayers, I tripped charged to break the scarecrows, ifi pull this off I’ll get a decent reform and can potentially threaten the middle token, but I rolled down only getting 9w and failed to break them, I know this was a 50/50 but dam its hard work from here.

I sent my other lancer unit in to finish the job on the soul flayers, but again failed to break them… what are these soul flayers made of?

Things have well turned to shit for me now, and I cant see a way I’ll win… I guess its time I get petty and try to kill Matts reapers.

Turn 4

Matt:

Dave got pretty unlucky with those wild runners again on the top right but I don’t think the triple charge on the scarecrows was the best option. It was always a lowish chance of pulling it off in one turn which is what he needed. Now is where I get to exert control and try and confirm the win.

The top butcher flesh ripper takes the rear on the lancers which I had set up the turn before and combos with the soul flayers. Even hindered this should be game over for them with the OP Soul Flayers.

The right hand scarecrows move forward and claim the loot, I toyed with waiting another turn but didn’t want to risk something weird happening and being held off it, as low likelihood as that was. The mindscreech and planar tucked in behind that horde whilst the other flesh ripper went into the right hand braves so that they couldn’t charge.
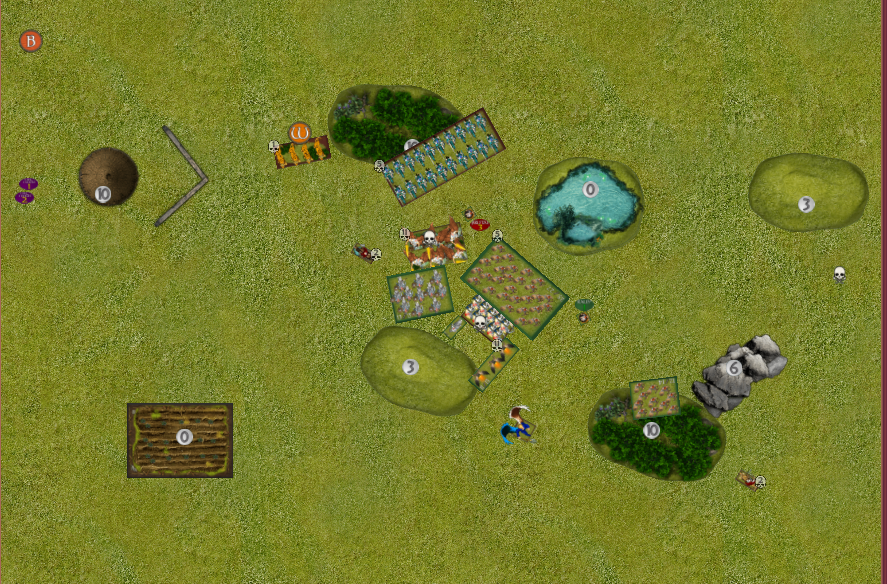
In the middle the scarecrows pivoted and went back over the obstacle, Dave could choose to chase me now perhaps although he won’t have a lot of speed left but doing this means I can use the obstacle in my favour in future turns if necessary.

On the left the scarecrows countered the EJ’s hoping to take them off when I position the horror for BC and vicious. The right hand reapers and the soulflayers double the braves horde. The left regiment repositions to take on aero’s or the winged captain if they choose to flank or rear those units.

The mindscreech positions to block LoS to some options on the winged captain.

In shooting the right hand mindscreech does a single wound on the runners troop whilst mind fog from the apparition fails to go off. The left mindscreech does no wounds on the winged captain. Bane chant from the horror goes off on the scarecrows

In combat the lancers regiment dies and the units reform. The braves horde dies to the double charge and the EJ’s die also. The scarecrows back up. Whilst the reapers and soul flayers reposition towards the right. The only safe choice now for the aeronaughts is the reapers at the back but I a not sure they can fit.

Dave:

I had some flanks open up this turn and with a little luck I’ll take all 3 of matts units of the board. with only a reaper regiment and a mind screech that token will be mine ,
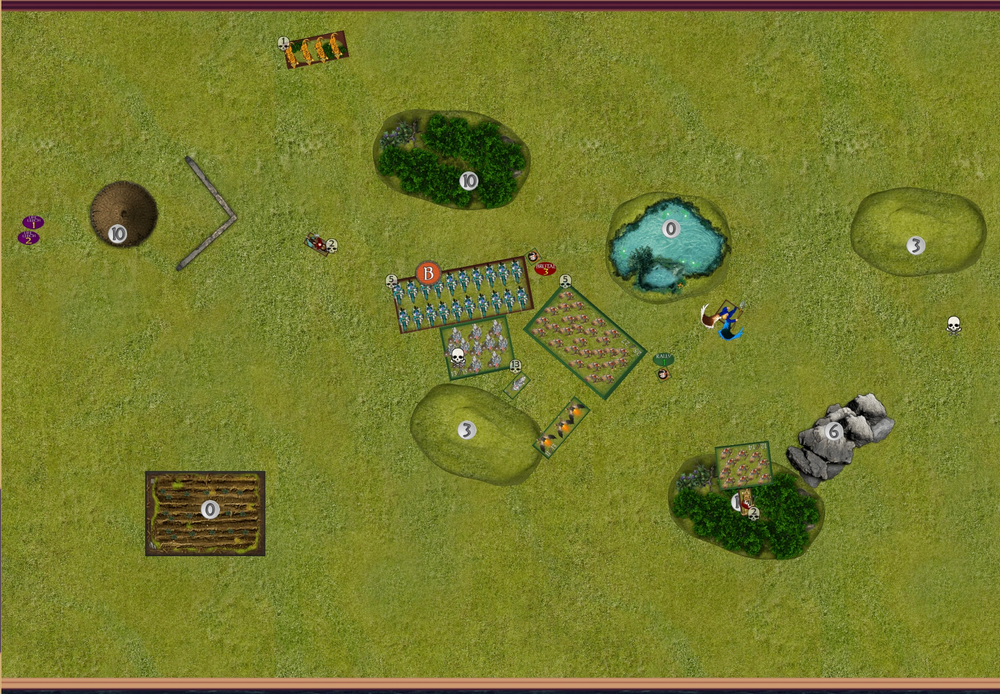
Starting with the soul flayers, I piled on 6 wound to take them to 14w, and I snaked them….

Next up the muster captain storming in with 14 attacks on 3/2, here comes 8w to get into the rout zone… nope picked up 5w and missed the waiver by 1.

Last combat on the left, I easily destroy the scarecrows but its too little to late.
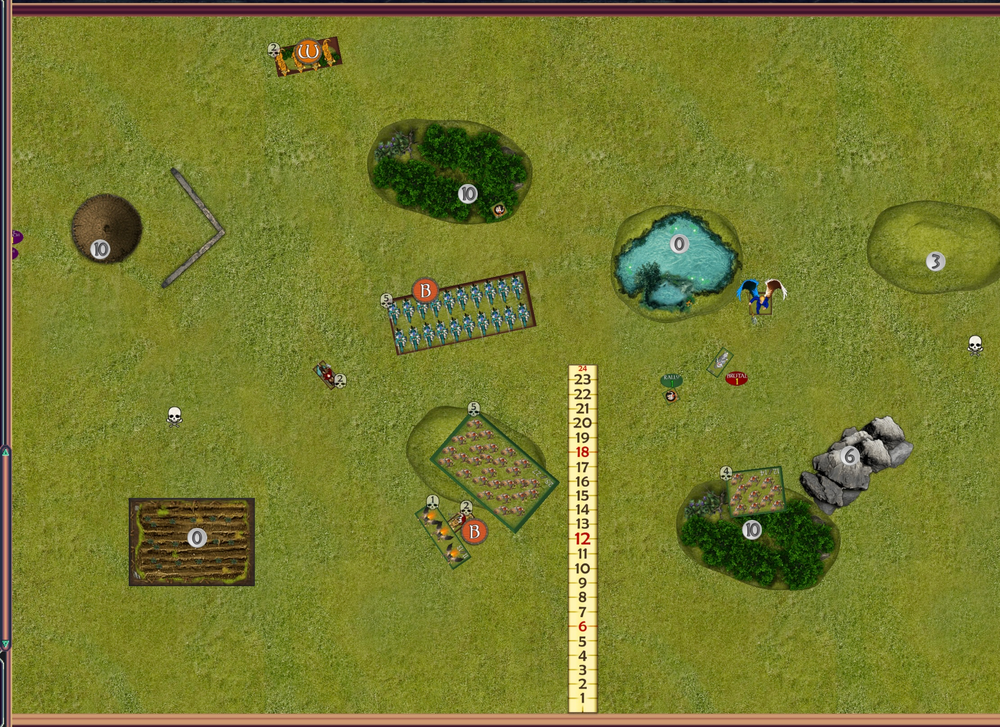
On the right flank I sent my sergeant in to finally kill the soul flayers… but they fail to get a wound and they dam soul flayers live another round…..

And this point I just stare blankly at the screen wondering why I cant kill any soul flayers…. I knew the where OP, but invincible? Surely not.

Other random crap happened with the braves, but its well and truly done here.

Turn 5

Matt:

See for yourself

Dave:

This is the part where I leave quietly

The Wrap-Up

Matt: After my initial getting used to the versatility in the shooting I actually felt like this army was somewhat like playing on easy mode. The board control with speed ten and multiple access to windblast is phenomenal. In some ways I had a good match up with only one unit of EJs but I don’t think I’ll be taking Nightstalkers until the power level drops a little.

Dave: When it’s a total white wash like this I think I need to look at the person who wrote the list first.

Game 12 – Halflings vs Dwarfs Pillage 2000 points ARMIES REVERSED

We have a change up this round with Dave pilotting the dwarfs and Matt with the halflings

Lists

Deployment

Matt:

I decided to centralise the tokens thinking Dave would clump up around them with the slow dwarfs and then I’d be able to pincer from either side. He surprised me with deploying hard centre left however. My first drops were about shooting in the middle to control tokens, then have enough to dellay him on his left while my right hopefully flanked around.

Dave:

I Stacked one side, and im not 100% sure why, I left a token regiment on the left to delay and annoy matt, My sharp shooters in the middle to clear off his weaker units left in the open.

Plans

Matt:

My plan involves completely around the fact that Dave will want to volume shoot his dogs, so plan is only allow him to do 1-2 per turn so I don’t lose a unit in one go. On top of thet with his hard deployment left I plan to draw his units in so that he is not concentrating on tokens and in fact likely moving away for them.

Dave:

This one was very simple, I’ve stacked to the left and plan to push up, meet Matt half way and then dog him down before we engage.

Turn 1

Dave:

I just crept up with my line keeping my deployment formation in tack, I’m about 20 inches away from Matts line so only his EJs have a charge and I’m not that afraid of them. If he gets close enough to jump my line next turn he should be in range to send some dogs.

My sharp shooters were very sharp, landing only 1 wound on his volley guy but a cheeky boxcar for nerve without inspiring sent it packing…. Suck it Matt.

On the right I’ve hid my only regiment a little better to stop any multi charges on it.

Matt:

Cheeky bugger getting a double 6 on those guns. That will learn me for leaving them uninspired although tbh I am happy for them to be target practice from the sharpshooters it protects my other stuff. Everything pushes forward. The left staying out of 16 so he can’t use his dogs yet. The right pushing hard to flank hard. The centre just forward enough to keep golloch coming forward to shoot but taking the movement penalty.

Turn 2

Dave:

I’ve crept up again about 2 inches I really want to get my dogs unleased before Matt gets into combat with me, so I’ve pulled some shenanigans so he has only a change on my bullwalkers with his horde, I feel like I’m at a sweet spot with his flyers that’s if he moves over the top I can take out the EJS with my lord on broc, or dog them off if they stay in front.

I also moved my stone priest in range to radiance of life back the one wound left from matts shooting last turn…. Suck it matt

My sharp shooters got very sharp and did 5 wounds to his last volley gun, but a 3 for nerve leaves them ready to fire away next turn.

I’m expecting a very fast out flank from matt come turn 3 so I’m doing my best to delay his force. I feel like my bark is worse then the my bite with the lone unit of ironclad with dog, and my limited shooting so I have to be careful and just look to delay and project threat.

Matt:

This turn is about resisting the temptation to push forward on the left. I am looking pretty damn strong on scenario at the moment. I think Dave is distracted by the left and he is too heavy on that side. Terrain will make it hard to move back adequately to the other tokens with the slowness of dwarfs. So pretty much everything backs up out of dog range on the left, if I can keep him moving that way that will be a win and then I can try and hold him up from getting back to the tokens.

The shooting horde in the middle also backs up. The wild runners on the right pivot back and come back towards the centre whilst the Ej’s and the general on the right start to dance around. The aeronaughts come in front of the ironclad and drop into the forest. He can now choose to charge or use his dogs on def 5. Either way I should be winning this exchange.

The horde shoots at golloch as there’s no cover and does 2 wounds, the remaining organ gun shoots at it also for no extra wounds. And then I box car the nerve roll!!!! Cop that you filthy animal! Although he could still get his headstrong roll.

Turn 3

Dave:

Ok Matts pushing hard with this out flank on the left, I’ve launched my dog at his EJ to try and pull a lucky nerve roll but only managed a waiver.

I’ve continued with my push up the centre carful not to give away cheap units.

Matt is holding 3 objectives so I’ll need to work to take 1, I’ve got my eye on the centre one sitting on top of his rifle horde.

Matt is slowly retreating and usually id see this as a bad strategy but my stumpy dwarf legs will keep me out of charge range and unfortunately out of the fight longer then I want to be, I need Matt to engage and his not which could be by undoing.

Matt:

I’m trying to play to the strength of halfings against the dwarfs which I believe is outpacing and the key with Dave’s list is not letting him get a whole lot of dogs out at once. I think the dog spam is best combo’d with the shooting (which golloch is currently directing elsewhere) to help take units off.

I move everything on the left back so the only thing he can get a dog off on is the top left EJ’s, I couldn’t get them back quite far enough without facing them the other way. To be fair that might not have been a bad option either but at least now he has to keep pushing forward to use them and I know psychologically he wants to use them.

The rifles back out of charge range of golloch after moving the character first. They will remain in range of one mastiff. I pivot the central braves so next turn they back up around cover and then eventually can move forward to contest the token.

The wild lancers on the right push forward far enough to stay out of range of golloch’s charge and to take some shootingin cover from sharpshooters. The other brave unit sidesteps to get close to cover.

The aeronaughts rear change the ironclad on the right and the winged muster captain jumps in front of the Ej’s and into range. The Ej’s just play with themselves.

Shooting does 3 wounds to golloch.

In combat the aero’s do 22 wounds and take off the ironclad.

Turn 4

Dave:

Another turn of Matt slowly retreating, clearly afraid of the dwarf fury I’m ready to unleash on him,

I sent a some dogs towards the top EJ regiment, however they were all distracted and all 8 failed to hit.

Towards the centre however, Golloch, some dogs from the centre ironclad and a regiment of sharp shooters all combined to pile on 11 wounds to the rifle horde, wavering it.

On the lower front I managed to waiver the EJs again only adding 1 wound.

My plan really needs to shift here, I’ve pushed up again as far as I can, however I fear Matt will retreat further leaving a charge to take out his units out of reach.

If matt doesn’t engage next turn I’ll have to try something stupid with Golloch.

Matt:

Dave is giving the appearance of being willing to continue to come to me on the left which works in my favour. I think with the amount of units, and how he has positioned them, not allowing me a decent charge with the horde, that I can afford to back off for one more turn and keep drawing him in. This turn he will get two dogs off on the wild lancers horde, so I have to hope against a waver. The braves up the back, back up slightly and the shooting horder does also. The winged captain goes into the sharpshooters and the other lancer horde goes hindered into the bottom ironclad. The EJ’s reposition to fly into the forest for the token and the other brave regiment bounces slightly to the right staying away from golloch but plenty of easy to pivot 90 and go back to the token. The aeronaughts move far enough forward to threaten but stay out of range of the brock lord who might want to ground them.

No shooting

In combat the winged dog does a piddly one wound but manages a waver ona. Roll of 9. The dogs do their expected 5 and will now be an uber distraction hopefully.

Turn 5

Dave:

Time to move, I passed headstrong on the ironclad and sent them back in on the CC, I failed on the sharp shooters so they had to sit idle,

I pushed up as far as I could with my left flank, managed to launch some dogs at the EJS and another at the rifle horde. Both managing two wounds but failed to break either.

I’ve now got to keep Matts units pinned to not contest my objectives next turn.

Golloch steamed away into oblivion, just out of charge range from the aeronaughts and now very much threatening next turn on the braves and rifles.

I’m predicting some tricky bullshit to contest the far right objective turn 6 if I get my way.

Further down the battlefield, my stone priest bane chanted the now non waivered ironclad who have manage to disorder the lancer horde. I’m hoping to hold them off now for the game (edit… turn out they are just within 3 inches… so I’m going to have to grind hard to dig them out now).

And lower down my berserker lord on broc as grounded the muster captain.

My other unit of non-waivered sharp shooters has however, managed 2ws and waivered the aeronaughts – suck It Matt.

Turn 6 will be super tough for me to out maneuver Matt now

Matt:

Is there a cheesier bastard on earth than Dave Fanning? Box-carring my bloody aeronaughts.

In the end it isn’t a complete travesty because if they survice they’re another token grabbing option still. Other than that I had some luck. His throwing mastiffs hadn’t produced any wavers and he had continued the march away from tokens with the bulk of his army.

I wanted to tie up the left flank now. So lancers went into the phalanx regiment with the EJs flanking them. The aero’s went into the ironclad horde and the sergeant went into the other buklwarkers.

The rifles may not survive another round of shooting and they are now within charge range of golloch so they decide to flank him to tie him up and double with the seargeant. Surely 40 attacks will do some wounds even on 5/6.

The bottom lancer horde counter charges, the winged general counters the sharpshooters and the Ej’s duck to the other side of the forest. The top right halflings reposition to be out of LoS of golloch.

No shooting

In combat

The winged general does 7 damage from 7 attacks haha and pops the sharpshooters. I don’t reform 90 as I want to stop the sharpshooters if there is a turn 7. The horde of lancers in the middle do 7 wounds but only roll a 3 on nerve to waver the ironclad. The rifles and sergeant only do one wound combined on golloch but at least now he cant shoot. The sergeant at the top left does 2 wounds, the aero’s a measly 1 causing no wavers. The combined horde and EJs do 14 wounds and then roll SNAKES.

This one is particularly hard for me as I feel I’d lured Dave nicely and if I had gone through there it was basically goodnight for him. I am still likely to win at end of 6 but can’t predict 7 at this point but it’s likely still good.

Turn 6

Dave:

Well dwarf fury was unleashed, waivered 3 of Matts units and killing 2, however the key combats were golloch vs Sergeant, and ironclad vs rifle horde.

The rifles folded like a pack of cards but the reroll saved the sergeant when I could only manage a 4.

This has pinned golloch in place, and although it wont be disordered for next turn, Matt only needs to avoid my front arch (including when I disengage the 1 inch) with both his braves to claim the win.

So my current plan next turn is to pray for a draw… where golloch disengages, pivots and some how hoses down a regiment with a single volley of fire.

Matt:

General flanks sharpies, most other stuff repositions onto tokens. I do damage and take stuff off. I lead 4-1 and we roll and go to 7 but it won’t get better for that loser I’ll still win.

Final Thoughts

Dave:

We played Matt, I learnt a lot this game, mainly just how dam slow those dwarf legs move…

I really needed to “at the double” for the first 2 turns, to get into position for the game. A mixture of poor deployment, terrain and fear of getting a bad charge early saw me out positioned and I never recovered.

I was not expecting the delay tactic of just backing up into your deployment zone. But when you were already controlling 3 tokens It was a smart play.

I really should of placed more tokens towards the center line of the board and deployed in the center using the blocking terrain and obstacles to help defend flanks. From there I could of formed my turtle shell and ground him out

I was lucky with my sharp shooters to pick off the volley guns early so I really had no long-range threats during the game. Again poor placement meant I didn’t get to take full advantage of that.

I also think its worth noting at this point that I roll headstrong incredibly well… only failing it once all game haha.

I played the list poorly so I think it deserves another shot with smarter play to better evaluate what works and what doesn’t or maybe i need more dogs

Matt:

I think I was definitely benefited by Dave not understand dwarfs. The double horde likely won’t work against some armies but was super fun and given he amount of bloody dogs that come in the army boxes I will probably give it a go. This game for me was definitely a case of playing the scenario for the win.

Game 11 Rift forged orcs vs Basileans

Scenario: Invade

2100pts + Samurai character

This game was in preparation for an upcoming tournament in Canberra, Rise of Ronin. 2100 points with the addition of a special samurai character which were sourced almost identically from the Dojo GT with thanks. You can check that our here:

Dojo GT

The Lists

List Thoughts

Dave:

I’ve tweak my list from last game, I’ve gone for thunderwolves over rift walkers as chaff, and mounted the rift forger with HSB. I dropped two of the rift forgers and helestriker horde because, this is 2100 points and I want a slower harder hitting list so i’ve gone for melee 3 and lots of attacks with CS.

Matt:

I’m still trying to find a list I really enjoy playing with the Basileans, but also that I can use models already painted. This time I really wanted to try the formation, the hitting on 4’s with the sisters hurts but I line the speed and ranged threat combined with nimble.

The Plans

Dave:

I have a slow but tough army, so my plan is to just creep in a box formation over half way, I’ll look to thin down matts weaker units and win through US. I’m looking to pump up Thonaar on HSB and make good use of storm strike but I also plan to the use the shrine to hand out bane chants like snags at a Bunnings on Saturday morning (I really hope no one outside of Australia understands this one haha)

Matt:

Plan is simples. Delaying tactics in the centre whilst I swing around with my fast stuff.

Deployment

Dave:

Blahhh, I just panicked and turtle shelled to one side of the field, Matt out dropped me and now I have this dirty big dragon to deal with.

Matt:

When I saw Dave going heavy centre I started dropping troops of chaff down to see if that’s how he would continue and it appeared to be the case. I basically want to have most of my fast stuff on one flank with the path finder.

Turn 1

Matt:

Strategy for turn 1 was give Dave a charge on the gurs with hellstriker if he was game and then counter punch. Otherwise punch forward and send the dragon forward to be annoying on the opposite flank.

Dave:

I moved up in a sort of turtle shell formation, looking to protect flanks as I nudge my US closer to half way.

I’ve pivioted my 2nd row to protect against the dragon and fired off a few shots into the dragon but between the amberox and lightning bolt 6 I roll bad and only manage the 2 wounds, 1 of which is lost to iron resolve.

Turn 2

Matt:

Dave the cheeky booger positioned so I couldn’t fit in on the back gurs. That’s ok because I will charge the front ones and I’m actually hoping not to go through them so they stuff up his movement around the building. Both panthers go into the Helstriker on manticore. The elohi reposition. The OPG push up to counter any charging and the dragon pops over the back. He will get charged by the samurai but withdraw should still make him dangerous.

The gurs do 3 wounds and fail to waver. Perfect. The panthers delete the helstriker and reform

Dave:

Dam I didn’t see the charge from the sisters until I’d finished my turn, that speed 10 can make them a real long range threat with all the other synergies they have in the list (mistake number 1 for those of you keeping score).

I moved my line forward again, still just creeping towards that halfway line. I’ve turn one thunderseer units back in to face the dragon and my other 2nd wave is ready to support or dart out on the flank next turn when my tundra wolves are destroyed.

My amberox and shine popped some long rang shooting/lightning bolt on the sword troop but it fizzed out to only manage 3 wounds.

My tundra wolves hit back on both gur units deleting both, one with only two wounds but a nerve roll of 9 and the other was blown out of the park with 7 wounds. My reposition has allowed me to protect the lower unit from both sisterhood regiments as my flank is blocked by the building.

My samurai turned to face the dragon and nailed it for a mighty 6 wound, now that its grounded my thunderseer unit is lined up to delete it next turn.

Turn 3

Matt:

Bloody hell that samurai on the dragon haha. I knew I would be disordered but not so heavily punished. The good thing for me here is that he has pivoted unit strength 3 around to face me so for scenario this is good even though the dragon won’t be there next turn. I held up both hordes with spears and swords and the other sword troop flanked the tundra wolves. The second spear regiment went into the front of the tundra wolves. All up I still don’t think the spears will kill the wolves but I’m going for continual blockade of that portionof the board.

Both OPG go onto the hill to benefit from TC next turn or the turn after, while the gurs and elohi reposition.

The dragon did 3 wounds only rolling 3-4 ones on the to wound roll, and failed to do anything. Bye bye dragon. The swords in the flank took off the wolves and repositioned. Everything else just did its delaying job

Dave:

I took the charge on Matt’s dragon and deleted it with the thunderseers, I took this opportunity to disengage the samurai and send it back towards the center to help out with the sisters when they get there.

Stupidly I didn’t tuck my other unit of thunderseers away from the LOS of Matt’s sisterhoods. (chalk up another error to Dave).

Across the main battle line I cleared out Matts spear regiment and sword troops.

My amberox lobbed some bombs at his OPG unit and the shrine chipping in with lightning bolt to plink on 6 wounds, but IR gave one back.

I had to tuck away the reborn to get a good reform on the horde as Matt’s elohi would be licking there angelic lips at my flank. This unfortunately has jammed me up with very little room to move.

Turn 4

Matt:

Dave just sent me a gloating message about how much he took off that turn. I think it’s cute that he thinks he has a chance from here.

The samurai charges in to hold up the left horde. The OPG and Elohi charge the other horde on either side of Thonaar they should be able to one shot them. The strength panthers flank the thunderseers. The spears and other OPG double the wolves with the idea being, failing a double one, the spears will protect the OPG.

The other panthers move around the back.

The OPG and Elohi one shot the horde, the OPF reposition to be able to flank the other horde if they can’t go through the samurai. the tundra wolves die and the spears overrun while the OPG pivot. The sisters take off the thunderseers.

US score is now 18-12 in my favour but could turn very quickly if he plays it well and gets ab it of luck.

Dave:

As expected I lost my thunderseers to the sisters, serves me right for not protecting them well enough. Its now turn 4, with all of Matts army currently scoring and only 1 of mine I have some serious work to do. From here my plan needs to shift from creeping over the half way line to deleting as much of Matt’s army as I can.

So I got straight to work… My horde made short work of the samurai and the shrine did shrine things handing out BC to the reborn, HSB to thonaar and BC to thonar and the rift forger.

I got a lucky waiver on Matt’s OPG (mainly because he screwed up his list) with the rift forger and thonaar and the reborn destroyed his elohi pumping on 14 wounds.

My new plan to table Matt is now off to a good start.

Turn 5

Matt:

So Here’s a big lol. I accidently added slashing instead of staying stone during list writing to the OPG which means they are waivered. Which is actually huge. Dave offers me to play it as the stone but I believe in owning the mistakes.

The OPG and the spears double charged the reborn but only managed a combined 5 wounds. There were 3 wounds on the samurai and what will be interesting now will be will Dave be coming back towards me band not towards scenario.

His horde can’t see over the hill with the leader point being just off so this will be interesting

Dave:

My Thunderseers are well and truly out of this game now, so its time for me to get them over the half way mark and into safety.

The amberox is also in a similar situation so I’ve move it to keep my horde freed up to do damage next turn.

My Shrine did its thing again and with bane chant and host shadow beast getting thrown out like cars at an opera show my reborn and Thonaar teamed up again to delete Matt’s other OPG unit.

The rift forger went back into the waiver OPG to waiver them again on the reroll, surely only snakes will save it next turn.

I did nothing with the horde this turn as I positioned last turn just off the hill with my leader point so my OPG target was blocked, (chalk up mistake 3 to me).

The mighty samurai was waivered last turn however fury sees him put 4 wounds on the sisters.

Matts down to 4 units and 12 US all scoring, and I still only have the 1. Turn 6 is really gonna be make or break for me.

Turn 6

Matt:

Buggering my list has really screwed the pooch again. Spears went into the reborn, the wavered OPG couldn’t move. The spears did 3 wounds and failed to break and the sisters did 3 on the samurai and failed to waver. Unless Dave double 1’s the OPG and doesn’t go through the spears he should win.

Dave:

Ok time to crush Matt into oblivion…

So being the tactical genius that I am, I sent the shrine into the OPG front, mainly to free up my rift forged horde for the flank and to also ensure it placed in my half on alignment.

I didn’t roll snakes and the OPG died quickly, so now on the reform my thunderseers, riftforged horde and amberox are now all scoring, so 8US to me, the shrine is borderline however if I play my cards right it wont matter.

The reborn orcs managed 7w and my mighty HSB fuelled rift forger managed 4w sending the spears off into a long good night.

Lastly Thonaar, and the samaurai polishing off the sisters leaving matt with just 3US.

Turn 7

We didn’t get this far suck it Matt I crushed you…

Wrap up

Matt:

The actual stated game plan went well at the start. If I had time again I’d hold the dragon off projecting threat rather than trying to get behind so early. Also I see no reason to take the dragon again over Julius.

Screwing my list hurt bad and that in of itself was probably enough to lose it. The sisters threat range I like and I might play with some variations on this. I am really liking the Elohi hammer but it does result in it getting one shot a lot.

I’ll tweak this list and have another go. Well played Dave as he looked in trouble for a while

Dave:

I’m really lucky to get away with this one, I jammed myself up early, positioned poorly and threw away two units but the hitting power of the rift forgers and some great dice got me through.

I needed to spread out further in deployment, both across the board and unit to unit. Hordes need room to swing and I didn’t give them that.

I’m really happy with the mounted version of the rift forger and how it can zip around, i’m also happy with the Thunderwolves over rift walkers.

I really think the sweet spot with the shrine is 1 HSB then handing out 3 bane chants.

Again, I feel I under performed with the thunders, yes I took out a dragon but need to work out how to convert past just taking out 1 unit.

From here I think I’ll stick with the list and try to understand it a bit better.

Rise of the Ginger Halflings – Part 2 (June)

It’s time to get this red show on the road. I discussed my colour scheme etc in part 1 here

My first two paint items are coming out of the Mantic Mega Army Halfling box. First things first I wanted to get a unit of infantry to get some unlocks going down. I believe that one of the best units in the army are the braves. Therefore I am going to paint up enough to make a regiment at PMC, or should I do MMC. What’s more acceptable do you think?

Just jokes. I don’t give a damn what you think, but I have done PMC anyway. If I fit them on I fit them on

Yes I am aware these aren’t fantastic pictures. Thank you for pointing that out. These were a real pleasure to paint. I love the character on the models.

As I mentioned in Part 1 I was using the new Army Painter quick paints. It went on so easily. Looking back now there a couple of tiny white spots. What I am not sure about is is this where paint slid off when I was painting or has it flaked off after the fact? I will have to keep an eye on this in the future.

One thing I haven’t enjoyed is not being able to build more of these hand weapon and shield guys. I even have a couple with one arm, but I guess that’s what makes them “Brave” right?

Next up is the Iron Beast, for no other reason than I wanted to.

Now this is a cracking model and quite simple to paint. As many of you may be aware none of the brands of quick paints to metallics. This is army painter’s grey highlighted with Vallejo silver and I think it has come up reasonably well. The pink is probably not quite as bright as I’d like but that is partly the lighting also.

The iron beast really lend itself to the quick paints as the detail is just the right level. The larger flat areas aren’t that large or flat so it goes on quite well. A quick highlight also helps break this up.

Anyway this is what I completed this month, obviously no basing yet but it ill get there

Game 10 Rift forged orcs vs Basathingy

Scenario: Pillage

Points: 2300pts

The Lists:

Thoughts with this list:

Dave – This is just something new for me, I figured since I brought the storm in the shire box set, id start looking at how rift forged worked. I really don’t know if this will work, but it looks fun.

Matt: This is another go at my list or variation of for Shirecon.

Deployment:

Dave – No idea what I was thinking to be honest… but hey you cant stuff up a plan if you don’t have one right…. Right….

Matt: My choice of side and deployment was all about the scenario. I had closer to 4/7 on the top. And I wanted to threaten those four. The plan was infantry in the middle and leave a troop behind. Cav on the flank and leave a troop behind. Split the elohi to threaten from the opposite side.

The Plan

Dave: I don’t know mine plan, but I know matts trying to sandwich me between Elohi and his knight horde, so really I guess my plan is to not get sandwiched

Matt: My plan is outpace Dave and crush him like the grub he is.

Turn 1

Matt:

Basically with my first turn I wanted to take control of the hills and put the threat range on. I am hoping that unless he gets a hellstriker over that the back token will be mine regardless. So it’s about competing for the others. The right token I am hoping to protect with the horde and the infantry troop can eventually take it. So I Push forward early for zone control but then I may seek a more defensive mindset I really am unsure.

Dave – I just moved up slightly trying to protect my key units from Matt’s elohi on the left.

I managed to punch off LB onto Matt’s gur panthers to clear the chaff but only got 1 wound.

Turn 2

Matt: There was a real temptation to barrel forward here and try and take off what I could. On the left the gurs and abbess were in range of the rift walkers and hellstriders so I strongly considered holding them up to push the elohi forward, however I felt that would be throwing away two lots of redirectors and the reality was I have 4 tokens towards me and I need to protect those to win.

The centre pushed forward to protect tokens whilst the troop at the back slid backwards to be as far away as possible whilst still controlling the token. On the right the helstriker character is the only thing that outpaces me so I put the gurs into him to allow the knights to push forward and take the hill. Again the goal of the troop is to control the token not act as a redirector if possible.

In combat the gurs did a mighty 3 wounds.

Dave – Looks like its nothing but bad options for me this turn, I spend a lot of time trying to protect my thunderseers from Matt’s knight horde, and unfortunately that meant I needed to advance on my reform move with my stormbringer on hellstriker, I only needed about 2inches and rolled a 5. Now its over exposed and probably going next turn.

Turn 3:

Matt: This turn was about options. Dave protected his thunderseers well on the right so I charged the helstriker as his back unit can’t see well enough to allow a triple charge and if i pivot (barring double 1’s) I may be able to get the thunderseers hindered over the obstacle. Either way theoretically the horde should survive a double charge.

I blocked his main infantry horde with my gurs and took a double charge on on the riftwalkers

In shooting I got bane chant off on the knights as closest path to the helstriker still took them through the forest.

The combined might of the OPG and spears only did 7 wounds on the riftwalkers but thankfully they popped with no inspiring around and the knights went through the helstriker. At the very last I am holding off that wider token for longer

Dave – Damn you Matt, I’m just hindered on the double charge on right and I’m just out of range on the left.

Just to chalk up another mistake, I’ve now noticed my helstrikers cant see through the forest protecting matts OPG and spearmen

I sent Thonaar in to clear some chaff and if it brings in a unit I’ll have heavy hitters ready to go and on the CC.

I powered up the shrine and was ready to hand out bane chants but naturally I failed my first attempt…. Bane chant 4

Turn 4:

Matt: Time to push this game forward a little. Firstly the OPG and elohi combo charge the helstriker horde, it is a slight risk with the OPG being hindered but I reckon we will be fine. Once the OPG are out of the way the abbess can see the rift forge horde so go in to hold them up. As long as one wound is done I will be protected from them charging even with a withdraw move.

The spears about face and move forward slightly in the off chance that the horde doesn’t end up disordered.

Samacris repositions to provide US help on the other side. The horde of knights counter charges the thunderseers. The middle OPG counter the pesky character and the spear regiment chargers the other rift forged character. The two troops stay behind to guard tokens.

In shooting, the priest bane chanted the knight horde. Samacris cast fireball on the third riftforger but failed to wound.

In combat, 17 wounds popped the left thunderseers and the units re faced into opposite directions. The Abbess did 3 wounds on the horde and the rolled box cars!

The OPG did 5 wounds on the riftforger and popped him. The spears did 2 wounds on the other with no waver. The Knight horde deletes the thunderseers after 11 wounds and reforms. Both Dave’s units will be hindered on the next charge.

Dave – Things go further south for me this turn.

The waiver on my horde hurts, I’ve snuck in Thonaar to protect it, I didn’t see the charge from the OPG on my helstrikers and that double charge really cost me.

The shrine really did the work this turn, as I successfully HSB the lone rift forger and got bane chant onto both rift forgers and my rift forged regiment.

Between host shadow beast and stormstrike, my lone rift forger piled on 10w to waiver the men at arms spearmen.

My other rift forger and rift walkers however, failed to stop the OPG only doing 6 wounds.

My reborn and rift forged charged the knight horde to try and take it out, but only waivered on the reroll

Thonaar managed to hold up the OPG for a turn and my thunderseers piled on 13W but unfortunately I snaked both rolls.

I wanna stay optimist but it looks like I’ll really struggle to budge Matt from here.

Turn 5

Oh David you poor soul. Two snake eyes. One relevantone not. Well you did more wounds on the Elohi than you deserved to so you can bite me. Thonaar was a big mistake as I’m likely to now roll through him and delete the horde.

The OPG counter charge the thonaar and the abbess joins in to make sure of it. Honestly I’m; just giving it Dave form both ends

The Elohi counter, the left spear regiment backs up to ensure control of the token. THe OPG go into the riftwalkers. Samacris hangs around ready to move where she is needed. The knights counter charge the lower unit.

The priest bane chants the knight horde and then its onnnnn.

Thonaar dies like the dog he is and then I over run and delete the riftforge horde mwhahahaha. I then reposition to the bottom left ready to take on thunderseers if necessary but also controlling another token.

THe OPG only do 6 wounds on the riftwalkers and don’t even waver them. The knight horde goes through its unit an repositions to make sure of a front.

Dave – Damn you Matt…. Cruelly he reminded me of the individual rule, even though Thonaar is (or was) mighty, he can still be overrun into another combat…. And that combat happened to be the flank of my horde… I’m proper screwed from here, I did some amazing work with my rift forgers in the middle to maximise host shadow beast and clear off the spear regiment but its all for nothing. I tried to get petty on the right and take out Matts knight horde but only got a waiver.

Turn 6

Matt: I don’t even bother checking because the chump has lost

Dave – What turn 6 its all over….

Wrap up:

Dave – Well damn, I really didn’t understand this list and it showed. I tried to make the most of the rift forgers but I don’t think that’s wear the value in this list is.

I over estimated the maneuverability of the shrine, but being speed 5 and not nimble or fly really limits how I can move even the waiver mitigation of the fury aura around. I think next game I need to park it behind two hitty units and make the most of it as a bane chant machine.

Popping host shadow beast on Thonaar is definitely a money maker, but I think that’s best achieved by sticking a rift forger on a mount to get it where I need on the battle field.

I’m not really shocked I lost considering I didn’t have a plan but I did find a few things out about the list.

Matt: I always felt pretty comfortable when he didn’t have any shooting AND I outpaced him. Still could have gone either way. The high pace in invade also helps

Final thoughts on the list:

Dave – The three rift forgers need to go, on foot they are too slow. I’m even 50/50 on the shrine but it feel cool so I think I’ll try and make lightning bolt work early next game as it still generates extra dice from the rift forged keyword, it just doesn’t get to continue casting.

I might also drop the rift walkers and look at faster chaff in the way of tundra wolves.

Matt: I still don’t see my list as highly competitive but it’s fun to use.

Game 9 – Halflings vs Basilea

Scenario: Invade

2300pts

List Thoughts

Dave:

I want to try something a little fun, I really want the crystal pendant in my list and I think bang for buck sticking it on my braves legion is where I’ll get best value.

I’ve also added some saucerors to buff my core list and I’ve stuck with my tried and tested battle group of juggers, sergeant and runners.

Matt:

I am pretty much decided I am going to take Basileans to shirecon which means I have to use models i have painted. Even though it’s hard I love using a horde of knights which I basically have so I’m going to continue to mess with various iterations, not expecting to have much success until I really know the list.

Deployment:

Dave:

I’ve pushed up the middle with my legion first, then the support structure around it. I plan to run it all together and avoid any nasty flanks from Matt. I saw an opportunity to through a flanking force in on the right and a solo brave regiment on the left that hopefully gets ignored all game and scored me some points.

Matt: I decided to deploy fairly centrally with the faster set of units on one side of the infantry heavy middle.

My plan:

Dave:

If Matt pops my legion I want him to do it with 3 units to get max wounds from the pendant, and if he avoids it I’ll have 4US over the line to score, so I just need to avoid a flank from his knight horde and I should be fine, I also plan to keep the front facing a hindered charge to avoid the knights as well.

As for the rest of my list, I hope to distract Matt with aero naughts and slip some ‘weaker’ units like brave regiments over the line to score as well.

Matt: Hold up the middle while the faster stuff does heavy lifting.

Turn 1

Dave:

I just creeped forward slightly with my main force, I kept a close eye on angles and staggered my front facing progressively to stop any multi charges and flanks on my main battle line.

On the right flank I’ve positioned to get decent charges from my hammers if Matt takes on the legion. And on the far left I

I’ve pushed my braves all the way forward hoping Matt will leave them alone, If I can get them to halfway and pivot, I’ll have a nice little distraction force on the left to keep Matt second guessing.

Matt:

Dave left the braves on the left in charge range and I’m figuring I’m going to take any opportunity to decrease his unit strength. Failing double 1’s I’ll be able to reposition so the general is in the front and with sharpness I feel I can win that trade off with the elohi inspired. The gurs reposition to chorale the Ej’s on the left whilst the knight horde pushes forward. If he wants to charge with Ej’s so be it. Through the middle I push forward deliberately giving his other ej’s and the general a charge if they want to come in close early. I think that would be a mistake on Dave’s part.

I leave the Abbess where she is to wrap around the back of the forest if needed.

In combat the Elohi deleted the braves and reposition. I had hoped I could turn my flank to the building and he wouldn’t be able to charge but he could by a couple of mm so repositioned to allow the front.

Turn 2

Dave

Dammit… there goes my distraction force, I’ve had to counter the Elohi with my general and send my EJ’s into the gur panthers. Both charges failed to break, with my EJ’s missing by 1. I over stretched my braves and exposed a flank I didn’t notice, This mistake has cost be all up about 5 US as I’ll probably lose the general and EJ’s, which could be very costly.

Just more creeping on the right Matt’s not taking any bait and I don’t blame him. I’ve positioned so that only the knight horde can take the braves regiment now.

Matt:

Ok so as predicted so far. I’m confident in the top left. The gurs withdraw out of combat and pivot staying an inch away so the ones behind can get in for a charge on the EJ’s. The knight horde is a tricky beast and one I have never handled well before. You always risk a snake eyes destroying 400 points of unit. I decide to go in to the brave regiment with it and the regiment of spears. The reason for both is the spears will protect me from the iron beast whether I go through or snakes. The main threat will be copping the general in the flank. Having said that the horde should be able to take a charge from the aero’s and general combined and I still think I will be winning that centre and hopefully getting the OPG into the general. I try positioning the abbess so I can see the flanking wild runners but Dave has them perfectly so I can’t see so instead I run it around to be annoying.

Everything else positions to not give flanks and moves forward

Samacris shoots and does a wild amount of damage on the legion.

In combat, the elohi roll 5 1s so do slightly under on their hits but doing 8 wounds, the nerve roll gets the waver. The gur panthers do an amazing 4 wounds and with a lucky nerve roll of 10 pop the Ej’s and over run.

The knights do 17 wounds on their own so I don’t bother with the spears only to snake eyes. Sad panda. Whenever I am not running a knight horde I’m like snake eyes are a “whatever” rule for me. But with a 400 point unit it can basically just smash you for the rest of the game.

Turn 3

Dave:

And its all on now…. I took a flank with my braves legion and with 60 attacks I managed 5w, I know its statically average for the charge but it feels very underwhelming, but hey I got a lucky waiver….

I did manage to pop his paladin foot knight with my aeronaughts and juggers, and also waiver his OPG with my muster captain (however they have fury).

I took a front charge with my aeronaughts on his knight horde, I don’t know why… maybe I was too impressed by the symmetry but they failed to even get into waiver territory and I’ve pretty well sentenced them to death.

On the left well it’s a shit show, I’ve lost my EJ’s and will likely loose the general next turn.

I chose brutal and life leech for my sauceror aura’s but they really had no effect this turn.

Matt:

So the one thing I had missed was the general into the OPG horde which was definitely a mistake but thankfully they have fury.

The Elohi went in to finish off the general the gurs repositioned for future turns. The knight horde countered the aero’s and the spears went into the flank of the other aeros. The OPG countered the general and the abbess went into the runners.

In shooting bane chant went off on the spears and I got 4/5 heal off on the OPG. Delicious!

In combat the general died to the elohi. The aeros died to the knights who stayed where they were so the iron beast couldn’t flank.

The spears did 7 wounds and wavered the aero’s whilst the OPG did 7 wounds on the general who was saved on re roll. The abbess only wanted to hit the runners with her habit and only did one wound.

If I look predictively I think can still win this, his big hitters are dead or in trouble whilst by next turn I will still have 3 hammers left in one OPG, the horde and the elohi. 2 opg if they are really lucky. We are both rapidly losing US but I think I will have the run of it.

Turn 4

Dave:

Yep my general on the left died, now matt as a clear run with his Elohi, so I’ve gotta work to pick off his cheap US. I used my mounted sergeant to take one unit of gur panthers off and juggers to clean off the previously waivered OPG horde with a flank.

I had a hard decision this turn, I really didn’t want to commit my pride of the shires but I did to get the headstrong aura over my aeronaughts (which they passed) and sent them into the last unit of men at arms spears. They unfortunately fluffed the roll and now look in a bad position going into next turn.

I’m quickly working through the bulk of Matt’s US however my force is shrinking fast, so the next turn will be telling.

Matt:

Bloody headstrong aura caught me off guard. It’s getting more difficult now only 6 scoring units left but plenty of US in those units.

I repositioned the gurs round the back using nimble and flew the elohi almost as far as they could to be a threat. Although their height might be a problem in trying to find a target turns 5/6. “Poor” Dave had only done two wounds on the spears so they could counter charge back in. As could the knights. IR and heal on the knight horde makes it super resilient. The OPG charged off the hill, to the general even hindered surely they can do him with brutal given he is on 7 wounds. The abbess keeps flailing on the runners.

Shooting, Samacris healed two wounds on the knight horde. I then had a dilemma, BC the spears or the OPG. I chose the spears because I felt the OPG should at least waver the general even though a waver would be less than ideal.

Combat. The Abbess did 3 wounds and wavered the runners. The OPG did 4 wounds being hindered and even with brutal only rolled a waver on the re roll with a 3. Unfortunately this buggers me I think.

The spears did 3 wounds and 2 good nerve rolls popped the aeros. At this point I offered the spear flank to the EJ’s and lancers in an attempt to draw Dave back towards the middle. The braves died to the knights and I repositioned to give front to the legion and Iron beast

Turn 5

Dave:

Matt only has 6 scoring units on the board, so I’ve tried pick off the soft targets and get some space between Matt’s big hammers and my force.

My Pride of the shires and sauceror with boom stick plinked on some more wound but again just pulled a waiver on the last gur panther regiment. I’ve condemned the pride to death but I needed to remove as much US as I can,

My juggers deleted the last unit of OPG with the help of a nice brutal 3 roll from the sauceror. I tried to be cheeky with my sergeant and get an overrun into the last men at arms spear regiment but I failed to budge the priest. I probably should of disordered Sami instead… bugger

From here I think it will be close but I might be able to nudge out a win, for Matt to charge any of my unit he will effectively take his unit of the game as getting back over into his half next turn could be tricky, It looks like Matts taking the avoidance tactic with my legion so that should be an easy 4US to walk across the line next turn.

Matt:

The gurs bounce back and around the forest. The Elohi and horde of knights double charge the pesky iron beast. The spear horde hodls up the legion and Samacris moves to provide distraction/fireball the general. The abbess keeps combat going.

Samacris positioning is to see if Dave will go for her instead to try and force a false move. She fireballs the general and does a massive few wounds, general is a dead dog.

In combat the iron beast gets smashed and both reposition and the runners finally die to the abbess.

I can still get this done.

Turn 6

Dave:

I saw a nimble charge on the Elohi horde and I couldn’t help myself, I fully intended to disorder them and hold them in Matt’s table half, but I’ll take popping them instead!

I also cleaned up the last spear regiment and now its 6 US on the board to 11. How could I loose it from here…. Here is how, so I had 2 options into what combat I do first and here is my plan. I charge the juggers and slight them left d3 then delete the spears, move the EJ’s left D3 and then slide the braves legion fwd d6 into my table half…. Easy…

Well I decided to do the legion combat first, and even though I rolled a 6 on the over run, stop .8 inches into it when I bumped into the juggers…. And now the legion is not majority in Matts half and wont score….. Dickhead….

Now Matt just needs to 1 shot my juggers and will win. Please give me a turn 7.

Matt:

Whan idiot they are juggers with the helm of the ram not lancers haha a bit harder hitting than I thought. Didn’t expect the Elohi to go down that easily. FML.

The knights charge into the juggers, the abbess tries some cheeky wounds on the halfling regiment but otherwise its play the scenario. I win this turn and probably lose on 7.

The knights take off the juggers as expected

Turn 7

Dave:

Yay turn 7, so I slide my units well into Matts half, so if he does take a flank on the legion, he won’t be able to get his horde back into a scoring position.

In other under whelming events, I moved my sauceror with the boomstick into the forest, fired off some LB on the last gur panther troop, getting the wound I need for the nerve check… and waiver.. dam.

I launched my sergeant into Sami to disorder her and protect my braves… not a single wound… dam.

I counter charged with my braves on the Abyss and failed to even get a hit… dam.

Well provided Matt cant crack my brave regiment I’ll get the win here…

Matt:

I lose 🙁

Wrap up:

Dave:

Well I nearly blew my whole game apart on the order of two combats, and threw away 5 US on another silly mistake early so I’m very lucky to get away with the win.

That was good fun to play and its nice to mix it up and take some different units and unit sizes to see how they play and mesh with the army.

Anyways as all ways, suck it Matt.

As for my final thoughts on the list:

Running the legion was a bit of fun, but practically its very big, leads to avoidance and isn’t really an efficient use of points. If I’d stuck with the pendant, I’d look at trying the crystal on a spear horde, still US 4, same attacks and this way I get phalanx. Maybe with the lower nerve I would entice the charge.

As for the rest of the list, I really like the juggers with the helm of the drunken ram and the mounted sergeant with rampage D3. The option to sneak behind the line and pick off easy targets or get in first put that wound on and trigger relentless for the juggers just work so well.

As for the items on the Aeronaughts, well I forgot them all game, and honestly I think blade of slashing is worth it but elite is a waste of point. I just didn’t have anywhere else to use them in the list.

I’m still not sold on the Saucerors, as much as I want to like them they often just give me the +1 aura, and I think when it comes to brutal or rally, I’d rather an extra inspiring source or make a unit more killy.

Matt:

Even following that early snake eyes, it didn’t cost me as much as it could have as I had somewhat planned for it. My two big mistakes were forgetting the headstrong aura on the iron beast and assuming the juggers were lancers like in Dave’s previous lists. I’m pretty happy that despite those I had won at 6. When you sink 400 points into a unit it takes away a few unit strength options. I will take this or a variation to shirecon. I really like the abbess. Dave played a good game and fairly beat me

Transitioning from UB to the tabletop

Well I attended Shirecon on the weekend, it was a one day Kings of War event of 3 games at 2300 pts held in Southerland Sydney and I had a blast.

I thought it would be of interest to write up my experience at the event considering my attempts to improve at the game have been almost exclusively on universal battle 2.

So firstly, I went 2-1 which I’m very happy with, finishing 6th over all from a field of 21. The event used blackjack scoring and my games were 18-3 (win), 16-5 (loss) and 16-5 (win). I had three amazing games against three amazing looking armies and my opponents were fantastic (even Matt Croger). The hobby level was fantastic, clearly we all at a lot of free time over our few covid lockdowns

The list I took was the Mighty Croger Crushers.

I don’t want to walk through my games, but more talk about my big take aways.

What went well

Scenario play – one of the benefits from my games on UB is I finally have a lot of reps with the various scenarios which really helped. My 2nd game was raze, and I managed to deploy smart get the objectives early and in the end claim all three, even though I didn’t have a unit left on the table if the game ended at 6 it would have been a draw, unfortunately the roll went against me but hey… it’s a dice game.

Experience with various lists – in my last game I was up against an order of the green lady list, I’ve never played OOTGL however, reviewing my opponents list I focused on his speed, def and if he had any fly. Straight away I knew he had the speed and manoeuvrability to run circles around me, but he didn’t have the grinding power I did. I placed all my objectives on the side he first placed a token and stacked one half of the board, only giving a few units away on the opposition flank to force a contest. Now it might not seem like much, but my one previous tournament (clash of kings Australia 2022) I experienced my opponents lists as the games progressed. I’m pretty sure all my opponents heard me say “they do what?” or “oh I missed that” that event. This time however, I managed to formulate a plan relatively quickly based on newly gained experience against various list types. This differed from going for a generic game plan, generic deployment and hoping that melee 4+ and def 5 would hold up.

Terrain- one of my more recent light bulb moments in our games on UB was how to use terrain and units to block and hindered charges. In two of my games I felt I did this really well, but it was something I was a little nervous of going in as there was always some subjectivity and ambiguity as to if a unit was blocked, in cover or not. In UB2 its pretty easy to see if its in or out down to even the smallest of margins but on the tabletop not so much. Talking through the intent of my actions or movements where possible, definitely helped. This process was aided by the use of blank bases which allowed my opponent to easily visualise and understand my actions.

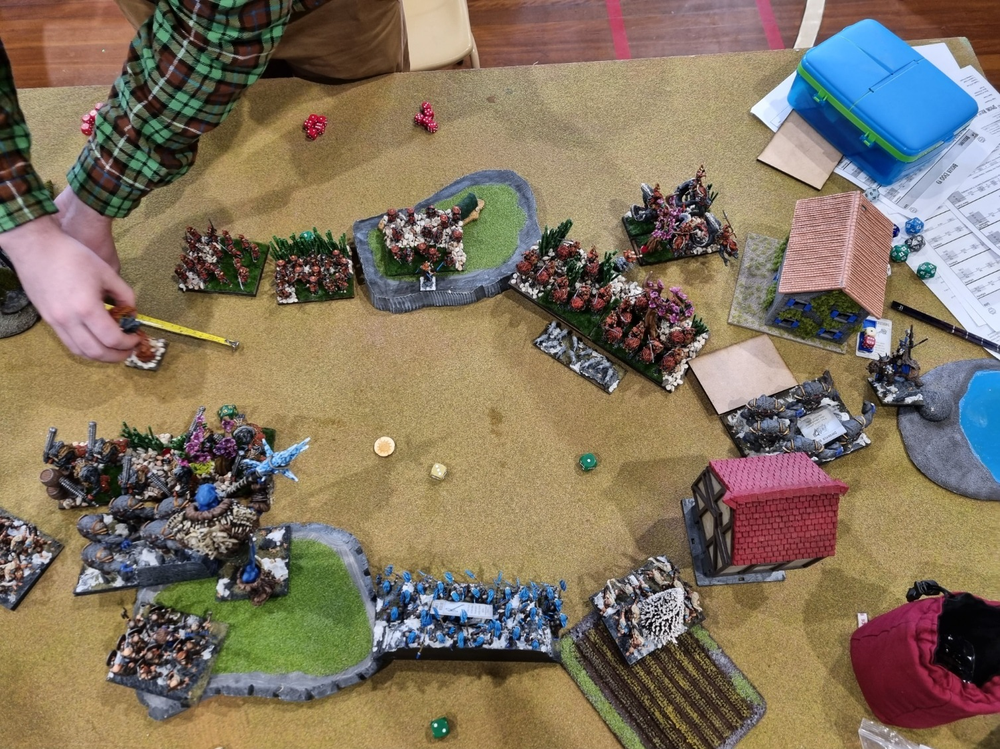
Check out my one big brain move as I block Matt’s Elohi between the building and his cav horde.

Time – So the big thing I was worried about going into the event was time and how would my brain hold up on the clock. I’m happy to say, I finished all 3 games with time up my sleeve (15,12,5 minutes respectively) and all 3 games went to turn 7. Ok full disclosure, my loss in game 2 did see me tabled, but hey… I had 12 minutes to look at my army in the dead pile.

I know I spend a lot of time on UB looking through all the options, but during the event I limited myself to a few rabbit holes and also committed with moves, which moving onto my next point… means no undoing.

Where I can improve

Where is my undo button! – Quite a few times I found myself tempting fate going through with moves I would probably have not made if this was UB. I did my best to check angles, look a turn ahead, but unfortunately I gave a few big flanks away early and I didn’t notice until I had moved my line. I need to get better at marking my units starting position and also playing with my bases (I did this well in my first game but muddled my spare bases between games and decided poorly, to push on without it). I see this as a very real option to get my game to the next level, as two poor charges probably cost me my 2nd game and one bad charge nearly lost me my last game.

Risk vs reward – it pains me to say this good advice came from Croger, but he was on the money. I double charged a unit of his OPG with Hrimm and a troll horde and contemplated flanking with my ice naiads. Yes, this would most likely put the unit on snakes twice to break but, if I roll snake eyes; its goodnight to me as my army would be horribly exposed. Worst case with the double charge to the front, is I don’t break them and Matt gets a punch back. Maybe it’s a spike and I lose my trolls, but they were going to die the next turn and my line stays in tact and my flanks protected. In the end, both Hrimm and the trolls rolled miserably and I missed the nerve by a lot. Risk mitigation isn’t foreign to me so i’m not sure why I took so long for me to apply it to kings of war. This is definitely a key take away for me and one I’ll look to apply in the future as a cheeky snake eyes can really derail your game our tournament if you don’t.

Wrapping up, I was super happy to get in-person gaming in. The armies all looked amazing and the tables of themed terrain were fantastic to play on. I cant wait for the next tournament, where I can put into practice a few more of my learnings.

Halfling hobby update – July

Hi Dave here again, i’m back for another update to cover off on what I finished over the last month.

So its been a bit under a month since my first update but I’m happy with my progress so far.

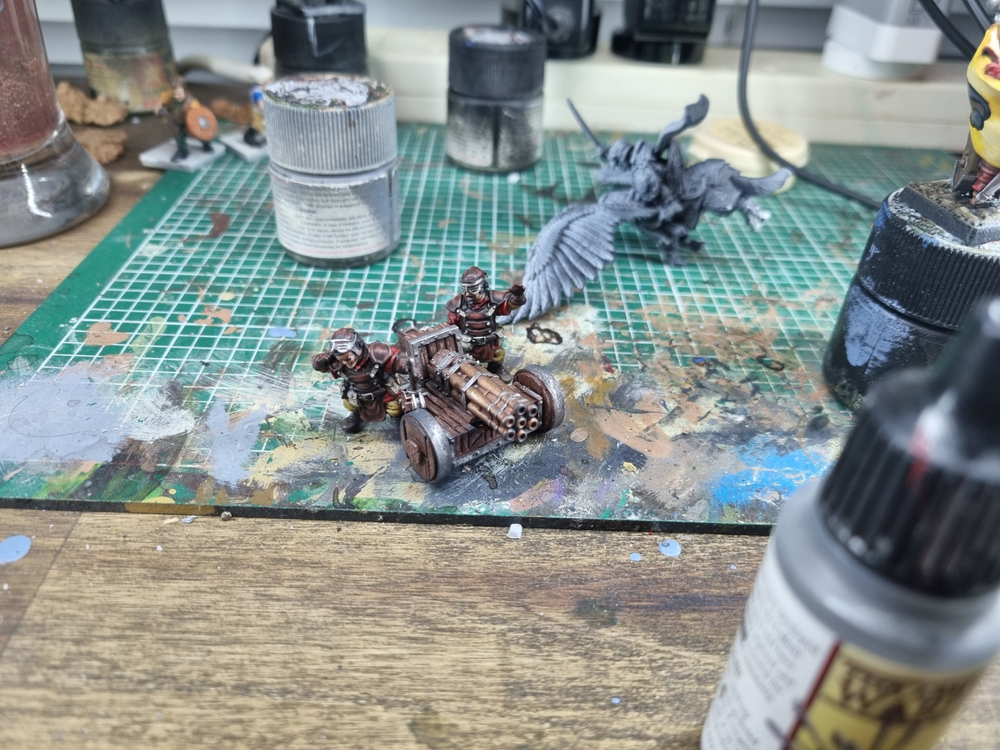
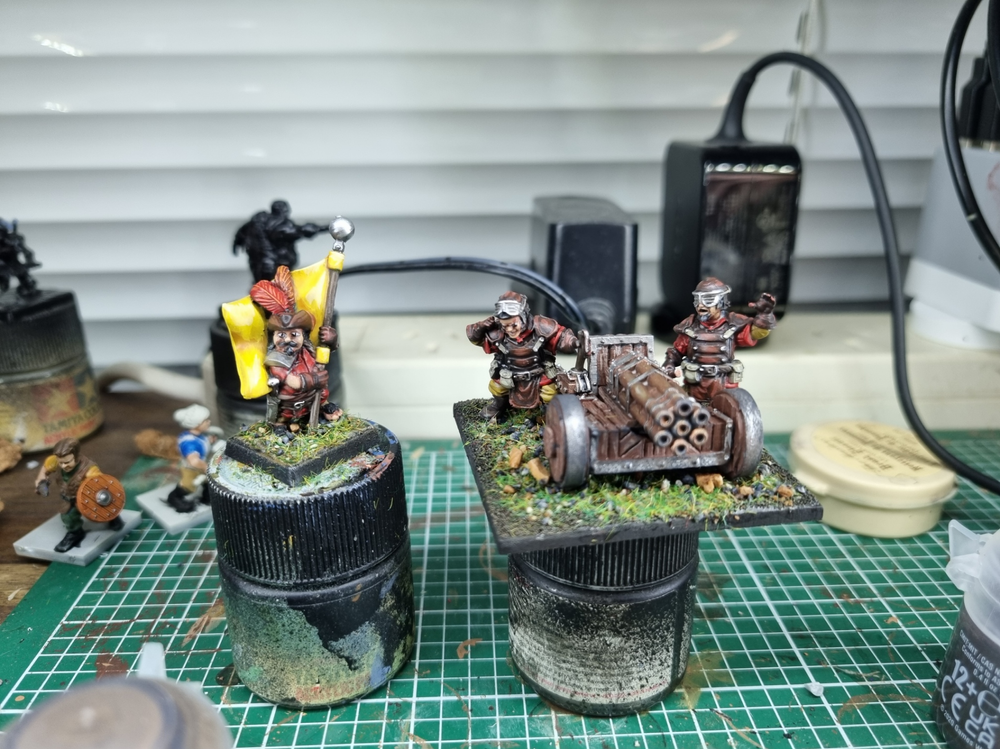
Starting off I managed to complete this war machine team, I magnetized the barrel so I can swap between howitzer and volley gun. (or more likely just never use it)

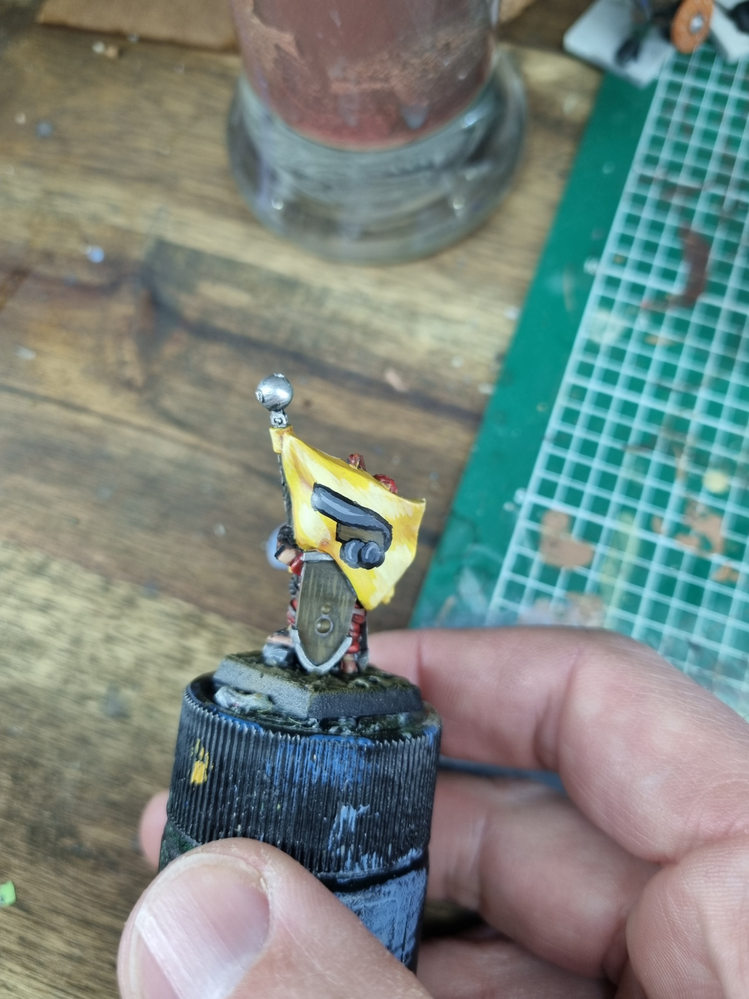
Next up I completed the only non mantic mini I’ll use in my army, the sergeant with the banner of Hodenburg. Hoden in german translates to testicle so I did my best to free hand a sneaky cock and balls on the back. The mini is from TTCombat

For my mounted muster captain on aralez I wanted to mix in a bit of height, maybe too much height…. I was super nervous chopping off the base but it came of relatively easily, I used 2mm brass rod to give it height, and stuck some penny washers in the base under the foam hill for weight. Lastly filled in the base with braves to make it look like the captain is charging over the battle line into combat.

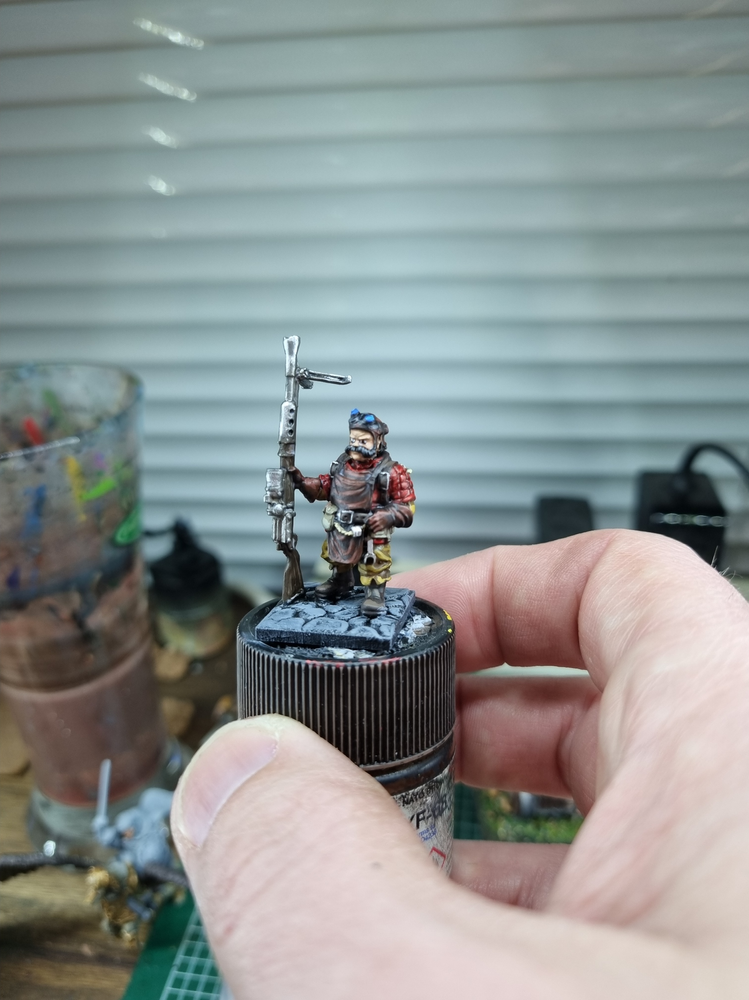
To finish off the month I completed this engineer, it was super quick and super fun to paint.

I also snuck in this ice blade for an up coming tournament.

In other unrelated news I finished a backdrop for some scenic photos and recently picked up a battle mat so I decided to set up some scenic photos for my army. Here is what I have finished to date. I’ve gotta get some diffusers or something for better lighting, and also probably use something better then a samsung phone, but I promise the end of army pics will be much better. (please if you have any tips for getting good army shots let me know)

Up next on the paint table its back to the grind of infantry. I’ll finished another regiment of spears, paint the iron beast and then hopefully get a regiment of juggers completed as well. I’ve already made the base for them but it needs some finishing touches once I get the minis stuck on, I’m attempting to make it look like my juggers are charging down the hill into battle.

Like always, if you want to know any paint or materials I use, or just have questions in general, just let me know.

Anyways, thanks for reading

Dave.

©2022 by Matt Croger & Kingsley Muir. KoW Australia is an unofficial site not affiliated with Mantic Games. Kings of War is a trademark of Mantic Games.